DIY Rainbow Suncatcher: An Incredible 7-Step Guide
DIY Rainbow Suncatcher projects are a wonderful way to bring a splash of color into your home. These delightful decorations not only brighten up your living space but also create a magical atmosphere when sunlight streams through them. The combination of creativity and simplicity makes this activity a perfect choice for both kids and adults. Not only is it easy to make, but the finished suncatchers can transform any window into a vibrant display of colors.
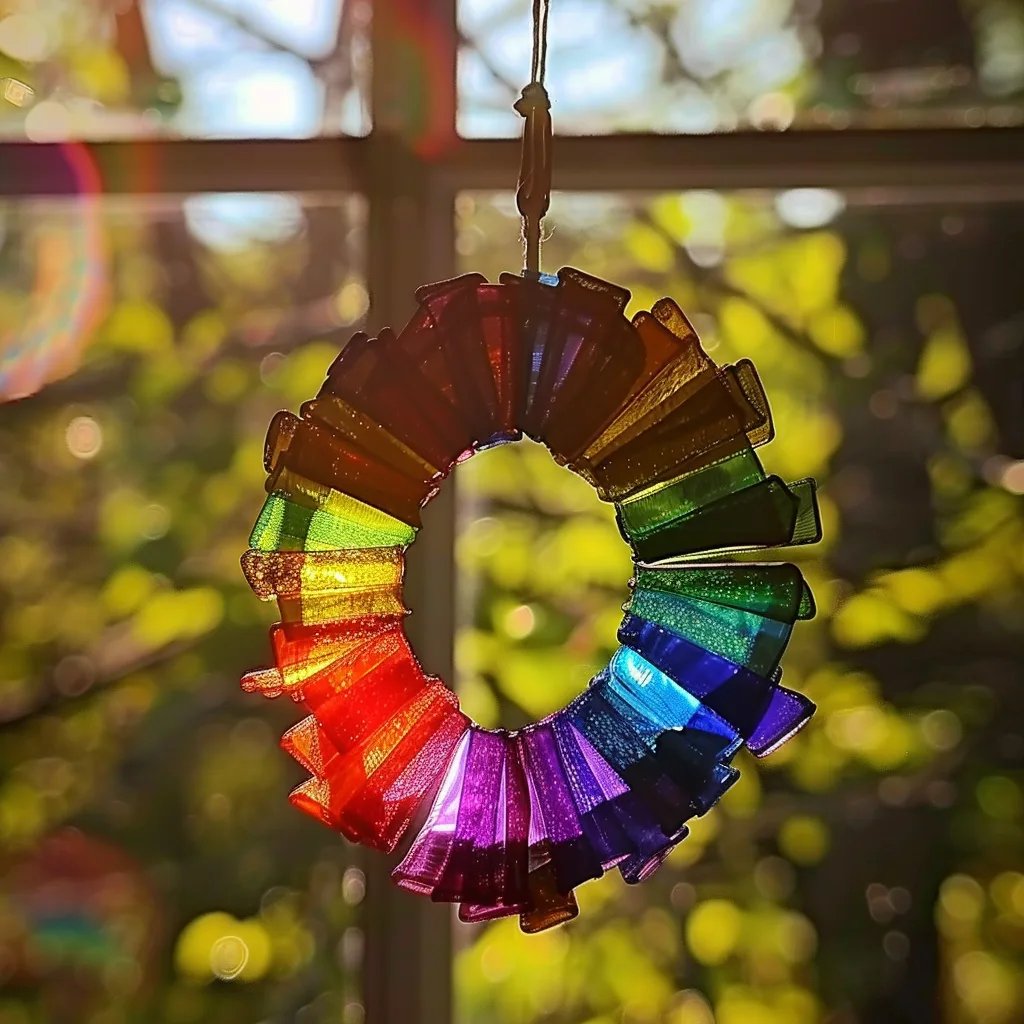
Have you ever witnessed the enchanting effect of sunlight filtering through colorful glass? The way it throws patterns and hues across the walls is nothing short of magical. Creating your own DIY Rainbow Suncatcher can help you capture that magic and spread joy within your home. This article explores why you’ll love making these projects, the necessary preparation, and a step-by-step guide to achieving stunning results.
Let’s jump into the world of DIY Rainbow Suncatcher making and discover the incredible techniques to bring this art to life.
Why You'll Love This DIY Rainbow Suncatcher
There are numerous reasons why creating a DIY Rainbow Suncatcher could become your new favorite hobby. Each reason adds to the charm and satisfaction of making these vibrant pieces. Here are just a few:
- Express Your Creativity: Use various colors and designs to express your personality.
- Simple and Fun: The process is straightforward, making it an excellent craft for beginners.
- Perfect for All Ages: Kids will enjoy the playful aspect, while adults can appreciate the artistic endeavor.
- Enhances Natural Light: Once completed, suncatchers amplify sunlight, creating a vibrant atmosphere.
- Great for Gifts: Handmade suncatchers make unique gifts for family and friends.
- Eco-friendly Crafting: Utilize recycled materials to create beautiful art without contributing to waste.
- Inspires Mindfulness: Crafting can serve as a form of meditation and relaxation.
With these points in mind, it’s clear that DIY Rainbow Suncatchers are more than just decorations; they're an experience that can spark joy and creativity in your life.
Preparation and Cooking Time
Creating your DIY Rainbow Suncatcher is not a time-consuming process. Here’s a detailed breakdown of the time you’ll need:
- Preparation Time: 15 minutes
- Crafting Time: 45 minutes to 1 hour (depending on the complexity of your design)
- Drying Time: 2 hours for optimal results
In total, you can expect to spend about 1 hour and 15 minutes crafting, with additional drying time. This estimate allows you to appreciate each step while resulting in a stunning decoration for your home.
Ingredients
To create your DIY Rainbow Suncatcher, you’ll need the following materials:
- Clear contact paper or transparent acrylic sheets
- Colored tissue paper or craft paper in various colors
- Scissors
- Marker
- Pencil
- Hole puncher (optional)
- String or fishing line for hanging
- Craft glue (if needed)
These components work together to bring your Rainbow Suncatcher to life, allowing for a blend of creativity and fun.
Step-by-Step Instructions
Creating your own DIY Rainbow Suncatcher can be quite straightforward if you adhere to these easy-to-follow steps:
- Prepare Your Workspace: Clear a space on a flat surface, ensure good lighting, and gather all your materials.
- Cut the Contact Paper: Cut a piece of clear contact paper to your desired suncatcher size. Ensure it's large enough to hold your design.
- Draw Your Design: Using a pencil or marker, sketch out your desired pattern or shape directly onto the contact paper. Common shapes include sun, flower, or heart.
- Cut Colored Tissue Paper: Cut your colored tissue or craft paper into small squares or shapes that will fill in your design. You can mix colors for a rainbow effect.
- Affix the Tissue Paper: Remove the backing from the contact paper and start placing the colored pieces onto the sticky side. Feel free to overlap colors for a more vibrant look.
- Seal Your Design: Once the design is filled out to your satisfaction, place another piece of clear contact paper over it to seal everything in place, effectively trapping the colors.
- Cut Out Your Shape: Carefully cut around the edges of your design, ensuring to leave a border to prevent the tissue paper from peeling.
With these steps, you’ll have your very own DIY Rainbow Suncatcher ready to catch and reflect the sunlight beautifully.
How to Serve
Once you've crafted your stunning DIY Rainbow Suncatcher, it's time to display it! Here are a few tips on how to serve and showcase your creation effectively:
- Choose the Right Window: Hang your suncatcher in a window that receives a lot of sunlight for the best effect.
- Use String or Fishing Line: Attach the suncatcher using string or fishing line for an elegant touch.
- Pair with Other Decorations: Enhance your window display by pairing suncatchers with plants, curtains, or other crafts.
- Make It a Set: Consider creating multiple suncatchers in various colors to form a beautiful collection.
- Change Seasonally: Make new suncatchers as seasons change to keep your decor fresh and exciting.
By employing these serving techniques, you can create a warm and cheerful atmosphere in your home, utilizing your handcrafted art to charm every guest who visits.
Through this DIY Rainbow Suncatcher guide, it’s clear that not only is this a fun and easy craft, but it also adds a unique touch to your home decor. So gather your materials, explore your creativity, and let those colors shine!
Additional Tips
- Use High-Quality Materials: Select vibrant colored tissue paper and durable clear contact paper to ensure your suncatcher is both striking and long-lasting.
- Experiment with Shapes: While classic designs are beautiful, consider experimenting with unique shapes. Stars, animals, or personalized symbols can add a fun twist.
- Layering Colors: For a more dynamic look, layer different shades of tissue paper. Lightly overlapping them creates depth and adds intrigue to your suncatcher.
- Secure Your Edges: After cutting out your shape, ensure all edges are pressed down tightly to avoid peeling. This will enhance the longevity of your suncatcher.
- Use Double Sided Tape: If you find that the contact paper isn’t sticking well, a bit of double-sided tape on the edges can help secure it in place.
Recipe Variation
Feel free to customize your suncatcher by trying out these variations:
- 3D Elements: Add a bit of dimension by including 3D elements such as small beads, sequins, or glitter to enhance your design.
- Themed Collections: Create suncatchers based on seasonal themes like winter snowflakes, spring flowers, or autumn leaves for year-round beauty.
- Glow-in-the-Dark Variants: Consider using glow-in-the-dark paint or stickers for a magical effect that continues to shine even after the sun goes down.
Freezing and Storage
- Storage: Keep your DIY Rainbow Suncatcher in a flat, protective area away from direct sunlight when not displayed. This prevents damage and fading.
- Preserving Beauty: If you anticipate storage for an extended period, cover your suncatcher with a soft cloth to prevent scratches or dust accumulation.
Special Equipment
To achieve your ideal DIY Rainbow Suncatcher, you’ll need these basic supplies:
- Sharp Scissors: Essential for cutting both the contact paper and tissue paper accurately.
- Pencil or Marker: Useful for sketching out your initial design before filling it in.
- Hole Puncher: Optional but helpful for creating holes if you plan to decorate with hanging elements.
- Cutting Mat: If you're worried about damaging your workspace, a cutting mat provides a protective surface.
Frequently Asked Questions
Can I use other types of paper?
Yes, you can use craft paper, old magazines, or even foil to experiment with textures and appearances.
Will my suncatcher last outside?
DIY Rainbow Suncatchers are best displayed indoors. Prolonged exposure to harsh weather can damage them.
What if my suncatcher doesn't stick?
Make sure to smooth out any air bubbles. If it still doesn’t stick, consider using a bit of craft glue to secure the edges.
Are there any alternatives to contact paper?
Yes, transparent acrylic sheets can be used instead of contact paper for more durability.
How can I clean my suncatcher?
Use a soft, damp cloth to gently wipe off any dust. Avoid harsh chemicals that can damage the colors.
Conclusion
Crafting a DIY Rainbow Suncatcher is an enjoyable and satisfying project. It brings color and light into your space, creating a whimsical ambiance. With just a few materials and some creativity, you can transform simple supplies into a stunning decoration. So, gather your materials, embrace your artistic side, and let the sun shine through your beautiful creations!