DIY Pony Bead Axolotl: A Detailed Guide to Crafting Your Own Adorable Aquatic Friend
Hello, fellow crafters! Today, I am excited to share with you my journey into the adorable and vibrant world of crafting pony bead axolotls. These charming little creatures have taken the crafting scene by storm, largely due to their unique, whimsical appearance and the community's fondness for these wonderful amphibians. Not only are they simple to create, but they also make fantastic gifts, keychains, or home décor items that add a splash of color and creativity to any space.
Whether you’re a seasoned crafter or just starting your DIY journey, you’re going to love making your very own pony bead axolotl. This step-by-step guide will walk you through the entire process, right from gathering materials to adding those finishing touches. Let’s dive in!
Why Pony Bead Axolotls Are Popular
Pony bead axolotls enjoy popularity for a myriad of reasons. For one, axolotls themselves are whimsical yet serene creatures known for their ability to regenerate limbs. They come in various hues, just like our pony beads, making them an ideal medium for creativity. Crafting a pony bead axolotl can be an excellent way to develop your beading skills, indulge your imagination, and even create fun accessories to personalize your space.
They’re perfect for gifting on various occasions—birthdays, holidays, or simply as an act of kindness. Plus, they offer a fantastic way to promote stress relief and mindfulness through crafting.
What You’ll Need
Before we embark on our crafting adventure, let’s gather the materials you’ll need. You’ll be surprised at how simple it is to get started!
*Materials:*
- Pony beads: In a range of colors (pink, white, black, and green are popular for axolotls).
- Elastic string (or fishing line): A sturdy yet flexible option is preferable.
- Scissors: For trimming your string.
- Tweezers (optional): To help position your beads precisely.
- Safety pin or needle: To help thread beads if you’re using elastic string.
- Bead board or tray: To keep your workstation organized.
Step-by-Step Tutorial
Step 1: Plan Your Design
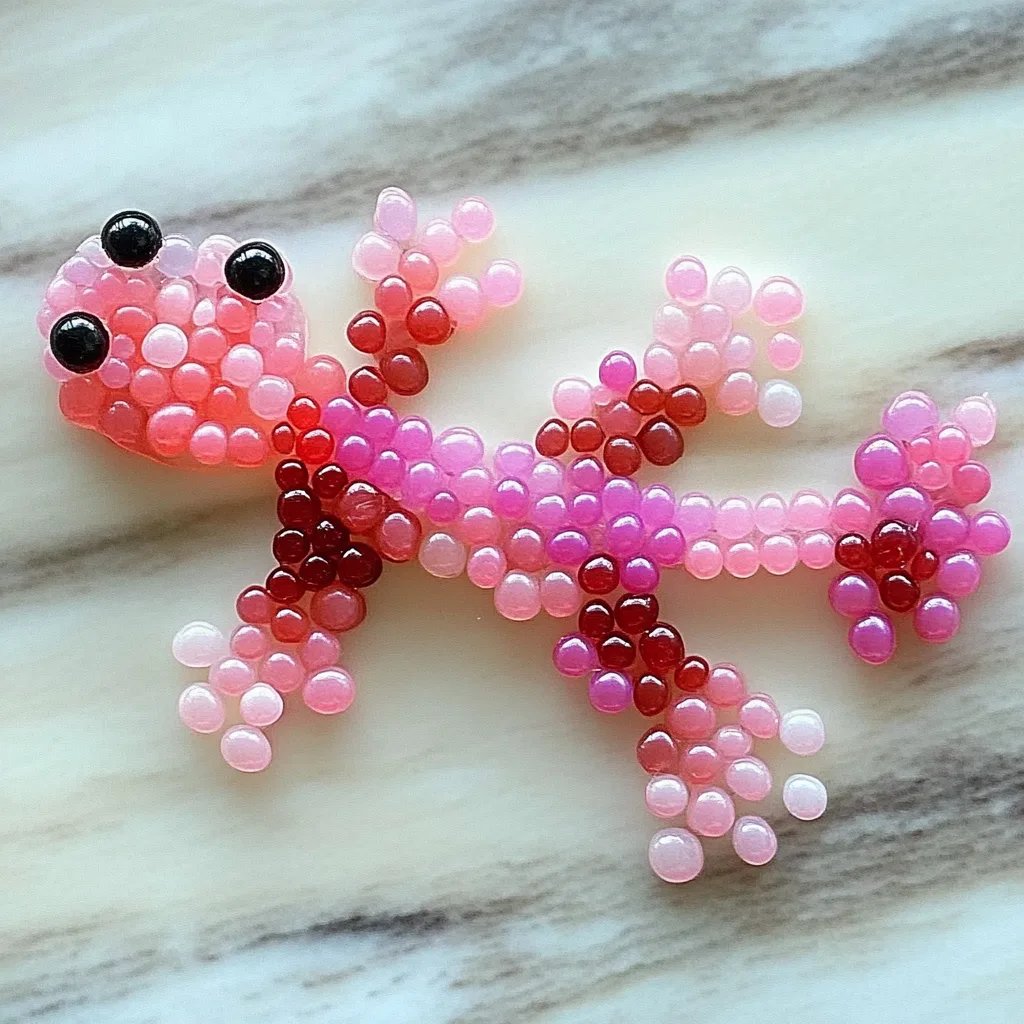
Before you start threading beads, it’s crucial to have a design in mind. Sketch out the shape of an axolotl to guide your color choices and layout. Axolotls typically have a rounded body, fins, and distinct gills, which make them stand out.
*Tip: Use a reference image of an axolotl to capture proportions accurately. This can also help when choosing shades for body and gills.*
Step 2: Cut Your String
Depending on how big you want your axolotl to be, cut a piece of elastic string approximately 60 inches long. When working with pony beads, it’s better to have a bit too much string than not enough; you can always trim it down after completing your craft.
Step 3: Start Beading the Body
Begin threading the pony beads for the body. I typically use five beads for the head, three for the body, and two for each fin. For our axolotl, I often start with pink beads that represent its adorable body.
*Why This Matters: This foundational step is crucial because it dictates not just the look, but the structure, allowing your axolotl to hold its shape once completed.*
Step 4: Create the Gills
For the gills, I recommend using a brighter shade of pink or purple in a wavy pattern; they should have a pretty flow. You can choose to add several beads for better definition. Take into account that the gills should have a slight rank along the top of the head.
*Note: If your beads are slipping off the end of your string, tie a tight knot to keep them in place as you add more.*
Step 5: Assemble the Appendages
For the fins, continue with using your chosen color beads (often the same as the body). Create small sections for the arms and legs by adding beads to represent joints. I suggest four beads for each leg—this gives an ample size and proportions typically seen in axolotls.
*Personal Anecdote: When I first created my axolotl, I felt like I was crafting a little character—I even gave it a name! These small details make the entire project special.*
Step 6: The Eyes!
Now, let’s make our axolotl truly come to life! Use two small black beads for the eyes. Position them symmetrically to ensure your axolotl looks balanced, which can add to its charm. Be mindful to leave a slight gap between the eyes and the body so that your axolotl doesn’t look too ‘bulbous’—this can create an aesthetically pleasing design.
Step 7: Final Touches
Once everything is in place, it’s time to secure everything. Tie a sturdy knot several times around the beads to keep them secure but be cautious not to pull too tightly, as this could break the elastic. Trim off any excess string.
Creative Variations
Don’t be afraid to personalize your axolotl! Try using different color patterns to reflect your personality or even themed designs (like a festive Christmas axolotl with red and green beads). You could also craft a larger version of your axolotl by using bigger beads.
Safety Tips
- Be cautious with sharp objects like scissors and needles. Ensure you create a clutter-free workspace.
- If you’re crafting with children, closely supervise them to prevent any choking hazards with small beads.
Troubleshooting Common Issues
- Beads Slipping Off: Tie knots in your string and cut it a bit longer next time.
- Proportions Not Right?: Don't be afraid to undo some beads and reassemble them as you see fit. Crafting is always about experimenting.
Wrapping Up
Creating a pony bead axolotl has been an incredibly rewarding experience for me, and I hope you find it just as delightful. It’s about more than just crafting; it’s about building creativity, honing new skills, and expressing yourself.
Whether you hang your axolotl on a backpack or gift it to a friend, it’s sure to bring joy to anyone who sees it. Don't forget to share your creations with your friends or in crafting communities! Happy crafting, and may your pony bead axolotl swim its way into your heart!