DIY Lava Lamp: An Amazing Ultimate Guide with 5 Steps
DIY Lava Lamp projects are incredibly fun and bring a touch of magic into your space. This hands-on activity not only captivates the imagination but also demonstrates fascinating scientific principles in a visually stunning way. Whether you're looking to create a relaxing ambiance in your room or engage kids in a creative project, crafting a DIY Lava Lamp will surely add excitement to your day.
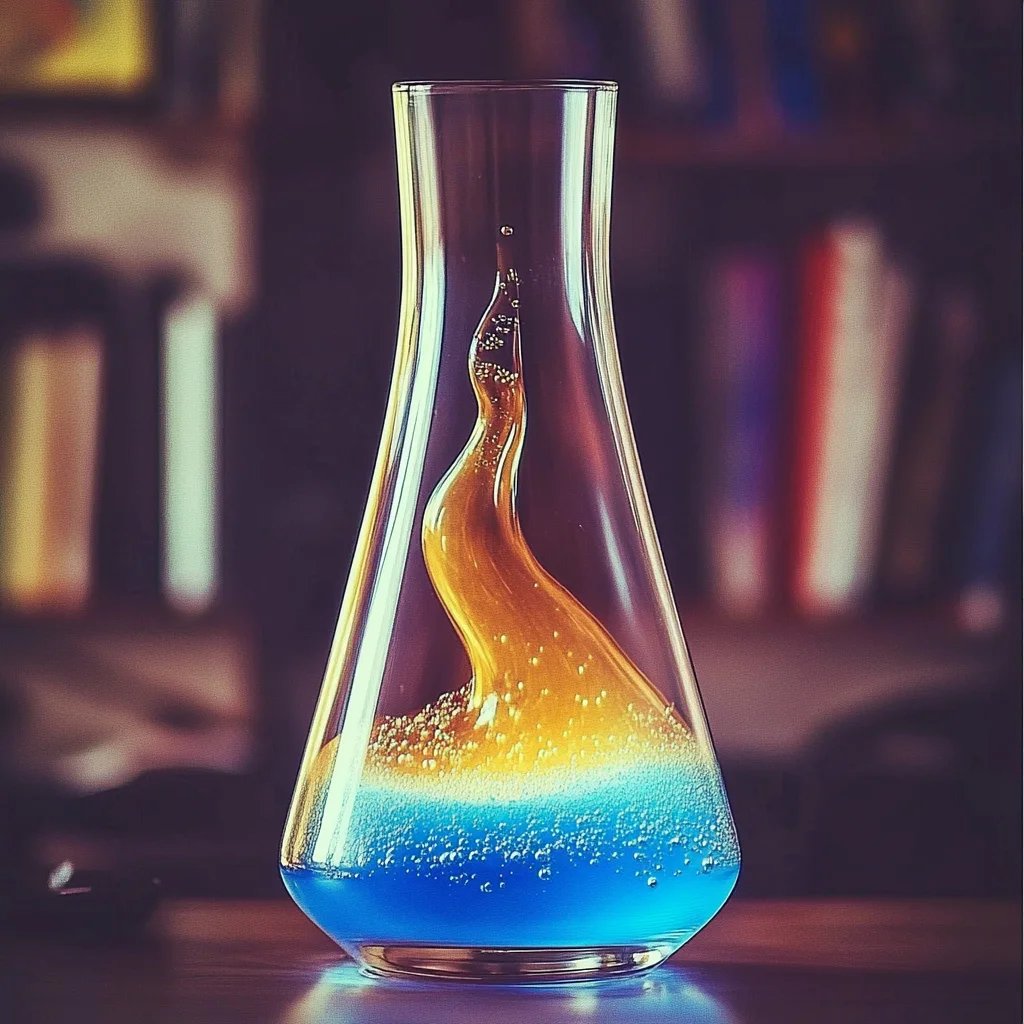
DIY Lava Lamps are not just for children; adults can also indulge in this creative endeavor. Picture watching colorful bubbles rise and fall gracefully, fueled by a simple yet effective chemical reaction. As you create your own lava lamp, you’ll discover the joy of transforming everyday materials into something mesmerizing. This article serves as your ultimate guide, helping you navigate through the process, understand the science behind it, and ensure a successful project.
Lava lamps have always held a sense of wonder. With vibrant colors swirling in captivating shapes, they have become an iconic decorative item. The best part? You can easily recreate this incredible effect at home! The process is straightforward, and the results are truly rewarding. So, let’s jump into how to make your own DIY Lava Lamp and why you’ll love this simple craft project.
Why You’ll Love This Recipe
Creating a DIY Lava Lamp is an experience you won't forget. Not only is it simple to do, but there are also several reasons why this project is bound to be a hit:
- Engaging Activity: This project is perfect for family bonding. Gather your household and get everyone involved in making their own lamps.
- Learning Opportunity: It’s an excellent way to illustrate concepts like density and immiscibility, making it an educational experience for kids.
- Creative Customization: You can choose your colors, shapes, and designs, giving each lamp a unique touch.
- Instant Gratification: The visual effects develop quickly, so you won't have to wait long to enjoy the results.
- Affordable Materials: Most of the items needed are already in your home or can be easily purchased, making this a cost-effective project.
- Relaxing Ambiance: Once completed, these lamps can serve as soothing night lights, creating a calming environment.
Given these fantastic features, you'll understand why DIY Lava Lamps are enjoyed by so many people of all ages. Now that you’re excited about the project, let’s discuss how to prepare for it!
Preparation and Cooking Time
Creating your DIY Lava Lamp does not require extensive time. Here’s a quick breakdown of the preparation time:
- Preparation Time: 15 minutes
- Setting Up the Lamp: 5 minutes
- Total Time: Approximately 20 minutes
This quick and easy timeframe makes it accessible, even for those with busy schedules!
Ingredients
- Clear plastic bottle or glass container
- Water
- Vegetable oil (or any light oil)
- Food coloring (multiple colors, if desired)
- Effervescent tablets (like Alka-Seltzer or fizzy tablets)
Step-by-Step Instructions
Follow these straightforward steps to create your own stunning DIY Lava Lamp:
- Prepare the Container: Start with a clean and dry clear plastic bottle or glass container. This will serve as the base of your lava lamp.
- Add Oil: Fill the bottle about two-thirds full with vegetable oil. The oil's density allows it to float on top of the water later.
- Pour in Water: Next, add water carefully to fill the remaining one-third of the bottle. It’s important to pour the water slowly to minimize turbulence, as you want the layers to remain separate.
- Color Your Water: Add several drops of food coloring to the water. Choose any color you love! As the food coloring mixes with the water, it will create a stunning visual effect.
- Create the Lava Effect: Break an effervescent tablet into smaller pieces and drop them into the water. Watch closely as they react and release gas, causing colorful bubbles to rise through the oil. Add more tablets for sustained movement.
- Optional Effects: If you wish to make your DIY Lava Lamp even more enchanting, consider adding glitter or small decorative items into the mix for added flair.
That’s it! You’ve made your own DIY Lava Lamp, ready to mesmerize you and your guests.
How to Serve
Displaying your DIY Lava Lamp is all about creating an appealing experience:
- Optimal Placement: Position it on a stable surface where it can be admired. A desk or shelf works well.
- Lighting: Consider placing your lava lamp in a dimly lit area so the colors can truly pop. Soft lighting enhances the mesmerizing effect.
- Watch and Enjoy: Gather your family or friends, and engage them in watching the colorful bubbles. It’s a delightful way to unwind or spark conversations.
- Educational Moment: Use it as a teaching tool by discussing the scientific principles behind its creation. Explain how density and chemical reactions work.
With these serving tips, your DIY Lava Lamp will not only brighten your space but also elevate gatherings and provide educational fun for everyone. Enjoy the captivating dance of colors and bubbles, and impress your guests with your creative ingenuity!
Additional Tips
- Experiment with Colors: Try using different food coloring combinations to create unique effects in your lava lamp. Mixing colors can lead to mesmerizing outcomes.
- Use Distilled Water: For clearer visuals, consider using distilled water instead of tap water. This can reduce impurities that may cloud your lamp.
- Temperature Matters: For even better results, ensure that the water is at room temperature. This helps the effervescent tablets react better when added.
- Keep It Clean: If you notice any sediment forming, gently clean your container to maintain a clear view of the bubbling action.
- Safety First: Ensure any small decorative items added are safe and won’t pose a choking hazard, especially if kids are involved.
Recipe Variation
Feel free to switch things up! Here are a few variations to try:
- Natural Dyes: Instead of food coloring, use natural dyes derived from fruits or vegetables to provide a different aesthetic and improve safety.
- Mini Lava Lamps: Use small glass containers to create mini lava lamps. These can serve as party favors or table centerpieces.
- Glow-in-the-Dark Effect: Add a few drops of glow-in-the-dark paint to your lamp to create an enchanting glow when the lights are turned off.
- Layering with Different Liquids: Experiment with other liquids to create unique effects, like tonic water which glows under black light.
- Scented Oils: Infuse your lava lamp with essential oils for a calming scent that enhances its relaxing ambiance.
Freezing and Storage
- Short-Term Storage: DIY Lava Lamps should be enjoyed fresh. However, you can store unused components separately in airtight containers for a short period.
- Reusability: You can easily reuse the container and the remaining liquid for another lava lamp, just refresh the effervescent tablets as needed.
- Avoid Long-Term Storage: Since the chemical reaction will eventually diminish, it’s best not to freeze the lamp or store it for extended periods.
Special Equipment
To create your DIY Lava Lamp effectively, consider having the following essential items on hand:
- Measuring Cup: For accurately measuring water and oil.
- Dropper or Pipette: Helpful for adding food coloring precisely.
- Stick or Skewer: Useful for mixing or breaking effervescent tablets before dropping them into the water.
- Stable Surface: A sturdy workspace or table to hold your lamp as you create it.
Frequently Asked Questions
Can I use a different type of container?
Yes! As long as the container is clear, you can use various shapes and sizes. Just ensure it can hold liquid safely.
What happens if I run out of effervescent tablets?
You can create temporary lava effects using baking soda and vinegar, but the visual impact may differ from the original recipe.
Can I use glitter in my lava lamp?
Definitely! Glitter can enhance the visual appeal of your lamp, but ensure it’s safe for use in liquids.
How often can I use the lava lamp?
You can use it repeatedly by refreshing the effervescent tablets whenever you want to reignite the reaction.
Is it safe for children?
Yes, but adult supervision is recommended, especially when handling effervescent tablets and small decor items.
Conclusion
Creating your own DIY Lava Lamp is not just a fun project; it's also a chance to learn and enjoy science in action. The colorful movement and swirling bubbles create a captivating atmosphere that can enhance any space. Whether you opt for vibrant colors or unique variations, making a lava lamp allows for personal expression and creativity. Engaging family and friends will make it an excellent bonding experience. So gather your supplies and get ready to delight in the magic of science at home!