DIY Gel Air Fresheners: The Amazing Ultimate Guide with 5 Simple Recipes
DIY Gel Air Fresheners are an incredible way to bring delightful scents into your home while being budget-friendly and environmentally conscious. Unlike store-bought air fresheners filled with synthetic fragrances and preservatives, these homemade gels are crafted with natural ingredients, allowing you to control the aroma and avoid harmful chemicals. Imagine filling your space with captivating fragrances that enhance your mood and eliminate unpleasant odors, all while enjoying the satisfaction of creating something from scratch. This guide will explore why you’ll love making your own gel air fresheners, the preparation steps, and five easy recipes to get you started.
Creating DIY gel air fresheners is not only a fun project but also an amazing opportunity to personalize your home environment. You can choose refreshing scents like lemon or calming scents like lavender, depending on your preference. Additionally, making your own air fresheners can save you money in the long run, as the ingredients are often inexpensive and easily accessible. Plus, you'll have the peace of mind knowing exactly what's in the product you are using. Let's explore why this amazing DIY project is worth your time!
Why You’ll Love This Recipe
There are numerous reasons why DIY gel air fresheners will become a staple in your home. Here are some highlights:
- Natural Ingredients: Using essential oils and other natural components ensures you avoid synthetic fragrances.
- Custom Fragrances: You can mix and match scents to create bespoke fragrances that suit your tastes.
- Cost-Effective: It's often cheaper to make your own than to buy pre-packaged products.
- Fun and Creative: Personalizing your air fresheners allows for creativity and experimentation.
- Environmentally Friendly: You can use eco-friendly ingredients and containers, reducing plastic waste.
- Child and Pet Safe: With the right ingredients, these air fresheners can be safe around children and pets.
These reasons amplify the appeal of DIY gel air fresheners. Not only will your home smell fantastic, but you’ll also be promoting a healthier environment for yourself and your family.
Preparation and Cooking Time
Making DIY gel air fresheners is a simple process that doesn’t take long. Here’s a breakdown of the approximate time you’ll need:
- Preparation Time: 15 minutes
- Cooling Time: 30 minutes
- Total Time: 45 minutes
These times can vary based on your individual pace, but this guide provides a good framework to follow as you embark on your DIY journey.
Ingredients
- 1 cup water
- 2 tablespoons gelatin
- 1 tablespoon salt (acts as a preservative)
- 10-15 drops of essential oil (your choice of scent)
- Food coloring (optional)
- Small jars or containers for storage
Step-by-Step Instructions
Creating your own DIY gel air fresheners is straightforward. Follow these easy steps:
- Boil Water: In a small saucepan, bring 1 cup of water to a boil.
- Mix Gelatin: Once boiling, remove from heat and immediately add 2 tablespoons of gelatin. Stir until completely dissolved.
- Add Salt: Incorporate 1 tablespoon of salt into the gelatin mixture. This helps preserve your gel air fresheners.
- Incorporate Essential Oils: Add 10-15 drops of your chosen essential oil, and mix well. For a stronger scent, feel free to add more drops.
- Add Color: If desired, include a few drops of food coloring to tint your gel. Stir until the color is evenly distributed.
- Pour into Jars: Carefully pour the mixture into your small jars or containers.
- Let Cool: Allow the gel to cool to room temperature before placing the lids on the containers.
- Set: Refrigerate for about 30 minutes to allow the gelatin to fully set.
- Display: Once set, place your gel air fresheners in desired areas around your home.
This step-by-step guide ensures that your DIY gel air fresheners will come out both effective and visually appealing.
How to Serve
When it comes to serving your DIY gel air fresheners, consider the following suggestions:
- Placement: Choose strategic locations in your home, such as near the kitchen, bathroom, or living area, for maximum scent distribution.
- Decorative Containers: Use aesthetically pleasing jars to enhance your home décor while providing wonderful fragrances.
- Scent Combinations: Experiment with different scent combinations in various rooms to create pleasant and distinct atmospheres.
- Gift Idea: These homemade gel air fresheners make thoughtful gifts for friends and family; just package them nicely!
- Seasonal Scents: Change the scents seasonally to keep your home feeling fresh and inviting all year round.
By following these tips, you can truly maximize the experience and effectiveness of your DIY gel air fresheners. Enjoy the wholesome scents and take pride in the amazing creations you’ve made!
Additional Tips
- Use Natural Essential Oils: Ensure your essential oils are pure and free from additives for the healthiest option.
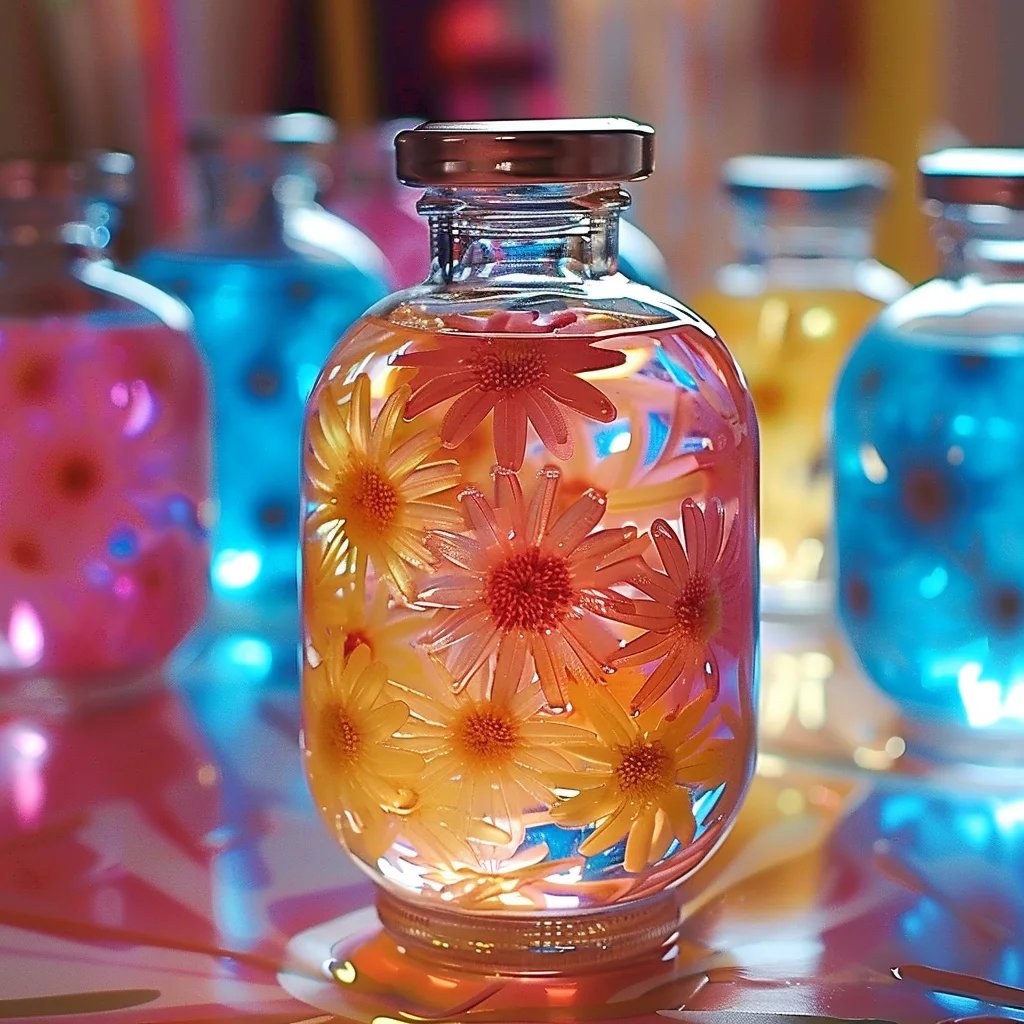
- Experiment with Textures: Try adding small decorative elements like dried flowers or herbs to enhance the visual appeal of your gel air fresheners.
- Refresh Regularly: For optimal scent, replace your DIY gel air fresheners every month or as they start losing their fragrance.
- Test the Scents: Before pouring your mixture into containers, consider testing the scent strength by placing a few drops on a cotton ball.
- Location Matters: To distribute scents more effectively, place your gel air fresheners near air vents or open windows.
Recipe Variation
You can create a variety of fragrances and formulations. Here are some ideas to inspire your creativity:
- Citrus Burst: Combine lemon and orange essential oils for a zesty scent that brightens your space.
- Herbal Fresh: Add mint and rosemary essential oils for a refreshing, green aroma that invigorates.
- Floral Bliss: Use lavender and chamomile for a soothing scent that promotes relaxation.
- Spice Blend: Experiment with cinnamon and clove essential oils for a warm, cozy fragrance, ideal for winter.
- Unscented Option: For a simple air freshener, you can omit the essential oils altogether and just enjoy the neutral scent of the gelatin.
Freezing and Storage
- Storage: Keep your gel air fresheners in a cool, dry place away from direct sunlight. They can last for several weeks.
- Freezing: It’s not recommended to freeze the gelatin mixture, as it may change its texture. Instead, prepare smaller batches that can be used up quickly.
- Refreshing Scent: If your gel starts to lose its fragrance, simply add a few more drops of essential oil to rejuvenate it without needing to create a new batch.
Special Equipment
While creating DIY gel air fresheners is straightforward, having the right tools can make the process smoother:
- Saucepan: For boiling water and mixing the ingredients.
- Mixing Spoon: To stir the gelatin mixture thoroughly.
- Measuring Cups: For accurate ingredient proportions.
- Jars or Containers: To hold your finished gel air fresheners. Choose decorative options for added flair.
- Funnel: This can help in pouring the mixture neatly into the containers, avoiding messes.
Frequently Asked Questions
Can I use synthetic fragrances instead of essential oils?
Yes, but using synthetic fragrances may defeat the purpose of a natural air freshener. Essential oils are recommended for a healthier option.
How long will the gel air fresheners last?
Typically, they can last about 2-4 weeks, depending on environmental conditions and the amount of essential oils used.
Can I double the recipe?
Absolutely! Just ensure to adjust your containers accordingly to hold the extra mixture.
What happens if I use too much salt?
Overuse of salt can affect the texture of the gel and may make it too salty, so stick to the recommended amount.
Can children help with this project?
Yes! This is a fun project for kids, but adult supervision is recommended when boiling water and using essential oils.
Conclusion
DIY Gel Air Fresheners offer a wonderful blend of creativity and practicality, allowing you to tailor fragrances that suit your home and personal preferences. Whether you're seeking calming aromas or invigorating scents, this guide equips you to make delightful air fresheners with just a few simple ingredients. By embracing this DIY approach, you not only save money and reduce waste but also create a healthier environment for you and your family. So gather your materials and start crafting your very own gel air fresheners today!