DIY Fireworks Eruption: An Incredible Ultimate Recipe with 5 Steps
DIY Fireworks Eruption is an exciting way to bring the thrill of a fireworks display right into your home. This incredible recipe is perfect for celebrations, parties, or simply for having fun with family and friends. Picture this: vibrant colors bursting forth in an awe-inspiring explosion of light, sound, and excitement. You can create a stunning and safe version of fireworks using common household ingredients, making it a fantastic, hands-on activity for all ages.
Creating your own fireworks eruption is not just about the spectacle; it also promotes creativity and provides an educational experience about chemical reactions. In this guide, you'll find step-by-step instructions to set up your DIY fireworks display safely. You'll learn why this method is a fun alternative to traditional fireworks, and I promise the excitement will be unmatched!
Let’s dive deeper into this significant and thrilling pursuit of DIY Fireworks Eruption. We’ll explore why you’ll love this experience and what you need to get started. The vibrant colors and sensory experiences await you!
Why You’ll Love This Recipe
When you embark on the DIY Fireworks Eruption journey, you’ll discover why it’s so well-loved. Here are five reasons why this recipe is a hit among thrill-seekers and curious minds:
- Safe Fun: Unlike traditional fireworks, this method is safe for indoor or outdoor activities, making it ideal for family gatherings.
- Educational Experience: Learn about basic chemical reactions and colors while engaging in this exciting project.
- Customization: You can modify the colors and effects, allowing for a personalized display that reflects your unique style.
- Easy to Prepare: The ingredients are simple and often already available at home, minimizing the effort and maximizing the fun.
- Mesmerizing Visuals: Watch in amazement as vibrant colors and exciting eruptions come to life, captivating the audience.
With all these benefits, it’s no wonder that DIY Fireworks Eruption is a favorite for celebrating, learning, and having a blast!
Preparation and Cooking Time
To make your DIY Fireworks Eruption, you will need to allocate about 30-45 minutes for preparation and execution. Here’s a breakdown of the time involved:
- Preparation Time: 15-20 minutes
- Activity Time: 15-25 minutes
- Cleanup Time: 5-10 minutes
These times may vary based on your experience and setup, but the framework serves as a solid estimate!
Ingredients
- Baking soda
- White vinegar
- Food coloring (various colors)
- Clear plastic cups or small containers
- Tray or baking sheet
- Funnel (optional)
- Water (for cleanup)
Step-by-Step Instructions
Creating a mesmerizing DIY Fireworks Eruption can be both easy and fast if you follow these simple steps:
- Prepare Your Area: Choose a safe space outdoors or in a well-ventilated area indoors. Lay down a tray or baking sheet to catch any spills.
- Add Baking Soda: Pour about 1-2 tablespoons of baking soda into each clear plastic cup or container. This will act as your “explosive” base.
- Add Food Coloring: Drip in different colors of food coloring into each cup. This will be what makes your eruption colorful and exciting. Mix gently if desired for unique hues.
- Mix Vinegar: In a separate container, measure and pour approximately 1/2 cup of white vinegar. If you’d like, you can use a funnel for easier pouring.
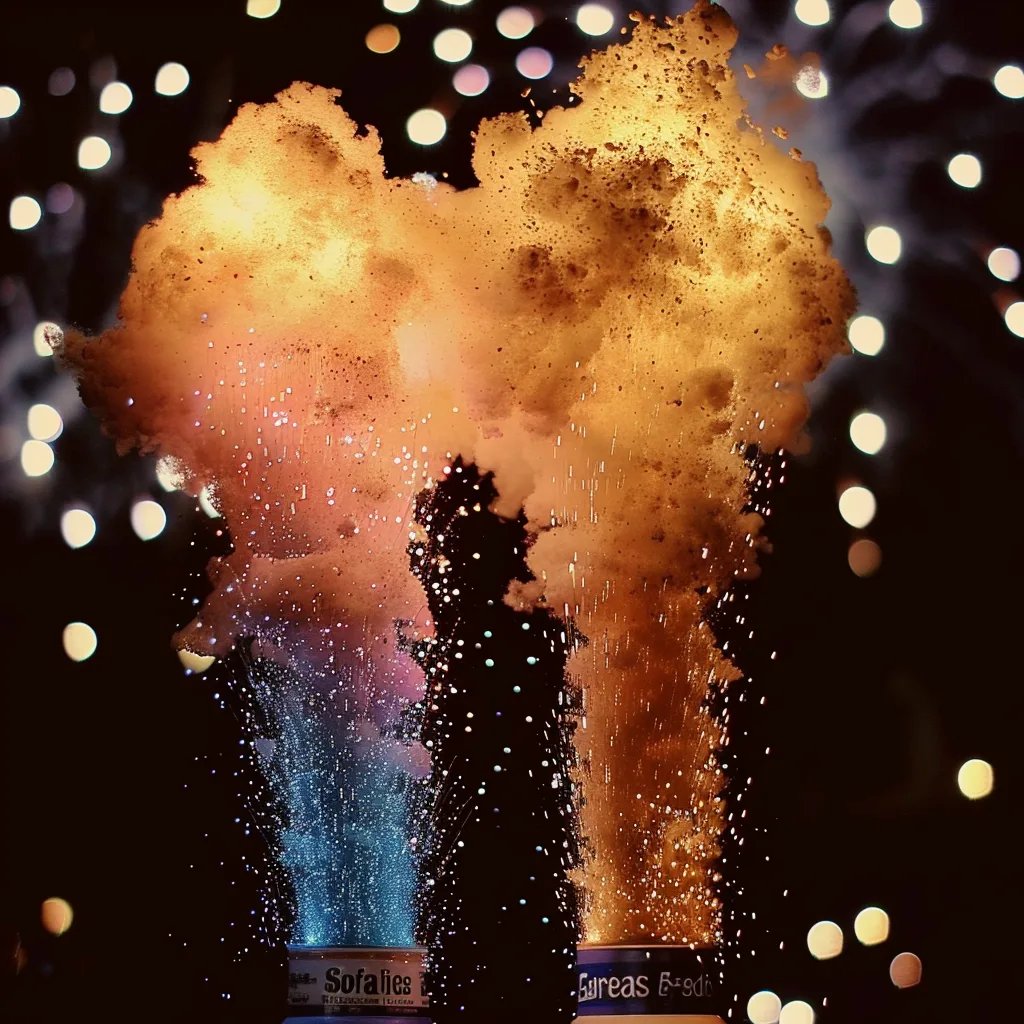
- Erupt the Mixture: Pour the vinegar into the container with baking soda. Stand back and watch as a mini volcano erupts with colorful foam! Enjoy the bubbly, colorful reaction as it simulates a fireworks effect.
How to Serve
To enhance your DIY Fireworks Eruption experience, here are some creative presentation ideas:
- Colorful Display: Arrange the cups or containers in a way that creates a vibrant visual display. Use multiple colors for a more striking effect.
- Themed Events: Tailor your eruption to fit events like birthdays or holidays. Use color schemes that match the occasion to make it memorable.
- Additional Effects: Incorporate sparklers (safely) or glow sticks around the eruption area for added excitement and ambiance.
- Interactive Learning: Involve everyone to take part in the preparation and eruption process. This inclusivity promotes learning and fun!
- Post-Event Cleanup: After the fun, make sure to clean up the area properly. Baking soda and vinegar are easy to clean, using water to rinse the surfaces.
With these tips, you can serve and showcase your DIY Fireworks Eruption effectively, ensuring that everyone enjoys the colorful explosions, a fantastic display of creativity, and scientific wonder.
Additional Tips
- Safety First: Always supervise children during the DIY Fireworks Eruption process. Ensure that everyone stays at a safe distance once the eruption begins.
- Experiment with Ratios: You can alter the amounts of baking soda and vinegar to create different eruptions. More baking soda may yield a larger reaction, while less may give a subtler display.
- Choose Safe Locations: If you are doing this indoors, clear the area of any valuable items or delicate decorations.
- Consider Outdoor Spaces: When venturing outside, choose a flat, dry surface to prevent any spillovers and ensure safety.
Recipe Variation
Feel free to get creative with your DIY Fireworks Eruption! Here are some fun variations to try:
- Color Themes: Choose colors that represent your favorite sports team or holiday to make the eruption more festive.
- Textured Effects: Add a small amount of dish soap to the baking soda mixture for a frothy explosion that lasts longer.
- Glow-in-the-Dark: Use glow-in-the-dark food coloring for a nighttime eruption to create a magical effect.
Freezing and Storage
- Storage: While the DIY Fireworks Eruption is best enjoyed fresh, you can store any leftover materials separately. Keep them in airtight containers to maintain their effectiveness.
- Freezing: It’s not recommended to freeze the mixture, as the reaction between baking soda and vinegar cannot be replicated after thawing. Prepare fresh eruptions as needed!
Special Equipment
You do not need many special tools for a successful DIY Fireworks Eruption, but consider having the following:
- Measuring cups for accurate ingredient portions
- Small clear cups or containers to showcase the layers of baking soda and food coloring
- A tray or baking sheet to catch any overflowing foam during the eruption
Frequently Asked Questions
What ages is this activity suitable for?
This activity is safe for all ages, but adult supervision is recommended for younger children.
What happens if I use too much vinegar?
Using excessive vinegar will create a more vigorous eruption. It is important to find a balance for the desired effect.
Can I reuse the ingredients after the first eruption?
Once the reaction has occurred, the ingredients are no longer effective for another eruption. You will need fresh ingredients for subsequent attempts.
Is this activity safe for pets?
While the ingredients are generally safe, it's advisable to keep pets away from the area to avoid any accidental consumption.
What if I don’t have food coloring?
You can create colored eruptions using fruit juices or natural dyes if you don’t have food coloring on hand.
Conclusion
DIY Fireworks Eruption is an exhilarating and educational experience that captivates audiences of all ages. Not only does it evoke excitement and wonder, but it also fosters creativity and a fascination with science. With simple ingredients and easy steps, you can make a spectacular display that’s perfect for any occasion. Gather your materials, prepare for some colorful fun, and enjoy the enchanting eruptions that come to life right before your eyes!