DIY Aquarium Jelly Donuts: A Guide to Passionate Crafting
Hello, fellow crafters! Today, I'm excited to share one of my all-time favorite crafting projects: Aquarium Jelly Donuts! This delightful creation is not only a treat for the eyes but also a fun activity to engage in. Imagine a vibrant donut filled with colorful “aquarium” jelly that’s sure to impress your friends or add a splash of personality to any party or celebration.
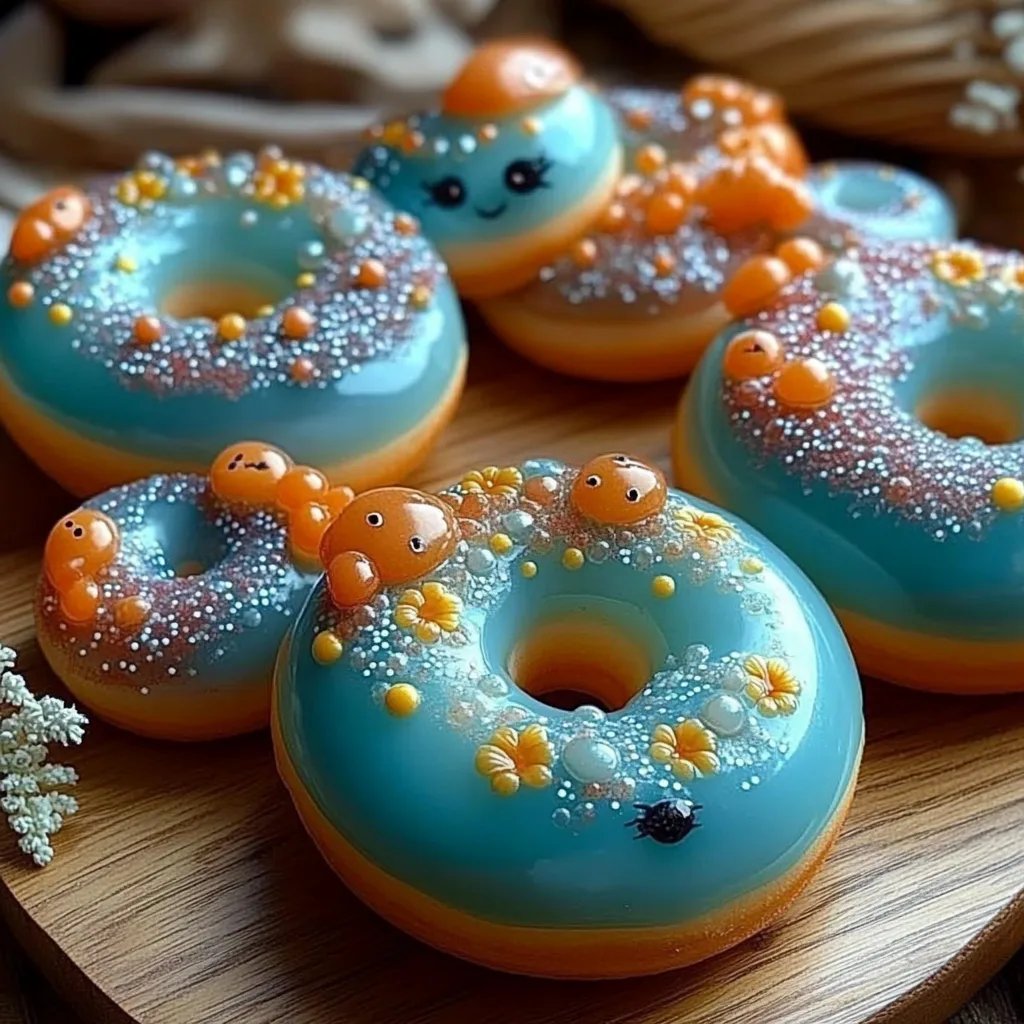
What Are Aquarium Jelly Donuts?
Aquarium Jelly Donuts are essentially donuts filled with a colorful gelatin mixture that mimics the appearance of an aquarium. The vibrant colors and shapes inside create a stunning visual that resembles aquatic life. These whimsical treats are perfect for themed parties, summer picnics, or just when you want to bring a bit of joy into your day!
In recent years, these jelly-filled creations have gained popularity in the crafting and baking community thanks to their eye-catching aesthetics and the joy they bring to both the maker and the consumer. Trust me; your guests will be delighted when they see these whimsical treats!
What You’ll Need
Before diving into this delightful project, gather the following materials. I’ll walk you through each step, including tips and tricks along the way!
Materials
For the Donuts:
- 2 cups all-purpose flour
- 1/2 cup granulated sugar
- 2 tsp baking powder
- 1/2 tsp salt
- 1/2 cup milk
- 1/4 cup melted butter
- 2 large eggs
- 1 tsp vanilla extract
- Donut pan (for optimal shape)
For the Aquarium Jelly:
- 1 packet of gelatin (unflavored)
- 2 cups fruit juice (blue raspberry, grape, or any vibrant color)
- Assorted fruit pieces (gummy fish, jellybeans, or any small, colorful candies)
- Food coloring (optional)
For Decoration:
- Powdered sugar (for dusting)
- Edible glitter (for that aquarium sparkle, if you desire!)
Tools
- Mixing bowls
- Whisk
- Measuring cups and spoons
- Cooking pot
- Spoon or whisk
- Toothpick (for decorating)
Step-by-Step Guide to Making Aquarium Jelly Donuts
Are you ready to roll up your sleeves? Let’s get started on making these delightful treats!
Step 1: Make the Donuts
Why This Step Matters: The donut base is the foundation of your Aquarium Jelly Donuts. Getting the texture just right is crucial for flavor and structure.
- Preheat the Oven: Start by preheating your oven to 350°F (175°C). This ensures that the donuts bake evenly.
- Mix Dry Ingredients: In a large mixing bowl, whisk together the flour, sugar, baking powder, and salt until well combined.
- Combine Wet Ingredients: In a separate bowl, mix the milk, melted butter, eggs, and vanilla extract. Whisk until smooth.
- Incorporate Wet into Dry: Slowly add the wet ingredients to the dry ingredients. Mix gently until just combined. Be careful not to over-mix, as this can create dense donuts.
Tip: If the batter seems too thick, you can add a splash more milk to achieve the desired consistency.
- Fill the Donut Pan: Grease your donut pan lightly. Using a piping bag or a spoon, fill each cavity about 3/4 full. This allows space for them to rise while baking.
What Could Go Wrong: If you overfill the cavities, your donuts might overflow or become misshaped. If that happens, don’t stress! Simply trim the edges with a knife after they’ve cooled.
- Bake: Place the pan in the preheated oven and bake for 8-10 minutes, or until a toothpick comes out clean.
- Cool the Donuts: Allow them to cool in the pan for about 5 minutes before transferring them to a wire rack to cool completely.
Step 2: Prepare the Jelly
Why This Step Matters: The jelly is what gives these donuts their aquarium-like appearance. Flavorful, colorful jelly will make your donuts pop, both in flavor and presentation.
- Make the Jelly Mixture: In a pot, combine the fruit juice and sprinkle in the gelatin. Heat over medium heat, stirring just until the gelatin dissolves completely. Be careful not to let it boil.
- Cool the Jelly Mixture: Pour the mixture into a shallow dish and allow it to sit at room temperature for a few minutes until it starts to thicken. You can gently place it in the fridge for faster cooling.
- Add Fruit Candies: Once it’s starting to thicken but isn’t fully set, add your assorted fruit pieces. They’ll float and create a colorful “aquarium” effect!
Step 3: Fill the Donuts
Why This Step Matters: This is where the magic happens! Filling the donuts with jelly transforms them into the aquarium treats we adore.
- Prepare for Filling: Once your donuts are completely cool, take a small sharp knife and cut a small hole in the side of each donut. Alternatively, you can use a piping tip for an easier filling process.
- Fill with Jelly: Using a piping bag or a small spoon, fill each donut with the prepared jelly. Fill them generously, but don’t overdo it, or you’ll have jelly spilling out everywhere.
What Could Go Wrong:
- If donuts aren’t cool, the heat could melt the jelly. Make sure they’re past room temperature first.
- If you overfill, just wipe away any excess jelly with a clean paper towel.
- Dust and Decorate: Lightly dust the filled donuts with powdered sugar for a delicious finish. Optionally, sprinkle them with edible glitter for the aquarium sparkle effect.
Tips for Perfecting Your Aquarium Jelly Donuts
- Experiment with Flavors: Don’t hesitate to experiment with different fruit juices and jelly flavors. Each variation can create a unique visual and taste experience.
- Use Silicone Molds: If you can’t find a donut pan, consider using silicone molds that allow for easy removal and shaped versatility.
- Plan Ahead: Making these for an event? Prepare the jelly the day before to allow ample time for setting.
- Safety Precautions: Always be careful while using kitchen appliances and tools. Ensure the area is clean to avoid cross-contamination, especially when using fruit.
Creative Variations
Now that you know how to create the classic Aquarium Jelly Donuts, why not try some variations? Here are a few ideas:
- Tropical Twist: Use pineapple or mango juice and add coconut flakes for a tropical spin. The bright yellow color paired with tropical fruits would be visually stunning!
- Seasonal Colors: For fall, try pumpkin spice donuts with orange and red-colored jelly and gummy candy leaves.
- Layered Jelly: For a more complex look, create layers of jelly within the donut using different colors and flavors.
In Closing
Making Aquarium Jelly Donuts has truly been one of my most enjoyable and rewarding crafting experiences. Not only are they fun to make, but they also add a whimsical touch to any gathering. Whether you’re sharing them at a birthday party, holiday feast, or just for a cozy weekend treat, these donuts are sure to brighten up the day.
So gather your ingredients, roll up your sleeves, and let your creativity shine! Remember, crafting is all about having fun—don’t worry about making them perfect; just enjoy the process! Happy crafting, and I can’t wait to hear how your Aquarium Jelly Donuts turn out!