Dive into Creativity: How to Make Bubble Painting
Welcome to the marvelous world of bubble painting! As an experienced crafter who loves exploring fun and creative projects with my family, I can confidently say that bubble painting is a delightful way to combine art and science. Whether you’re hosting a birthday party, looking for a rainy-day activity, or just want to unleash your inner artist, bubble painting offers a colorful explosion of creativity that’s perfect for all ages.
In this comprehensive guide, I’ll walk you through everything you need to know to create your very own bubble paintings. From the materials and techniques to troubleshooting common issues, I promise to share insider tips to ensure that your bubble painting experience is as joyous and seamless as possible.
What is Bubble Painting?
Bubble painting is an innovative and fun process that combines bubble-blowing with painting to create stunning, whimsical designs. It’s immensely popular among children, but I believe that people of any age can enjoy this engaging activity! This vibrant art form is used in classrooms for educational exploration—teaching kids moments of chemistry while simultaneously encouraging self-expression through art. Additionally, it's an excellent activity for birthday parties or family gatherings, where everyone can participate and share laughs.
Why Bubble Painting?
The appeal of bubble painting lies not just in its low-cost materials but also in its sensory experience. The joy of blowing bubbles, watching the vibrant colors spread and combine, and seeing the final artwork come to life is utterly rewarding. Plus, it’s a unique twist on traditional painting—there’s no brush required! Let’s dive into the step-by-step process, clear out some common pitfalls, and embrace the colorful chaos of bubble painting.
Materials You’ll Need
Before we embark on this bubbly adventure, let's gather our materials. Luckily, the requirements are simple and most can be found around your home:
Essential Supplies:
- Liquid Bubble Solution: You can buy a pre-made bubble solution or make your own using dish soap and water (more on that in the alternatives section).
- Food Coloring or Liquid Watercolors: These are essential for adding vibrant colors to your painting. Get creative with different shades!
- Straws: Thin, normal-sized drinking straws are perfect for blowing bubbles.
- White Paper: Use regular printer paper or thicker watercolor paper for sturdier art.
- Shallow trays: These will hold the bubble mixtures—dinner trays or baking sheets work well.
- Paper towels: For cleanup, of course!
- Aprons or old clothing: Things can get a little messy, so dress accordingly.
Optional Supplies:
- Muffin tins or small cups: To separate different colors in bubble mixtures.
- Squeezy bottles: Great for creating controlled bubble creations.
Step-by-Step Bubble Painting Tutorial
Now that we have our materials ready, it’s time to begin the bubble painting process. I’ll guide you through each step, sharing tips and insights along the way.
Step 1: Prepare Your Bubble Solution
While it’s easy to use store-bought bubble solution, I always enjoy making my own. Here’s a simple recipe:
- 2 cups water
- 1/2 cup dish soap (preferably unscented)
- 1 tablespoon sugar (adds sturdiness to the bubbles)
- In a large bowl, combine the water and dish soap gently to avoid forming bubbles.
- Stir in the sugar until it dissolves completely.
- Let the mixture sit for at least 30 minutes before using—this helps to strengthen the bubbles.
Step 2: Set Up Your Work Area
Painting can get messy, so I recommend laying down newspapers or a plastic tablecloth to protect your workspace.
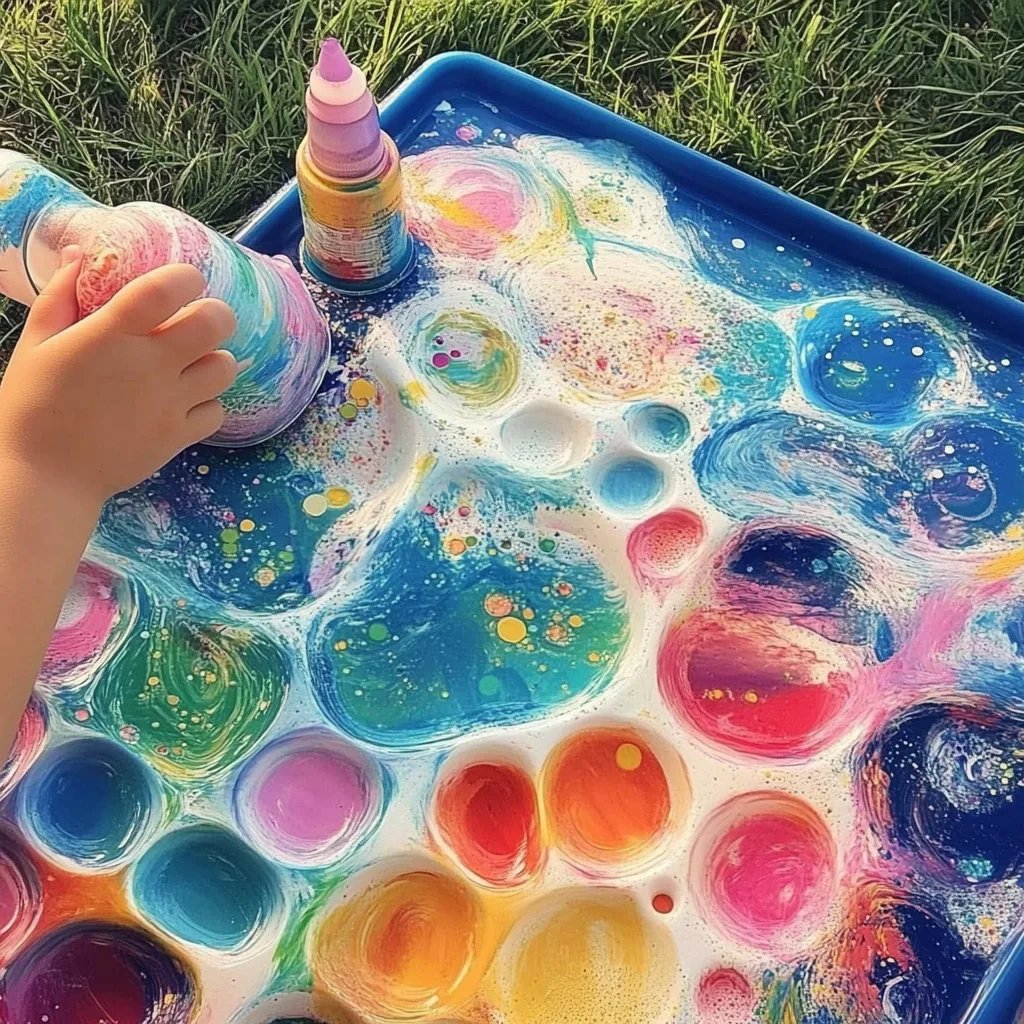
- Pour the bubble solution into shallow trays.
- Add a few drops of food coloring or liquid watercolor to each tray to create colorful mixtures. You can experiment with blending colors for even more vibrant designs.
Step 3: Create Your Bubble Mixture
This is where the fun begins!
- Take one straw and dip it into the bubble solution.
- Place the straw in your tray and gently blow through the straw. Avoid inhaling, as this could be a choking hazard.
- Watch as colorful bubbles rise and spill over the edges of the tray!
Step 4: Transfer Bubbles to Paper
Now that you've created a bubbly eruption, it's time to make some art!
- Position a piece of paper above the tray, aiming for the bubbles to create prints on the page.
- Carefully lift the paper off the tray once bubbles have burst onto its surface.
Tips for Success:
- Maximize Bubbles: If you notice fewer bubbles forming, try adjusting the amount of soap in your solution, or gently swirling it to create more surface area.
- Controlled Chaos: If the bubbles pop before reaching the paper, try blowing softer or hold the paper closer to the bubbles.
- Layering Colors: For a beautiful overlapping effect, allow one layer of bubbles to dry before applying another color on top.
Common Pitfalls and Fixes
- Too Few Bubbles: Ensure you’re using a good bubble solution, and don’t blow too hard or too soft.
- Messy Prints: If the prints are messy, try using thinner paper or absorbent watercolor paper; it holds the designs better.
Step 5: Enjoy and Reflect
Once your artwork is dry, take a moment to appreciate your creation! You can hang it up, show it off to friends, or even gift it.
Creative Variations
Feel free to modify this activity according to your preferences! Here are a few creative twists I’ve tried:
- Alterative Colors: Use edible colors for a child-safe version or natural food dyes for a more organic take.
- Thematic Bubble Painting: For holidays, use themed colors corresponding to celebrations (red and green for Christmas, pastels for Easter, etc.).
- DIY Bubble Wands: Create your own bubble wands using pipe cleaners or skewers for larger and more intricate bubbles.
Safety Tips
- Always supervise young children to ensure they are blowing bubbles safely.
- If using edible colors, check for allergies before crafting.
Conclusion
Bubble painting incorporates fun, creativity, and scientific exploration into one delightful activity. I genuinely believe that this is one of the most enchanting ways to express artistic flair while engaging with family and friends. So gather your materials, embrace the colorful chaos, and let each bubble guide you to stunning masterpieces that reflect your imagination. Happy painting!