Dive into Creativity: Crafting Your Own Under the Sea Sensory Play Tub
As an experienced crafter and childhood educator, there's something profoundly magical about engaging children with sensory play. One of my absolute favorites, which never fails to ignite excitement and curiosity, is the Under the Sea Sensory Play Tub. This tactile and visual experience not only captivates the little ones but also introduces them to the wonders of the ocean—promoting exploration, fine motor skill development, and imaginative play.
In this article, I'll guide you through my tried-and-true method for creating an Under the Sea Sensory Play Tub. Whether it’s for a rainy afternoon, a birthday party, or educational purposes, this sensory tub is versatile and sure to keep young minds engaged. Let’s dive into this fantastic crafting adventure!
What Is an Under the Sea Sensory Play Tub?
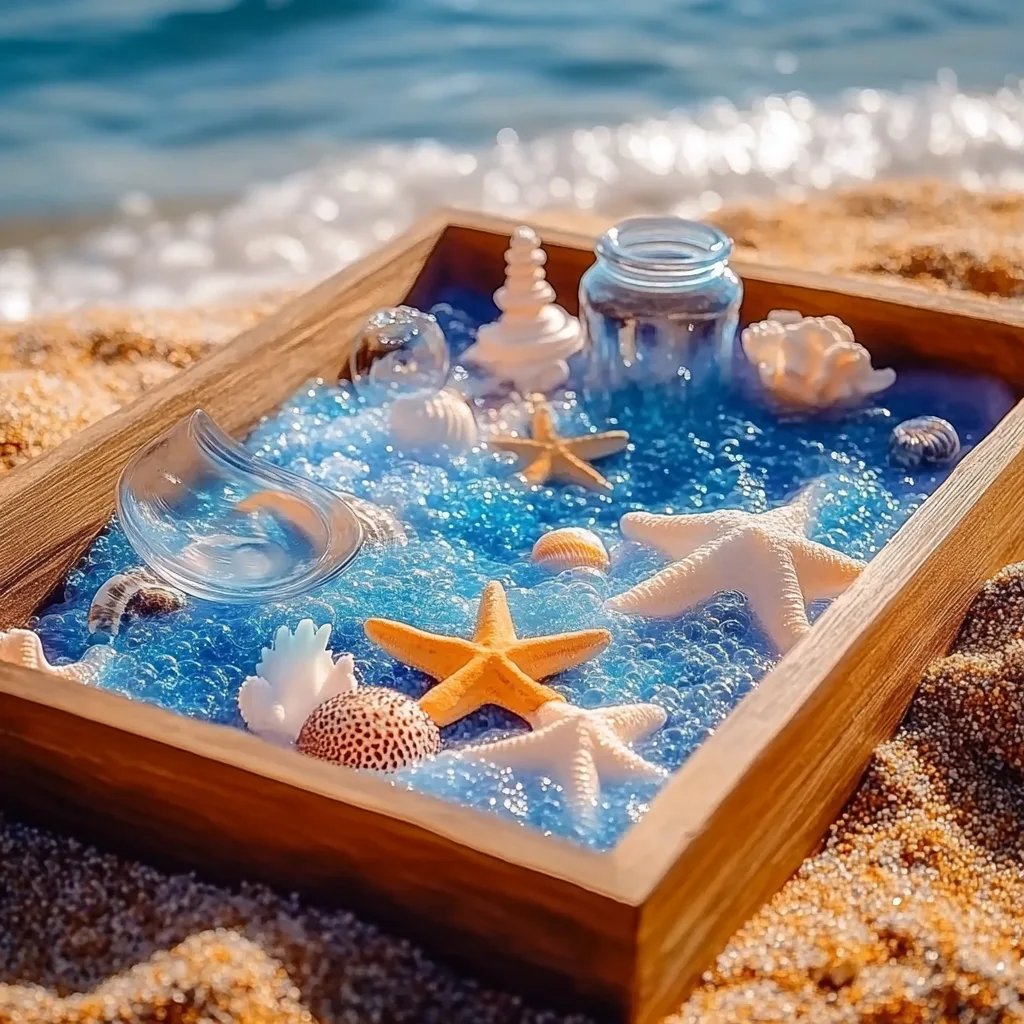
Essentially, an Under the Sea Sensory Play Tub is a container filled with various materials mimicking the ocean environment, all meant to stimulate the five senses. Think of it as an interactive play experience where children can scoop, pour, and engage with ocean-themed elements such as water beads, toy sea creatures, and natural materials like sand or shells.
These sensory tubs are prominent in early education and at home because they provide a safe space for children to explore textures, learn and practice motor skills, and encourage imaginative storytelling. As a bonus, they can often be set up in under 30 minutes and easily modified to suit your child’s interests!
Materials You'll Need
Here’s a comprehensive checklist of what I recommend gathering for your Under the Sea Sensory Play Tub:
- Container: A plastic tub or shallow bin (a clear plastic bin adds a visual pop).
- Base Material: Water beads, blue-dyed rice, or sand.
- Water Play Accessories: Small sea creatures (like plastic fish, starfish, and crabs), seaweed (fabric strips, or felt), shells, and smooth stones.
- Tools for Play: Scoops, cups, and funnels—these items encourage fine motor skills and exploration.
- Optional Scents: A drop of essential oil with refreshing ocean notes (like eucalyptus or peppermint) to enhance the sensory experience further.
- Decorative Add-ons: Glitter, fabric swatches, or colored tissue paper for added visual appeal.
Pro Tip:
Choose non-toxic, washable materials, especially if your tub is meant for younger children who might explore through taste.
Step-By-Step Tutorial: Crafting Your Sensory Play Tub
Step 1: Selecting Your Base
Why It Matters: The base material sets the scene for your underwater adventure.
- What Could Go Wrong: If you choose a base that’s too messy or difficult to clean, you might discourage playtime.
- How to Fix It: Stick with easy-to-clean options. For instance, water beads can be rinsed off easily, while sand may require a more thorough sweep afterward.
Instructions: Begin by pouring your selected base material (water beads, dyed rice, or sand) into the bottom of your sensory tub. For added effect, you may choose to layer two different materials, like a layer of blue-dyed rice followed by a layer of sand, enhancing the oceanic visual aspect.
Step 2: Adding Ocean-Themed Items
Why It Matters: This step is where the magic truly happens; it turns a simple play area into an immersive environment.
- What Could Go Wrong: Overcrowding the tub may make it hard for children to discover and explore each element.
- How to Fix It: Start with a few select pieces—perhaps a couple of sea creatures and a few shells—and add more only if space allows for exploration.
Instructions: Place your plastic sea creatures, shells, and decorative items on top of the base layer you've created. Scatter them evenly, ensuring that every diving hand will have something exciting to uncover.
Step 3: Enhancing the Experience
Why It Matters: Engaging all senses makes the experience richer and more rewarding for children.
- What Could Go Wrong: Using overpowering scents can be overwhelming or unpleasant.
- How to Fix It: Use essential oils sparingly; one drop might be all you need, so start small!
Instructions: At this point, you might want to introduce scents. If you’re using essential oils, mix a drop with water in a spray bottle and give the tub a light misting. This creates a refreshing smell without overtaking the sensory experience.
Step 4: Providing Tools for Exploration
Why It Matters: Tools allow for experimentation with different actions, promoting fine motor skills.
- What Could Go Wrong: Lack of tools might limit engagement, as children may not know how to interact with the materials.
- How to Fix It: Ensure plenty of scoops, cups, and small molds for pouring and molding the rice or sand.
Instructions: Add an assortment of scoops, cups, and funnels into the tub. Show children how to use them to pour and measure the materials, fostering a sense of accomplishment and discovery.
Final Touches
Ensuring Safety
While crafting your sensory tub, remember:
- Supervision: Always supervise young children during playtime to ensure safe exploration.
- Age Appropriateness: If your sensory play tub includes smaller items, make sure it’s suitable for your child’s age to prevent choking hazards.
Alternative Methods and Ingredient Substitutions
Feel free to mix up the ingredients! For instance, you can substitute water beads with foam balls if your child prefers a bouncier texture. For educational variations, consider including educational elements, such as a chart of sea creature names or facts.
Personal Anecdote: A Memorable Playtime
I once crafted a version of this sensory tub for my niece’s birthday party when she turned three. Little did I know how much of a hit it would be! The children enjoyed scooping and pouring while pretending to be ocean explorers. Watching them work together to create their own underwater stories was a joy. It taught me the value of letting children's imaginations run wild, giving them the space to narrate their adventures.
Creative Variations
To keep things fresh, consider these ideas:
- Themed Sensory Play: Create variations based on specific sea ecosystems, like coral reefs or tide pools.
- Color Themes: Use colored playdough for sea bed or paper squids for a colorful twist.
- Seasonal Tie-Ins: Align with seasonal changes by incorporating festive elements related to ocean holidays, like beach-themed decorations in the summer.
Conclusion: Embrace the Ocean
Creating an Under the Sea Sensory Play Tub not only provides a fun-filled adventure but also encourages learning and exploration. No matter your crafting skill level, I hope this guide empowers you to dive in and create your own sensory experience. Remember, the most important part is to enjoy the process with your child—after all, it's not just about the end product; it’s about the memories you create along the way!
Happy crafting, and may your sensory adventures be filled with discovery and joy! 🌊🐠