Discover the Joy of Creating Paint with Bubbles: A Step-by-Step Guide
Hello, fellow crafters! Today, I’m excited to share with you a whimsical and colorful project that has been a favorite among kids and adults alike: making paint with bubbles. This creative process not only brings vibrant colors into your artwork but also adds an element of surprise and joy with each brush stroke. Whether you’re a seasoned artist or just dipping your toes into the crafting world, making bubble paint is an accessible way to explore your creativity and have a blast in the process!
What is Bubble Paint?
Bubble paint is a fun, interactive painting technique that involves creating colorful bubbles that can be popped onto paper or canvas, leaving behind an enchanting pattern. It's popular in art classes, craft camps, and even as a playful project at home. Perfect for parties, family bonding, or solo relaxation, bubble paint transforms a simple afternoon into a magical experience filled with laughter and creativity.
Now, let me guide you through the process of creating this enchanting paint with easy-to-find materials and a few handy tips along the way. Let’s get started!
Materials You’ll Need
Before diving in, gather the following materials:
- Dish soap (any kind will do, but I prefer a concentrated formula)
- Water
- Food coloring or liquid watercolor
- Mixing bowls (small)
- Straws (the flexible kind works best)
- Paper or canvas (thick paper or white cardstock works well)
- Paintbrushes (optional, for spreading the paint)
- Plastic gloves (optional, for keeping your hands clean)
- Apron or old clothes (just in case things get messy!)
Why These Materials Matter
The ingredients you choose will greatly impact the outcome of your bubble paint. Dish soap is key because it creates those lovely bubbles, while the food coloring or liquid watercolor provides vibrant hues. Experimenting with different brands can yield exciting results!
Now that you have your materials set up, let’s jump into the step-by-step process!
Step-by-Step Tutorial: Making Bubble Paint
Step 1: Create the Bubble Mixture
In a mixing bowl, combine:
- 1 cup of water
- 1/2 cup of dish soap
- 1/2 cup of food coloring or liquid watercolor
Why This Step Matters: The ratio of water to soap is crucial. Too much soap will create more bubbles, but they may pop too quickly. Too little soap may not create enough bubbles.
Tip: If you want to create multiple colors, you can divide the mixture into smaller bowls and add different colors to each.
Step 2: Mix Gently
Using a spoon or a small whisk, stir the mixture slowly to combine. Avoid whipping it too vigorously, as this will create a lot of foam rather than bubbles.
What Could Go Wrong: If you accidentally create a lot of foam, simply let it settle for a moment before moving on. We want bubbles, not foam!
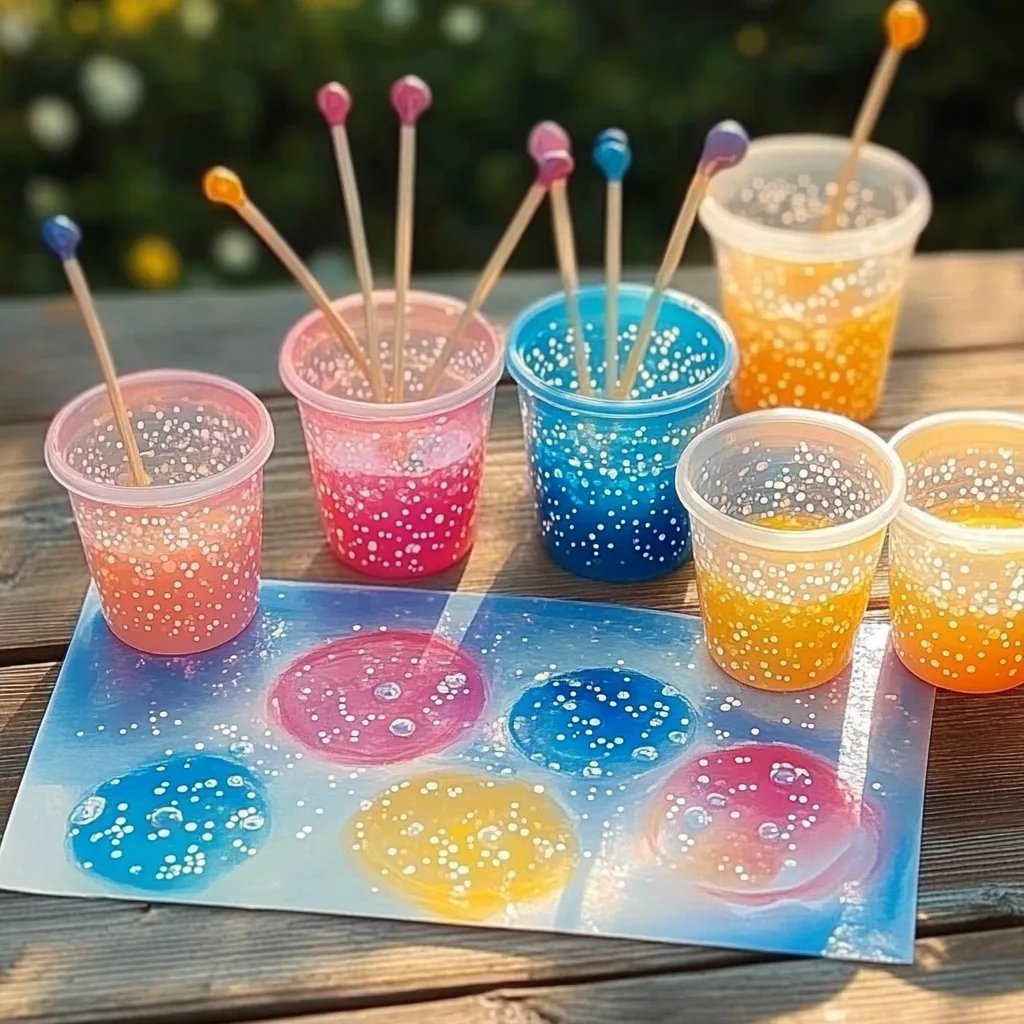
Step 3: Blow the Bubbles
Take your straw and dip one end into the bubble mixture, making sure it’s fully submerged. Now, gently blow into the straw to create bubbles on top of the mixture.
Why This Step Matters: This is where the magic happens! Blowing gently will produce bigger bubbles that can sit on the surface of the mixture longer.
Safety Warning: Be cautious not to inhale the mixture! Always blow gently and make sure no mixture gets in your mouth.
Step 4: Create Art
Once you have a good layer of bubbles, take your paper or canvas and place it over the bubbles. Press down slightly so that the bubbles adhere to the surface.
Variation: For a more vivid explosion of color, you can also use a paintbrush to spread the mixture over the paper before blowing bubbles.
Step 5: Repeat and Experiment
You can either continue using the same mixture to create more bubble prints or prepare new colors.
What Could Go Wrong: If the bubbles don’t leave enough color behind, try blowing more aggressively or adjusting your mixture by adding more food coloring.
Step 6: Let Your Art Dry
Once you are satisfied with your colorful bubble designs, set your artwork aside to dry completely. Depending on the thickness of your paint, this can take anywhere from 1 to 24 hours.
Tips for a Successful Bubble Paint Experience
- Experiment with Colors: Mix colors for stunning effects! Layer them on top of each other for additional depth.
- Create Patterns: Use different tools like combs or sponges to create textured applications alongside the bubble designs.
- Outdoor Fun: Consider taking this project outdoors! Just lay down some old sheets or newspapers to protect your lawn, and enjoy coloring in the fresh air.
Personal Anecdote: A Colorful Memory
I vividly remember my first bubble paint session with my niece during a sunny afternoon. We had so much fun creating our art that we ended up with paint on our arms, faces, and even the grass! It turned into a vibrant memory that we often recall fondly. The key takeaway? Embrace the mess; it’s all part of the fun!
Alternative Methods and Ingredient Substitutions
- Sugar: If you’re looking for a thicker consistency, feel free to add a teaspoon of sugar to your mixture. This will help create a more viscous bubble solution.
- Natural Dyes: Experiment with natural food dyes or even fruits to create more organic colors!
Wrapping Up Your Crafting Adventure
Making bubble paint is not only an easy and fun project, but it also encourages creativity and a sense of play. Whether you’re in your kitchen, backyard, or community center, this project can be adapted to fit any space and occasion. Remember, practice makes perfect, and the only limit is your imagination!
I hope you feel inspired to dive into this bubbly world of color. Happy crafting, and never hesitate to share your colorful creations! If you have any tips or experiences to share, drop a comment below. Let’s continue to share this joyful journey of creativity together!