Discover the Joy of Baking Soda Fizzy Painting: A Fun and Creative Craft for All Ages
Hello, fellow crafters! Today, I'm excited to share one of my absolute favorite DIY projects that combines science and art in a delightfully fizzy explosion of color—Baking Soda Fizzy Painting! This vibrant and engaging technique has become increasingly popular, especially among parents and teachers looking to incorporate a fun, sensory experience into their art activities. It captivates not just the young ones but also the young-at-heart!
Whether you're looking for a fantastic weekend project, a way to entertain kids on a rainy day, or a creative outlet for yourself, this fizzy painting is versatile and enjoyable. You'll be amazed at how a simple blend of ingredients can create jaw-dropping visual effects while encouraging creativity and imagination. Plus, the best part is that it’s safe and easy to clean up—perfect for little hands.
What Is Baking Soda Fizzy Painting?
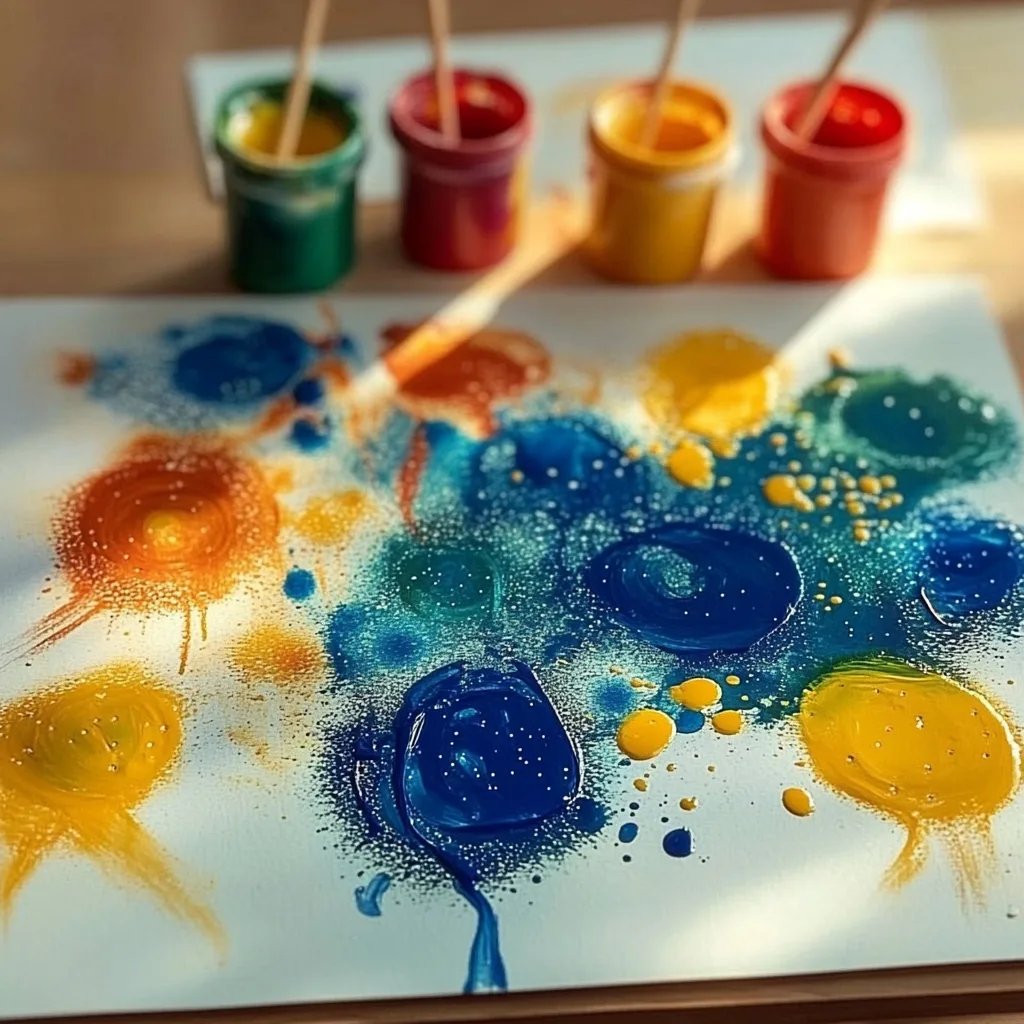
Baking Soda Fizzy Painting combines baking soda, vinegar, and food coloring to create a fun, bubbling reaction that doubles as a painting technique. When you apply the vinegar to the baking soda, it fizzes and produces a dramatic, colorful display. The result? Beautiful, unique artwork that’s as much about the process as it is about the outcome!
What You’ll Need
Before we dive into the step-by-step tutorial, let’s gather our materials. Most of these items are everyday household staples, making this a budget-friendly activity!
Materials:
- Baking soda (1-2 cups)
- White vinegar (1 cup or more, depending on the amount of fizz you want)
- Food coloring (various colors)
- A shallow dish or tray (to contain the fizzy reaction)
- Paintbrushes or droppers (for applying the vinegar)
- Paper (watercolor paper works best) or canvas boards
- Spritz bottle (optional, for extra fizz)
- Plastic cups (for mixing colors)
- Aprons or old clothes (to protect from stains)
Safety Warning:
While this project is kid-friendly, always supervise young children and consider using non-toxic, natural food coloring.
Step-by-Step Guide: Creating Your Baking Soda Fizzy Painting
Now that we have everything ready, let’s jump right into creating our masterpiece! I’ll outline each step and share insights along the way to ensure your experience goes as smoothly as possible.
Step 1: Prepare Your Workspace
Find a clean, flat surface to work on. Cover your table with newspaper or an old tablecloth to catch any spills. I like to work outside when the weather permits; the fresh air adds to the enjoyment!
Step 2: Mix the Baking Soda
In your shallow dish or tray, evenly spread 1-2 cups of baking soda across the bottom. The more baking soda you use, the thicker your painting will be. You can create different textures and depths with this material!
Tip: Ensure a good coverage—too thin, and it won’t create an interesting painting experience; too thick can become hard to paint on. The ideal layer is about 1/2 inch.
Step 3: Prepare Your Colors
In a few plastic cups, mix several tablespoons of baking soda with a few drops of food coloring. You can create a range of colors! I recommend starting with the primary colors—red, blue, and yellow—and then mix them to make secondary colors like green, orange, and purple.
Creative Variation: Experiment with mixing colors in separate cups to create gradients or swirls!
Step 4: Painting with Color
Using paintbrushes or droppers, apply your colored baking soda mixture onto the baking soda surface. Let your creative instincts take over! You can swirl colors together, use different shapes, or even write messages.
What Could Go Wrong: If the baking soda starts to clump or feel dry, lightly mist it with water from the spritz bottle to keep it moist.
Step 5: The Fizzing Action
Now comes the exciting part! Once your design is complete, grab your vinegar. With either a dropper or a paintbrush, begin to apply the vinegar over the baking soda painting. You'll watch as it fizzles, bubbles, and releases delightful, colorful reactions!
Why This Matters: This fizzing reaction helps blend the colors, creating a mesmerizing effect, much like a science experiment. It’s the perfect way to teach kids about chemical reactions while having a blast!
Step 6: Let It Dry
Once you've enjoyed the fizzing, set the artwork aside to dry. This may take several hours depending on the thickness of the baking soda layer. You can speed up drying using a fan or simply leave it in a warm, dry space.
Step 7: Cleanup
Once everything is dry, simply brush off any leftover baking soda. It’s safe for disposal, and you can wipe down surfaces with water and a cloth.
Troubleshooting Guide
- Baking Soda Not Fizzing: Ensure your vinegar is fresh. A common issue arises if the vinegar is old or has been diluted.
- Colors Not Mixing Well: If the colors are too vibrant when vinegar is applied, it may be due to an excess of food coloring. A few drops go a long way!
Personal Anecdote
I remember my first experience with fizzy painting with my niece. When she saw the colors burst and intermingle, her eyes lit up like a lightbulb! It was pure joy watching her giggle and cheer each time the vinegar fizzed. We spent hours creating magical landscapes full of abstract colors, and it truly deepened our bond. It became a cherished memory that holds a warm place in my heart.
Alternative Methods
- Using colored baking soda: You can mix different colors into your base baking soda instead of applying color on top.
- Essential oils: For a pleasant smell, consider adding a few drops of essential oils into your vinegar before applying.
- Edible alternatives: If you're concerned about ingestion (especially with younger kids), you could use safe edible colors with coconut oil and baking soda.
Final Thoughts
Baking Soda Fizzy Painting is more than just a craft; it’s a wonderful opportunity to explore science, creativity, and simple joy. It’s a project that can be adapted for all ages, making it a perfect family activity, classroom experiment, or solo project. The mesmerizing fizzing process and colorful results foster a sense of accomplishment!
So grab your supplies, gather your loved ones, and let the creative juices (and bubbles) flow. Happy crafting, and may your days be filled with color and joy!