Creating Stained Glass Glue Art: A Beginner’s Guide to Crafting Beauty
Welcome to the colorful world of stained glass glue art! As someone who has spent countless hours with a glue bottle in my hand and a vision in my mind, I can truly say that creating stained glass art is not only a rewarding project but also a beautiful way to brighten up your space. Stained glass glue art combines the elegance of traditional stained glass with the accessibility of modern crafting materials. This art form is perfect for home decor, gifts, or even seasonal decorations.
In today’s tutorial, I’m thrilled to guide you through each step of making your own stained glass glue art masterpiece. Let's dive into what this project entails, why it's captured the hearts of crafters, and how you can create your very own piece, even if you’re a complete beginner.
What is Stained Glass Glue Art?
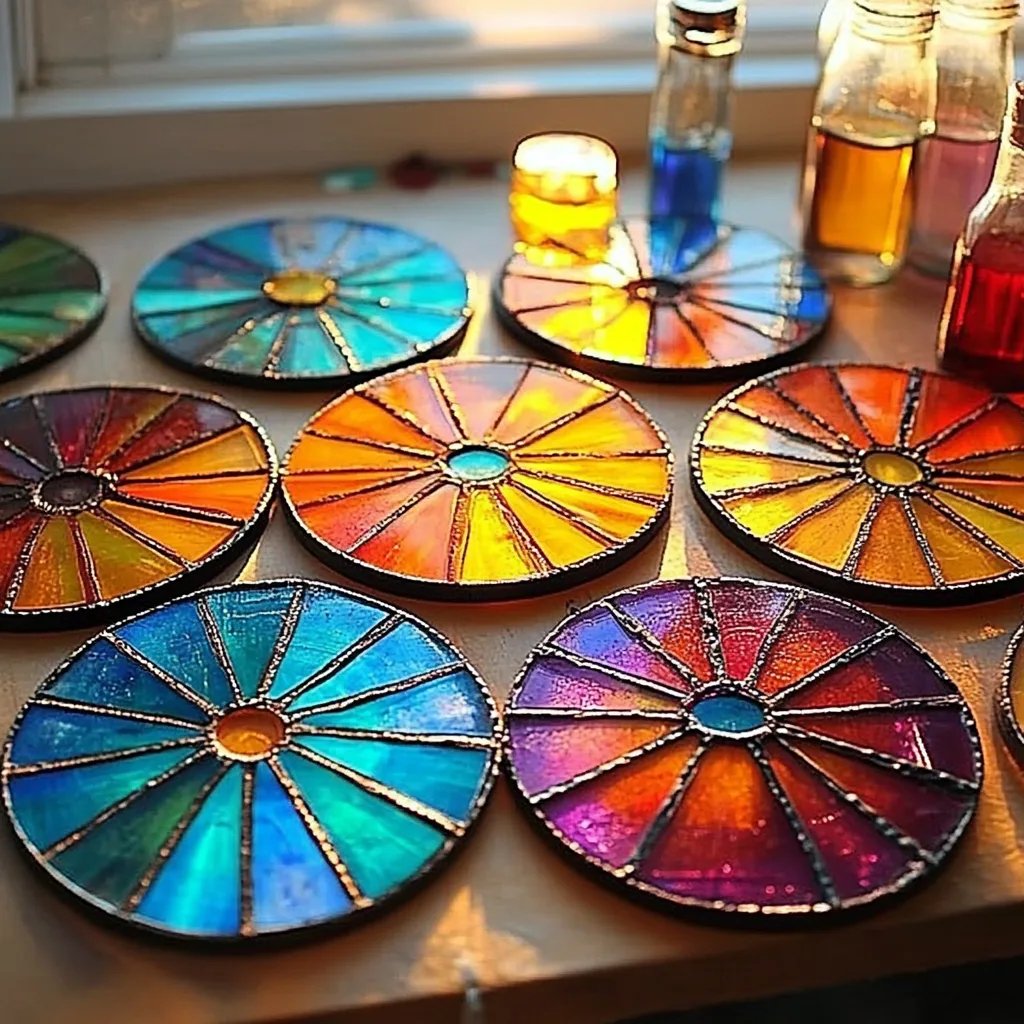
Stained glass glue art is a technique that simulates the vibrant and colorful effects of traditional stained glass windows, but using simple glue and colored tissue or cellophane paper. It has gained immense popularity due to its relatively low cost, ease of process, and the striking designs you can create without the need for extensive glass-cutting skills or advanced tools. It serves as a perfect introduction to both stained glass art and crafting in general.
When to Use Stained Glass Glue Art
I’ve found this craft to be incredibly versatile! Here are some common occasions to indulge in this joyful project:
- Home Decor: Brighten windows, room dividers, or entryways.
- Gifts: It’s a personal and thoughtful gift for friends and family.
- Seasonal Items: Make festive decorations for holidays, like sun catchers for spring or autumn leaves.
- Educational Purposes: This project can also be a fun, hands-on project for kids to learn about colors and light.
Step-by-Step Tutorial
Materials Needed
- Colored Tissue Paper or Cellophane Sheets: These will provide the color and texture of your design.
- PVA Glue: This is your main adhesive. It dries clear and is easy to work with.
- Water: For diluting glue if desired.
- Opaque Black Marker or Paint: For outlines and finer details.
- Cardboard/Canvas Panel: For the base of your art, use a sturdy surface that can hold the glue and tissue.
- Paintbrush or Foam Brush: To apply glue smoothly.
- Scissors: For cutting your colored papers.
- Wax Paper: To protect your work surface.
- Sealant Spray (optional): To protect the finished piece if desired.
Step 1: Choose Your Design
The first step is to choose or sketch out your design. It could be anything—a simple geometric pattern, flowers, or even abstract shapes. You can find inspiration almost anywhere: nature, architecture, or even simple doodles. I usually start with a pencil sketch that I can easily erase and modify.
Step 2: Preparing the Base
Once you have a design in mind, take your cardboard or canvas panel and place your sketch underneath, if it’s transparent enough. This will serve as a guide. Alternatively, you can draw directly on the surface with a pencil. If you’re feeling adventurous, try a freehand design! Just remember that the more intricate the design, the more time it will take, so start simple if you’re a beginner.
Step 3: Cutting the Colored Papers
Begin cutting your colored tissue or cellophane into shapes that will fit your design. It’s okay if they aren’t perfect—art is about expression, not precision! I often recommend cutting slightly larger pieces so they can overlap the edges, which allows for less stress later on during gluing.
Step 4: Applying the Glue
Mix a bit of water with PVA glue to create a more fluid consistency, making it easier to spread. Using your brush, apply a thin layer of glue on the area of your design where you’ll place your first piece of colored paper. This helps the paper stick better and creates a more translucent effect.
Tips:
- Work one area at a time; letting the glue dry between colors can help keep the colors from bleeding together.
- If you accidentally apply too much glue, simply blot it gently with a paper towel.
Step 5: Positioning the Colored Paper
Place the cut piece of colored paper over the glued area, pressing it down gently. You can dab more glue on top of the paper to seal it, which helps prevent edges from lifting and adds to the stain-glass effect. Smooth out any wrinkles with your fingers, as they’ll be very noticeable once the piece dries.
What Could Go Wrong: If you notice air bubbles under the tissue paper, gently peel it back and reapply with glue, ensuring to smooth it out each time.
Step 6: Continue Layering
Continue the process for each piece of colored paper, working within your design. Use different colors to create contrast and depth. If you're using light and dark colors together, be mindful of placement to avoid muddying your design.
Step 7: Outlining Details
Once the base layer is completely dry (and it can take several hours, depending on humidity), you can use your opaque black marker or paint to outline your shapes. This step will complete the stained glass look and make your colors pop!
Tip: If you make a mistake with your outline, a bit of rubbing alcohol on a cotton swab can often help remove the marker before it dries.
Step 8: Finishing Touches
After everything has dried completely, you may choose to apply a sealant spray to protect your artwork further, especially if you plan to display it in a sunny area. Note that sealants may cause a slight sheen; always test on a small piece first.
Creative Variations
As you grow comfortable with the technique, consider branching out:
- Mixing Mediums: Try incorporating glitter or fabric scraps into the design for added texture.
- Framing Your Art: Once completed, frame it with a simple wooden frame to give it a polished look.
- Seasonal Themes: Craft designs specific to holidays—think snowflakes for winter or flowers for spring!
Safety Tips
- Always work in a well-ventilated area, especially if you’re using spray sealants.
- Keep all materials out of reach of small children and pets, especially scissors and glue.
Final Thoughts
Stained glass glue art is a delightful way to unleash your creativity and make something truly beautiful. Don’t worry if your first piece isn’t perfect—it’s all about the experience and learning along the way! I encourage you to experiment with colors, shapes, and designs. Each piece is unique and speaks to your artistic journey.
Happy crafting, and may your windows be forever filled with color!