Creating Spooktacular Pumpkin Faces from Paper Cups or Plates: A Step-by-Step Guide
Greetings, fellow crafters! As autumn rolls in and the leaves begin to change, I find myself yearning for those warm, cozy vibes and the delightful sights of Halloween. What better way to embrace this wonderful season than by crafting adorable pumpkin faces from simple paper cups or plates? This project is not only fun, but it can also become a centerpiece for your Halloween celebration, a creative activity for kids, or even a whimsical addition to your autumn decor. Join me in this detailed tutorial as we transform ordinary paper items into charming pumpkin faces that will bring a smile to anyone who sees them!
Why Pumpkin Faces?
Pumpkin faces have become a popular craft during the fall season, especially leading up to Halloween. They evoke a sense of nostalgia and childhood joy, reminding many of carving real pumpkins—but without the mess! These playful paper creations can easily be customized to suit your style, making them perfect for parties, school projects, or family gatherings. Plus, they’re safe for kids and adults alike, giving everyone a chance to unleash their creativity.
What You’ll Need:
Before we jump into crafting, let’s gather our materials. The beauty of this project lies in its simplicity and accessibility. Here’s what you’ll need:
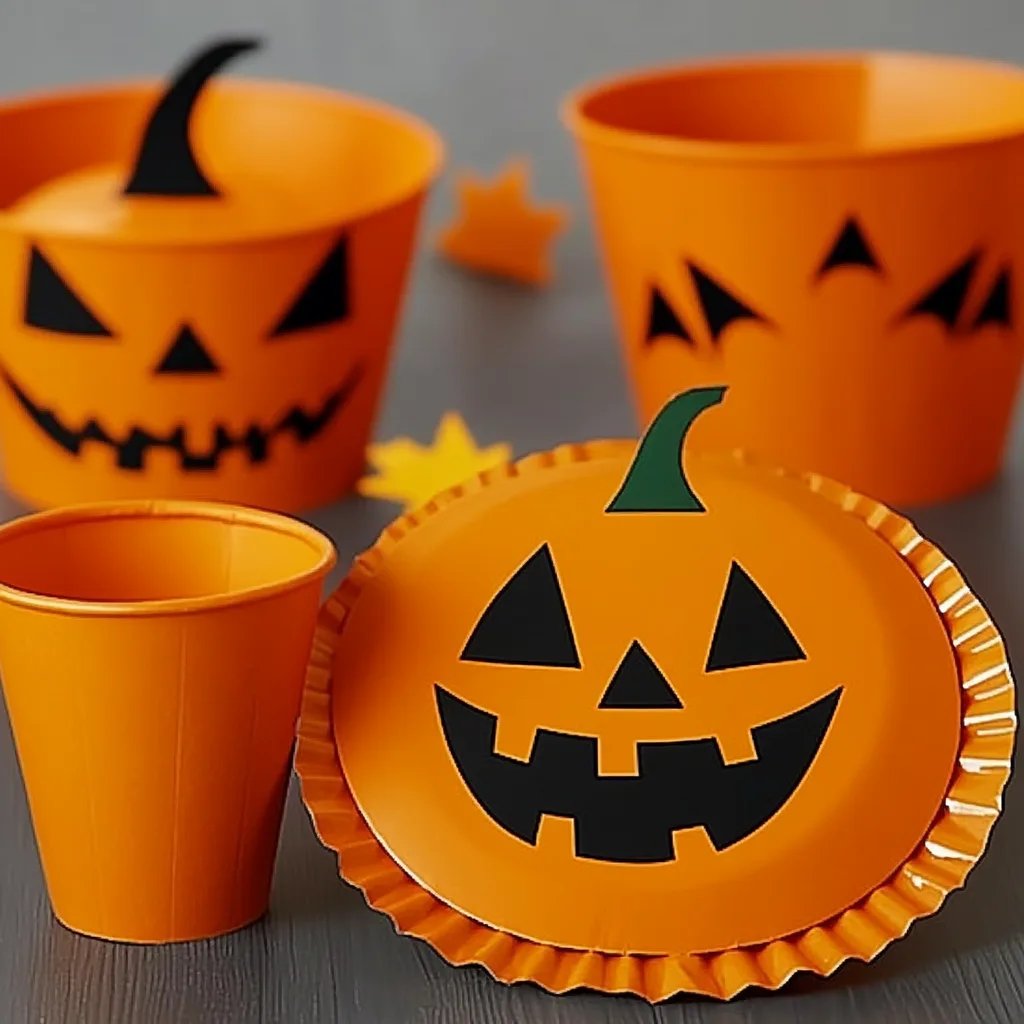
- Paper cups or plates (orange is the classic choice, but feel free to use whatever colors you like!)
- Black construction paper or markers for the face
- Green construction paper (for leaves, if desired)
- Glue or tape
- Scissors
- Paint or paint markers (optional, for additional design)
- Googly eyes (optional, for extra charm)
Step-by-Step Instructions
Step 1: Prepare Your Base
The first step is to choose your base: paper cups or plates. I often use paper plates, as they provide more surface area to work with.
- Tip: If you’re using plates, you might want to consider cutting them in half if you want smaller pumpkins.
Why It Matters: Choosing the right base will determine how much space you have for your pumpkin face design and will impact the final appearance.
Step 2: Designing Your Pumpkin Face
Now comes the fun part: designing your pumpkin face! Grab your black construction paper and scissors.
- Cut out Shapes: Create various shapes for eyes, mouths, and noses. Think about classic designs like triangles for eyes and jagged edges for a scary toothy grin.
- Alternative Method: If drawing isn’t your strong suit, you can print out templates from the internet and use them as a stencil to trace your shapes onto the black paper.
Why It Matters: Customizing the face makes it distinct and personal. This is where creativity shines!
Tips to Avoid Common Pitfalls:
- Sometimes, cutting can end up messy. Take your time and use sharp scissors for clean edges.
- If a cut isn’t perfect, you can always adjust by layering another piece over it or gluing an additional shape to cover any imperfections.
Step 3: Assemble Your Pumpkin Face
Once you have your cut-out shapes ready, it’s time to assemble your pumpkin.
- Glue or Tape: Use glue or tape to affix the facial features to your paper cup or plate. If you’re feeling adventurous, you can also paint the features directly onto the surface.
- Adding Googly Eyes: If you’re using googly eyes, simply glue them above the cut-out eyes for an adorable effect!
Why It Matters: Proper attachment ensures that the features stay in place and gives the pumpkin a cohesive look.
Step 4: Adding Decorative Details
Now it’s time to add some flair!
- Leaves and Vines: Cut out leaf shapes from green construction paper and glue them onto the top of your paper cup or plate for a more complete pumpkin look. You can also twist thin strips of green paper to create vines.
- Painting: If you want to add a personal touch, consider painting freckles or other designs with paint markers to make your pumpkin unique.
Alternatives: You can use stickers or washi tape for embellishments if you prefer not to draw or paint.
Why It Matters: Details enhance the overall aesthetic and turn a simple craft into a delightful masterpiece!
Step 5: Display Your Creation
Once your pumpkin faces are complete, it’s time to showcase your handiwork!
- Display Ideas: Arrange them as a centerpiece on your dinner table, hang them on the walls or windows, or place them outside your home. If you use cups, consider adding battery-operated tea lights inside for a glowing effect at night!
Safety Warnings
While crafting is fun, it’s essential to be cautious, especially if little hands are involved. Here are a few safety tips:
- Scissors: Always supervise children when using scissors or hot glue.
- Glue: Use non-toxic glue, particularly if younger crafters are involved.
Personal Touch and Creative Variations
Crafting is about personal expression! Here are some creative variations to inspire you:
- Monster Faces: Instead of traditional pumpkin faces, try creating silly monster faces with multi-colored bodies, adding feathers or even glitter!
- Ghost Cups: Use white cups or plates with black features for ghost faces!
- Themed Parties: Match your pumpkin faces to your Halloween party theme—think spooky, cute, or whimsical.
Final Thoughts
Crafting pumpkin faces from paper cups or plates is a fantastic way to usher in the fall season. Not only is it an engaging activity that sparks creativity, but it also offers a beautiful way to decorate your space. The process I’ve outlined is straightforward and perfect for crafters of any age, making it an excellent family bonding experience.
Embrace the joy of crafting this Halloween season and bring your unique pumpkin faces to life! Feel free to share your results or any variations you come up with. Happy crafting! 🎃