Creating a Rain Cloud in a Jar: A Step-by-Step Guide to Crafting Your Own Mini Weather Phenomenon
Hello, fellow crafters! Today, I'm thrilled to share a delightful project that's sure to bring a little wonder into your home: creating a Rain Cloud in a Jar. This charming DIY activity is perfect for curious minds of all ages and offers a fun, hands-on way to explore the science of weather right from the comfort of your living room.
*Why is this project gaining popularity?* It’s not just a pretty sight; it’s a fusion of art and science that captivates children and adults alike. Plus, it offers a great opportunity for learning about the water cycle, making it an ideal addition to school projects or rainy day activities. You can enjoy your crafted rain cloud as a centerpiece, a unique conversation starter, or even a gift for friends who appreciate whimsical decor.
What You'll Need
Before we dive into the crafting process, let’s gather our materials. I always recommend using items you may already have at home or can easily access at the local supermarket or craft store. Here’s a simple list to get you started:
- A clean, clear glass jar or a clear plastic cup – This will serve as the base for your cloud.
- Water – Essential for creating your cloud and rain.
- Shaving cream – This will act as your cloud.
- Food coloring (any color) – To create the rain. I often enjoy using blue for a classic rain cloud effect, but feel free to explore other colors!
- Dropper or pipette – For precise application of food coloring. If you don’t have one, a small spoon will work too!
- Small bowl (optional) – To help mix the food coloring with water if you want different shades.
Now that we have everything ready, let’s roll up our sleeves and get our crafting on!
Step-by-Step Tutorial
Step 1: Prepare Your Jar
Why this matters: A clean jar allows for an unobstructed view of your cloud and rain creation.
Begin by ensuring your jar is thoroughly washed and dried. Once it’s clean, fill the jar about three-quarters full with water. You want to leave some space at the top for the shaving cream cloud and the colorful rain.
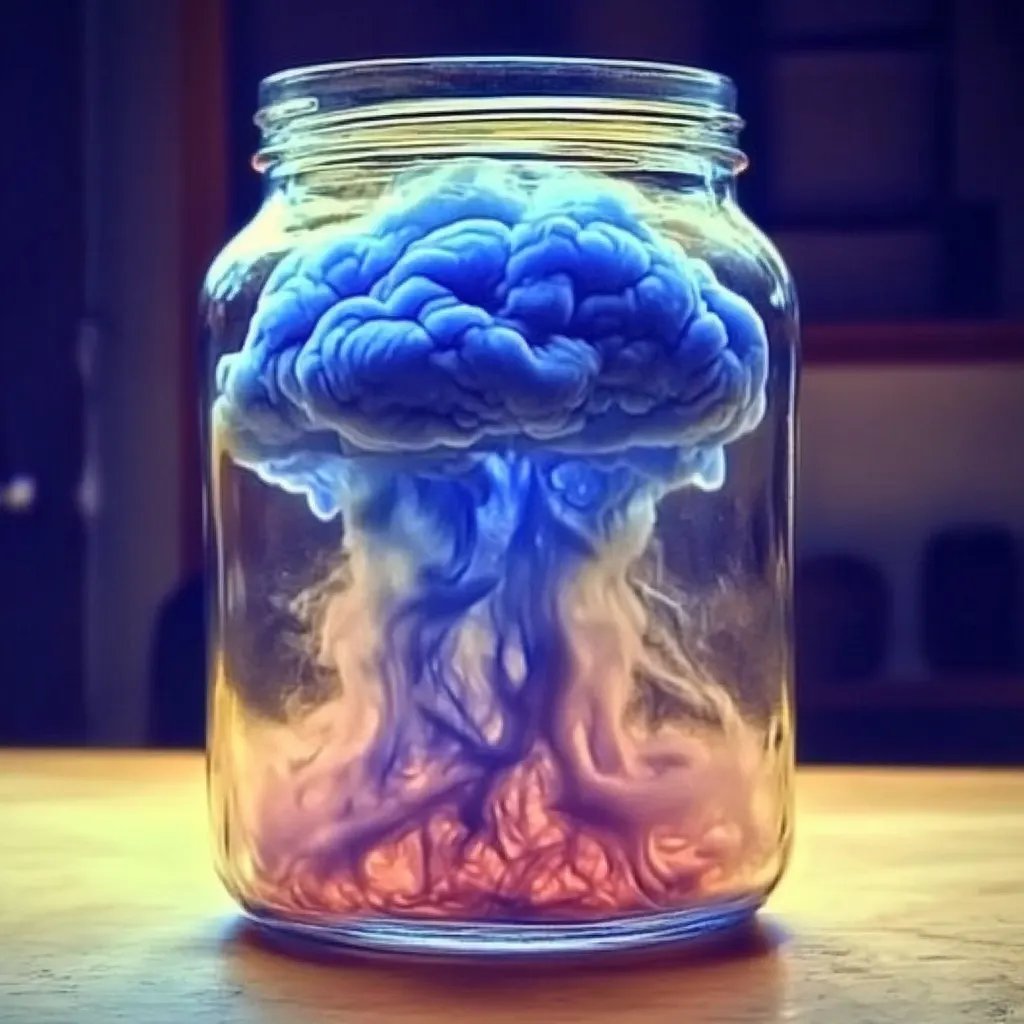
Step 2: Create Your Cloud
This is where the magic begins!
Grab your shaving cream and carefully spoon a generous layer on top of the water. Use the back of the spoon to smooth it out, creating a flat cloud layer.
Common mistake: Not using enough shaving cream or mixing it too much with the water can prevent the cloud effect. If you find your cloud is not buoyant, simply add more shaving cream until you have a nice, fluffy layer.
Step 3: Prepare the “Rain”
Now comes the exciting part! Take your dropper or pipette and dip it into your food coloring. If you're feeling creative, mix the food coloring with a few drops of water in a small bowl to create lighter shades.
Carefully drop the food coloring onto the shaving cream cloud. I suggest letting it fall from slightly above the cloud to mimic how rain spills from actual clouds.
Pro tip: Start with only a few drops! You can always add more, but it’s tricky to go back if you overdo it.
Step 4: Watch the Rain Fall
What could go wrong: If the food coloring does not penetrate the shaving cream right away, it may either sit on top or spill over the edges. This is usually an indicator that either your shaving cream is too thick or you haven’t applied enough pressure with the dropper.
As you observe the colored drops, you’ll see them begin to sink into the cream, simulating the effect of rain. The spectacle can be mesmerizing!
Step 5: Enjoy and Experiment!
This is where you can continue experimenting with your creation. You can add more drops of food coloring, mix colors for a more vivid effect, or even switch flavors of shaving cream for a scented twist.
Creative variation: Adding glitter to your dish can create a fantastic sparkling effect, especially when the drops fall.
Tips for Success
- Environment considerations: Make sure to set your project on a level surface to avoid spills!
- Timing: Let the jar sit for a few minutes after you've added the coloring. This allows the reaction to unfold beautifully, with colors slowly penetrating the shaving cream.
- Safety warning: Although most of the materials are safe, be cautious to avoid getting food coloring on clothing as it can stain.
- Cleanup: If you have excess food coloring that has spilled, use a damp cloth to wipe down the jar.
Personal Anecdotes
The first time I made a Rain Cloud in a Jar with my niece, she was enchanted! We spent hours sending miniature figurines to ‘visit’ the clouds and using them to create stories about rainbows and sunshine afterward. Crafting isn’t only about the final product—it’s also about the memories we create along the way.
Conclusion: A Little Science with a Lot of Fun!
Creating a Rain Cloud in a Jar is not just a fun craft; it’s a fantastic way to blend creativity with science. Whether you’re making this on a rainy afternoon with kids, enjoying some solo crafting time, or looking for a unique gift idea, the joy you get from watching your rain cloud come to life is truly special.
I hope this article inspires you to gather your materials and start crafting. Trust me, the delightful spectacle of your own rain cloud will bring a smile to anyone who sees it. Get creative, experiment, and—most importantly—enjoy the journey!
Happy crafting, and may your clouds always rain love and joy!