Create Your Own DIY CD Suncatcher: A Step-By-Step Guide
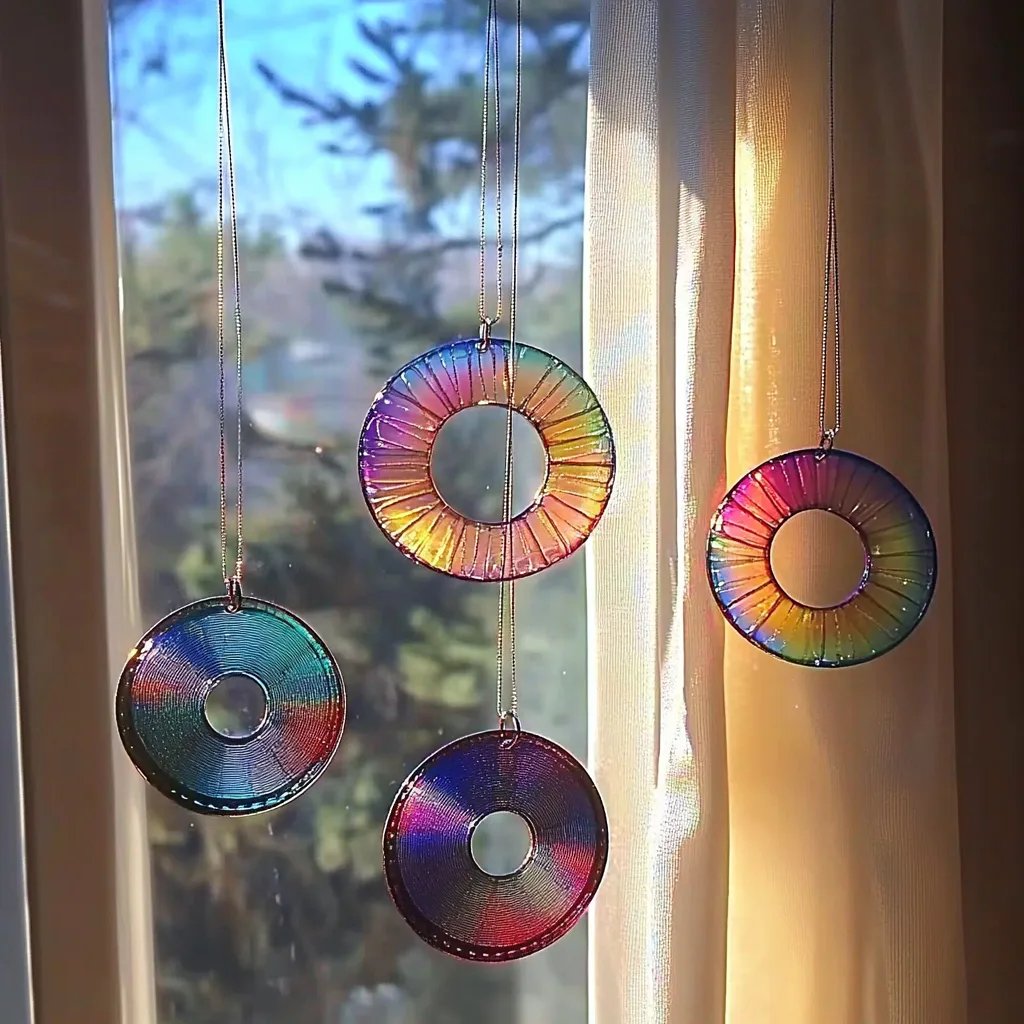
As an avid crafter, I’ve always been on the lookout for projects that don’t just bring joy to the crafting process but also add a little magic to my home environment. One of my absolute favorites is making CD suncatchers. These playful, colorful decorations are not only a fun way to repurpose those old CDs lying around but they also transform any space when the sun hits them just right, scattering beautiful rainbows across the walls.
What makes CD suncatchers particularly appealing is how accessible they are. With minimal materials and a little bit of creativity, anyone can craft their own stunning pieces. I’ve found that they serve as perfect decorations during any time of year, whether you’re looking to jazz up a sunroom in the summer or add a touch of cheer to your winter decor.
In this detailed guide, I will walk you through the entire creation process, sharing my personal tips, insights, and some creative variations to make your suncatcher uniquely yours. Whether you are a seasoned crafter or a complete beginner, you’ll find this project to be rewarding and enjoyable. So, grab your supplies, and let’s get started!
Materials You’ll Need
Before diving into the steps, let’s gather all the materials we’ll need for this project. Don’t worry; they’re all simple, easily accessible items:
- Old CDs: The main canvas for your suncatcher. Feel free to use any scratched or unwanted CDs.
- Acrylic Paint: Choose vibrant colors that’ll pop in the sunlight.
- Paintbrushes: You’ll need a couple, ideally in different sizes for detail work.
- Mod Podge or Clear Acrylic Sealer: This will seal your artwork and make it shine.
- Glue: Craft glue or a strong adhesive to attach embellishments.
- String or Fishing Line: For hanging your suncatcher.
- Scissors: To cut string or any paper you might want to use.
- Embellishments (optional): Think beads, sequins, or glitter to add depth.
- Masking Tape (optional): This can help you create clean edges while painting.
Safety Warning:
While crafting is a joyful endeavor, please be cautious. Ensure you’re working in a well-ventilated area, especially when using glue and paint, and keep any sharp tools away from children.
Step-by-Step Tutorial
Step 1: Prep Your Workspace
Before I start crafting, I always set up my workspace. I recommend laying down newspaper or a disposable tablecloth to catch any accidental spills or splatters. Create a clean, organized area where you can freely paint and decorate.
Step 2: Clean the CDs
First things first, clean your CDs to remove any dust or fingerprints. I usually rinse them under warm water and gently wipe them with a soft cloth. Make sure they are completely dry before moving to the next step—moisture can interfere with paint adhesion.
Step 3: Paint the CDs
Now comes the fun part! Using your acrylic paint, start applying colors to the CDs. You can go for solid colors, create patterns, or mix them for a marbled effect. Here’s where I love to get creative, sometimes using a sponge for a technique that creates texture.
Why This Step Matters: The paint layer forms the foundation of your suncatcher. It'll determine how beautifully light reflects and refracts through the CD.
Tip: If you’re worried about the paint drying too fast, work on one CD at a time. While one is drying, you can begin on the next.
What Could Go Wrong: If the paint starts to bubble, it could mean your brush wasn’t clean or the paint is too thick. You can fix this by sanding down the surface lightly and applying a thinner layer.
Step 4: Add Details
Once the base layer is dry (this usually takes about 30 minutes), it’s time to embellish! Using different colors or smaller brushes, you can add designs—think sunflowers, stars, or abstract swirls.
This step is where your creativity can truly shine! I once made one with a spiral pattern that turned out to be my favorite.
What You Can Use: You can also use stickers, washi tape, or even cut-out shapes from construction paper to make your suncatcher more dynamic.
Step 5: Seal Your Artwork
Now that your design is exactly how you envisioned it, let it dry completely before sealing it. Once dry, brush a layer of Mod Podge or clear acrylic sealer over the top. This will not only protect your paint but enhance the colors, giving your suncatcher a glossy finish.
Step 6: Attach the String
While the sealer dries, cut a piece of string or fishing line, depending on how long you want your suncatcher to hang. Use glue to attach one end of the string to the top of the CD. Make sure it’s secure! I like to wait for about an hour before testing the strength.
Step 7: Hang and Enjoy!
Once everything is fully dry, find a sunny spot in your home—this could be a window or even outdoors. Hang your completed suncatcher and watch how the sunlight transforms your space. If possible, hang it in a spot where there’s enough light to illuminate it beautifully during the day.
Creative Variations
Feeling adventurous? Here are some variations you might consider:
- Multi-layered Suncatchers: Create multiple painted CDs and layer them at different heights for a 3D effect.
- Nature-Inspired: Use leaves or flowers for a natural approach, gluing them onto the CD before painting.
- Seasonal Themes: Make themed suncatchers, such as snowflakes for winter or floral designs for spring.
Final Thoughts
Crafting is a deeply personal journey, and my hope is that making a DIY CD suncatcher brings you joy and satisfaction like it has for me. As with any craft, patience is your best friend, and the process—more than the final product—can often lead to unexpected delight.
So gather your materials, unleash your creativity, and let the sun catch your beautiful creations! Happy crafting!