Create Stunning DIY Firework Salt Paintings: A Step-by-Step Guide
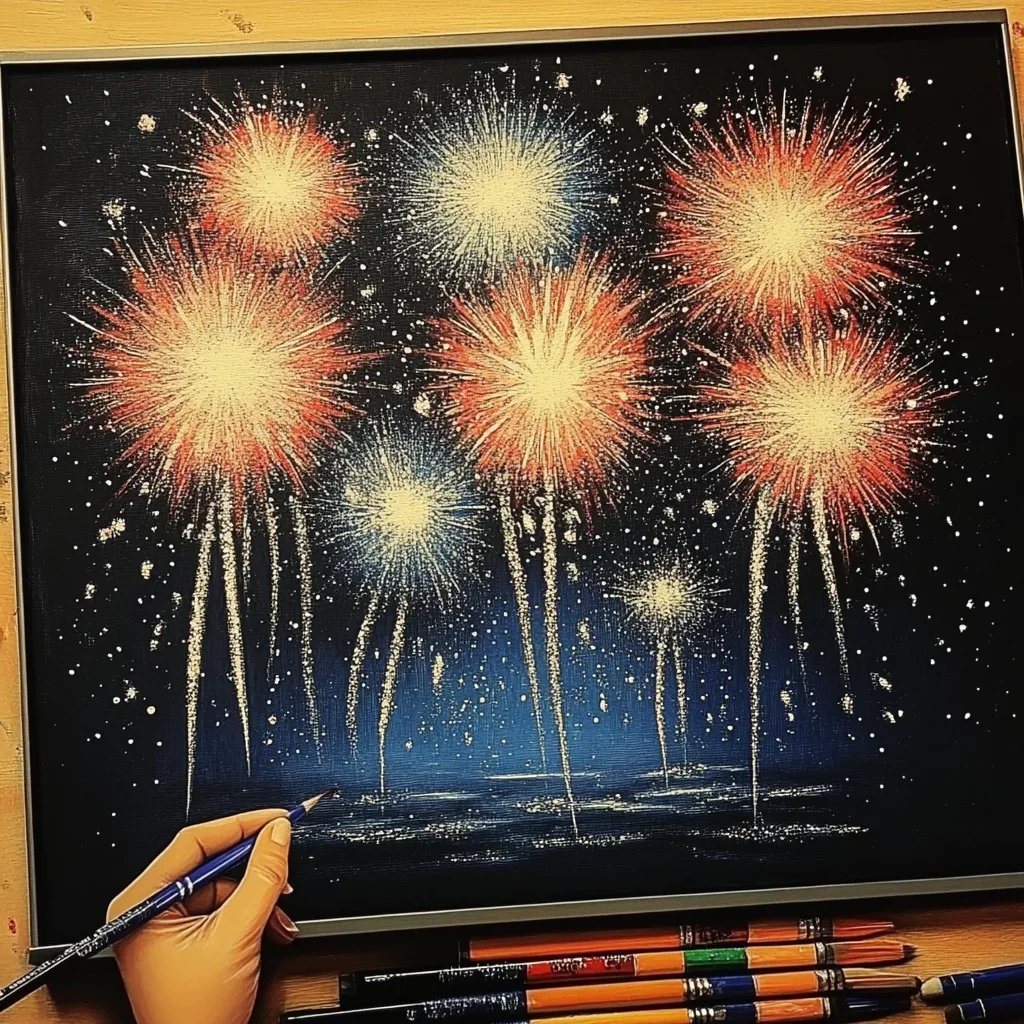
Hello fellow crafters! Today, I’m excited to share with you one of my favorite artistic projects: DIY Firework Salt Paintings. This colorful and textured art form combines salt, watercolor paint, and a dash of creativity to create mesmerizing designs that mimic the charming bursts of fireworks. Whether you’re looking for a fun activity to do with your kids, a unique way to decorate your space, or a creative outlet, firework salt painting ticks all the boxes!
Why You'll Love Firework Salt Paintings
Over the years, I've embraced many forms of art, but firework salt painting remains a standout due to its accessibility and versatility. It’s a popular craft among educators and parents, making it an ideal activity for birthday parties, family gatherings, or just a peaceful afternoon at home. Plus, since it's easy to set up and clean, you can dive right into creating beautiful works of art without much fuss.
Now, let’s talk about what you’ll need and how to bring your beautiful firework salt painting to life!
Materials You’ll Need
To get started, gather the following materials:
- Salt (Table salt or coarse salt): This is the base of your art and helps create the texture.
- Heavyweight watercolor paper or cardstock: A sturdy surface is crucial so that your colors pop and the paint doesn’t easily warp the paper.
- Liquid watercolors or food coloring: Choose bright colors to recreate vivid fireworks. If you're using food coloring, I recommend liquid gels for a bolder effect.
- Glue (white school glue or liquid glue): This holds the salt in place and is the first step in creating the artwork.
- Paintbrushes: A thick brush for applying glue and smaller brushes for painting.
- A tray or shallow dish to catch the excess salt: This makes cleanup easier and helps ensure you don't waste any salt.
- Optional: Shimmer or glitter: To add that extra sparkle to your fireworks!
Step-by-Step Tutorial
Step 1: Sketch Your Design
Begin by planning your design. I like to sketch the fireworks on the watercolor paper lightly with a pencil. Think of different shapes—bursting packs, long trails, and even spirals. Keep your design organic; fireworks are all about movement and randomness!
Step 2: Apply Glue
Once you have your design, it’s time to bring it to life! Use a paintbrush to apply glue over your sketched lines. Be generous but avoid making it excessively thick; there should be enough glue to hold the salt without creating puddles.
Tip: If your glue is running, dab your brush on a paper towel before applying it to prevent it from seeping under your design.
Step 3: Sprinkle Salt
After applying the glue, immediately cover your design with salt. Hold the paper over a tray and sprinkle the salt generously, ensuring every glue line is covered. This is where the magic happens! You can use coarse salt for larger textures, but regular table salt works well too.
What could go wrong: If some areas are missed or you apply too little glue, the salt may not stick, leading to incomplete designs. Don’t worry! Just use more glue and sprinkle more salt in those areas.
Step 4: Shake Off Excess Salt
Let your masterpiece sit for a while to allow the glue to set. After a few minutes, carefully hold your artwork vertically and shake off the excess salt. This reveals your crisp, white, textured designs outlined by the salt.
Step 5: Watercolor Your Fireworks
Now for the fun part! Using a clean brush, dip it into your liquid watercolor or food coloring and lightly touch the colors onto the salt. The watercolors will flow and spread, creating beautiful, dynamic bursts that mimic fireworks!
Pro Tip: Don’t over-saturate the paper as it could warp. It's always better to add multiple thin layers of color than one thick one. If you find some colors are too dull, layer them for greater depth.
Step 6: Add Glitter (Optional)
Once you’ve painted your fireworks, you may want that extra sparkle! While the colors are still wet, sprinkle a gentle dusting of glitter over the design. The wet paint will catch the glitter, adding a dazzling effect to your artwork.
Allow to Dry
This is perhaps the toughest part—waiting! Set your painting aside in a safe, dry area to allow it to completely dry. This could take a few hours, so be patient!
Troubleshooting Common Issues
- Salt Doesn’t Stick: Ensure you use enough glue and apply it generously. If spots miss, add more glue and sprinkle salt on those areas.
- Color Bleeding: If you’re using very watery colors, they might bleed into each other. To prevent this, use thick watercolor. Alternatively, use a tiny brush to isolate colors as you apply them.
- Not Enough Color: If a color looks too faint, don’t hesitate to go back in and add more layers after the first coat dries.
Creative Variations
As you gain confidence, feel free to experiment! Here are some creative variations:
- Patriotic Fireworks: Use red, white, and blue for a festive Fourth of July project.
- Galaxy-Themed: Create a night sky backdrop using dark blues and purples, then add silver or gold salt fireworks.
- Themed Colors: Tailor your color palette for upcoming holidays like pastel colors for Easter or warm tones for autumn.
Personal Anecdote
I remember creating my first firework salt painting during a family gathering. We spread out all the supplies on the dining room table, and everyone, from my youngest niece to my parents, joined in. The laughter and creativity brought the family closer, turning simple supplies into cherished memories. We still display those artworks proudly, reminding us of that magical day.
Safety First!
While this craft is generally safe, remember to supervise younger children closely, especially with small items like salt and liquid dye. Protect your workspace with newspapers or plastic coverings to avoid any spills.
Final Thoughts
DIY Firework Salt Painting is not just an art project but an opportunity to unleash creativity without the fear of making mistakes. As you embark on this colorful journey, remember to have fun and play! The beauty of this craft lies in its imperfections, so embrace every splash and sprinkle. So grab your materials, invite some friends or family, and let’s create a stunning display of colors that capture the essence of fireworks in your home!
Happy crafting! If you have any questions or want to share your results, feel free to connect in the comments below. I’d love to hear about your creations!