Create Magical Twisted Unicorn Hard Candy Wands: A Step-by-Step Guide
As an experienced crafter, I’ve fallen deeply in love with the whimsical charm of Twisted Unicorn Hard Candy Wands. These colorful candy creations are perfect for birthdays, fairy tale-themed parties, or simply as a fun project to indulge your creativity (and satisfy your sweet tooth!). The vibrant swirls and delightful flavors make these candies a hit with children and adults alike. Today, I’m excited to share my comprehensive guide to making these enchanting treats at home.
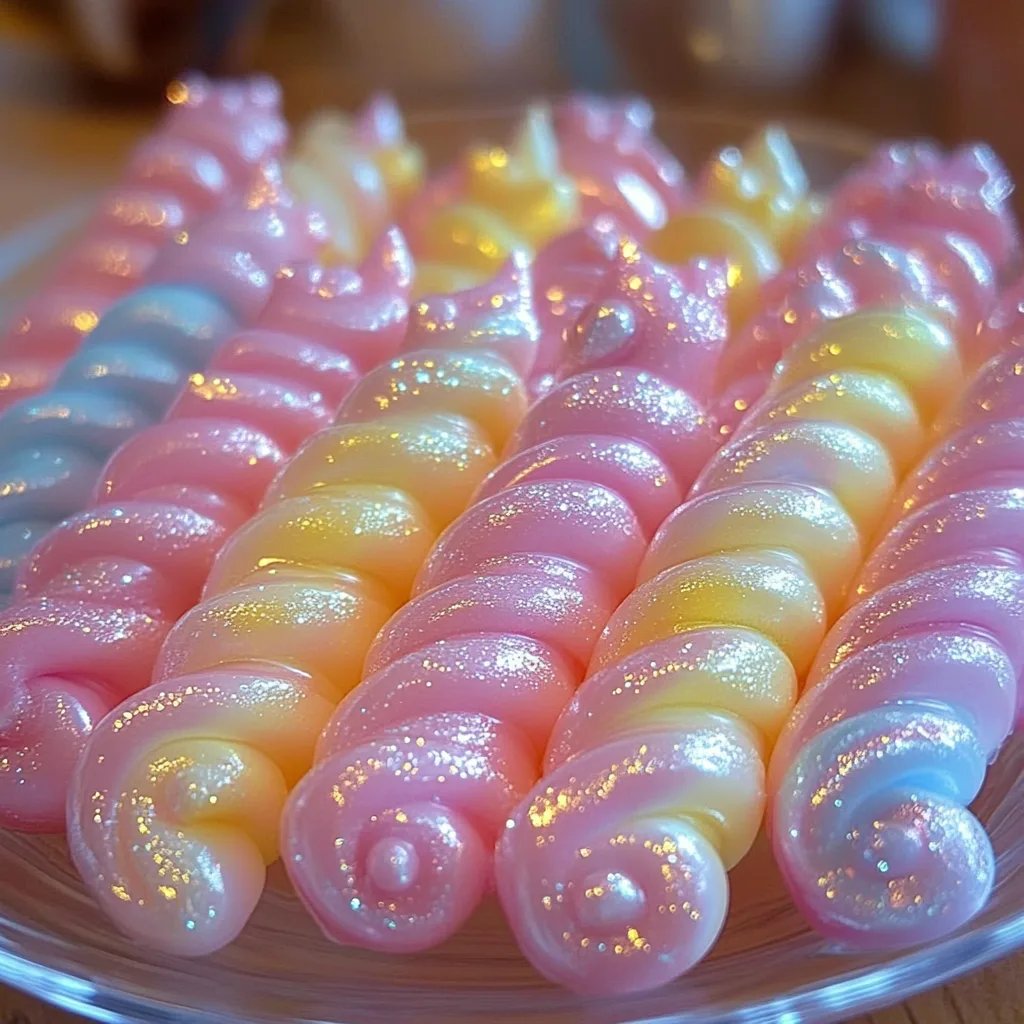
What Are Twisted Unicorn Hard Candy Wands?
Twisted Unicorn Hard Candy Wands are vibrant, striped candy sticks that resemble unicorn horns. They are often infused with fruity flavors and can be customized with colors that reflect your unique aesthetic. They not only taste great but also serve as a delightful party favor or a fun activity to share with family and friends. Picture this: you’re celebrating a birthday or a magical-themed event, and each guest receives one of these beautiful candy wands. It's sure to be a memorable experience!
When and How to Use Twisted Unicorn Hard Candy Wands
These candy wands are ideal for a variety of occasions:
- Birthday Parties: Add a sprinkle of magic to your celebrations.
- Theme Events: Perfect for princess, fairy tale, or whimsical themes.
- Gift Ideas: Encased in colorful cellophane, they make fantastic gifts for anyone with a sweet tooth.
Now, let’s dive into the exciting process of making Twisted Unicorn Hard Candy Wands!
Materials Needed
Before we get started, here’s your handy shopping list:
- Granulated Sugar: 4 cups (this is the base for your candy)
- Water: 1 cup
- Corn Syrup: 1 cup (this prevents crystallization)
- Food Coloring: Assorted colors (I love using pink, blue, and purple for that unicorn vibe)
- Flavored Extracts: Such as strawberry, blueberry, and vanilla (choose what you love!)
- Candy Thermometer: Essential for ensuring your sugar reaches the correct temperature.
- Silicone Mat or Parchment Paper: For rolling the candy.
- Wooden Dowels or Lollipop Sticks: These act as the wand handles.
- Cornstarch or Powdered Sugar: For dusting.
Step-by-Step Tutorial
1. Prepare Your Workspace
Before I start cooking, I make sure my workspace is clean and organized. Having all my materials within reach makes the process smoother and more enjoyable. Remember to wear an apron to protect your clothes from sticky sugar!
2. Combine Ingredients
In a medium saucepan, combine the granulated sugar, water, and corn syrup. Stir gently until the sugar dissolves. It’s crucial not to stir the mixture after it starts to boil, as this can cause sugar crystals to form.
3. Heat the Mixture
Place the saucepan on medium heat and attach the candy thermometer. Allow the mixture to boil without stirring until it reaches 300°F (hard crack stage). This step is critical; sugar that isn’t cooked to the right temperature won’t harden properly.
*Tip*: Keep an eye on the thermometer during this phase. If it climbs too quickly, reduce the heat slightly to avoid burning the mixture.
4. Divide the Candy
Once your syrup hits 300°F, remove it from the heat and carefully divide it into three separate bowls, one for each color you’ve chosen. Be cautious; the sugar mixture is incredibly hot! Using a spoon or spatula isn't advisable as they can melt or warp under the heat.
5. Color and Flavor
Add a few drops of food coloring and half a teaspoon of flavored extract to each bowl. Use a heat-resistant spatula to stir gently until the color and flavor are well mixed. The colors will blend beautifully, resembling a rainbow!
*Note*: Use gel food coloring for vibrant hues that won’t water down your candy.
6. Twist and Shape
Allow the mixtures to cool just slightly until they are no longer bubbling. Since time is of the essence, work quickly!
Sprinkle your workspace with cornstarch or powdered sugar to prevent sticking, then take small portions of each colored candy and roll them into ropes. Combine and twist them together to form a long, colorful "unicorn horn."
Pro Tip:
If the mixture becomes too hard to handle, you can briefly reheat it in the microwave (in 10-second increments) until it's pliable again.
7. Attach Your Sticks
Gently wrap the twisted candy around the wooden dowels or lollipop sticks, securing the ends with a little more candy to ensure everything sticks together. Make sure you leave some of the stick exposed for easy handling.
8. Cool and Set
Place your candy wands on the prepared silicone mat or parchment paper to cool completely. This may take up to an hour. Once cooled, they will harden, and your beautiful Unicorn Wands are ready for decoration or packaging!
Common Pitfalls and Solutions
- Candy Not Setting Properly: If your candy remains sticky or chewy, it likely didn't reach the correct temperature during cooking. Always ensure you use a reliable candy thermometer.
- Crystallization: If sugar crystals form, they can spoil your candy's smooth texture. This is why it’s important to avoid stirring once the mixture reaches a boil.
Creative Variations
Feel free to personalize your Twisted Unicorn Hard Candy Wands. Here are some fun ideas:
- Layered Colors: Instead of twisting, you can layer the colors in a mold for a rainbow effect.
- Add Edible Glitter: While the candy is still warm but not too hot to touch, add a sprinkle of edible glitter for an extra magical finish.
- Flavor Pairing: Experiment with different flavor combinations, such as raspberry-lime or mango-peach for a zingy twist.
Safety Precautions
Always be very cautious when working with boiling sugar. It can cause severe burns! Keep a bowl of cold water nearby in case of accidents, and never leave the stovetop unattended while boiling sugar.
Conclusion
Creating Twisted Unicorn Hard Candy Wands is not only a delightful culinary adventure, but it’s also a way to share your creativity with friends and family. I hope my guide will help you craft these magical candies with confidence and joy. Remember, crafting is all about experimenting and having fun!
Enjoy your magical candy-making journey, and happy crafting!