Crafting Your Own Pink Salt Scrub: A Refreshing DIY Experience
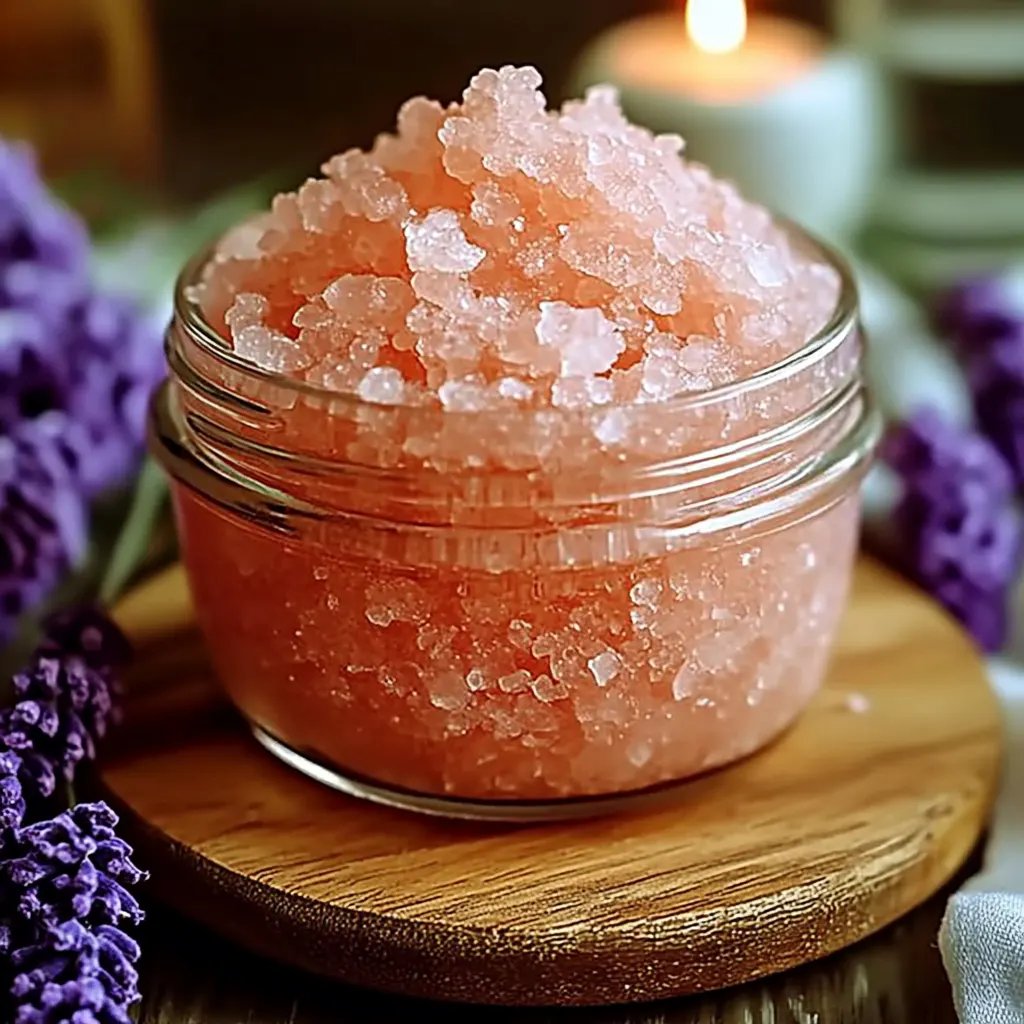
Hello, fellow crafters! Today, I’m excited to share with you one of my all-time favorite DIY beauty creations: a soothing pink salt scrub. If you haven’t experienced the rejuvenating effects of a salt scrub before, you’re in for a treat! Pink salt scrubs are not only popular for their aesthetic appeal but also for their skin-nourishing benefits. The combination of Himalayan pink salt, oils, and other natural ingredients creates a spa-like experience in the comfort of your own home—perfect for self-care rituals, gift-giving, or even as a fun group crafting activity.
Why Pink Salt Scrub?
Himalayan pink salt is cherished not only for its beautiful hue but also for its mineral content, containing essential trace minerals like potassium, magnesium, and calcium. These minerals can help to exfoliate your skin, removing dead cells while promoting hydration and circulation. The gentle scrub is suitable for different skin types and is a great way to unwind after a long day. You can use it during a shower, a relaxing bath, or even as a foot scrub while indulging in some self-care. Trust me, your skin will feel incredibly smooth and radiant!
Materials You'll Need
Let’s gather our materials! Making pink salt scrub requires only a few simple and easily accessible ingredients:
- Himalayan Pink Salt – 1 cup (fine or coarse, depending on your preference)
- Carrier Oil (such as coconut oil, sweet almond oil, or olive oil) – ½ cup
- Essential Oils (optional for fragrance) – 10-15 drops
- Vitamin E Oil (optional, for added skin nourishment) – 1 teaspoon
- Mixing bowl and spoon – for combining your ingredients
- Airtight container – for storing your scrub (a glass jar is a lovely choice)
- Measuring cups and spoons – to ensure accurate measurements
Step-by-Step Tutorial
Step 1: Choose Your Base Oil
To begin with, I'll choose a carrier oil as my base. Coconut oil has antioxidant properties and is wonderfully moisturizing, but if you prefer something lighter, sweet almond oil is a great option as well. Just remember to consider any allergies you or your intended recipient might have.
Tip: If you’re using coconut oil, remember that it may solidify in cooler temperatures. You can easily warm it slightly in the microwave or place the container in a warm water bath until it liquefies.
Step 2: Combine the Ingredients
In a mixing bowl, add the 1 cup of Himalayan pink salt. If you want a finer scrub, you could pulse it a few times in a blender, but using it as is works beautifully for a coarser texture that really exfoliates.
Next, pour in your ½ cup of the chosen oil. Mix it gently with a spoon, observing how the salt absorbs the oil. At this stage, you want the mixture to be moist but not overly oily. To achieve the perfect consistency, I suggest starting with ½ cup of oil and gradually adding more if it seems too dry.
Common Mistake: If you accidentally make it too oily, just add a little more salt to balance it out.
Step 3: Add Fragrance with Essential Oils
Here comes the fun part! Now it’s time to personalize your scrub with essential oils. I love using lavender for its calming properties, but you can opt for peppermint for a refreshing zing or lemon for a bright, citrusy scent. Add about 10-15 drops of your preferred essential oil and give it a mix.
Safety Warning: Always do a patch test with any essential oils to ensure you don't have any allergic reactions.
Step 4: Optional: Enrich with Vitamin E
If you want to take your scrub to the next level, consider adding a teaspoon of Vitamin E oil. This is particularly wonderful for skin nourishment and acts as a natural preservative.
Step 5: Store Your Creation
After mixing, transfer your scrub to an airtight container. I love to use a pretty glass jar that showcases the beautiful pink and white hues! This makes it not only functional but also decorative.
Personal Anecdote: I once decorated a jar with twine and a handmade label for a friend’s birthday, and she was ecstatic! It’s a lovely way to add a personal touch.
Step 6: Enjoy!
Now that your pink salt scrub is ready, it’s time to use it! I recommend using it in the shower to wash it off easily. Just take a handful, apply it to your damp skin in circular motions, and rinse off with warm water.
Creative Variations
Feeling adventurous? Here are some creative variations you can try:
- Herbal Infusion: Add dried herbs like rosemary or mint to your scrub for a spa-like experience.
- Citrus Zest: Incorporate a teaspoon of lemon or orange zest for a refreshing twist that also adds a pleasing aroma.
- Color Play: For a splash of fun, you could add a natural colorant or even a few drops of food coloring to enhance the visual appeal. Just be cautious as certain colors may stain.
Tips and Troubleshooting
- Consistency Issues: If your scrub feels too oily, add more salt. If it's too dry, add a touch of oil until you reach your desired consistency.
- Storage: Store it in a cool, dark place to prolong its shelf life. Depending on the oils you used, it may last for about 3-6 months.
- Usage Reminder: Always use dry hands when scooping out the scrub to avoid introducing moisture into the jar.
Closing Thoughts
Crafting your own pink salt scrub is not only rewarding but also allows you to express creativity while indulging in self-care. I hope my step-by-step tutorial inspires you to create your own version. Whether it's for personal use or as a heartfelt gift, this scrub will surely add a touch of relaxation to your routine.
So gather your ingredients, let your creativity flow, and get ready to pamper your skin! Happy crafting!