Crafting Your Own Miniature Dinosaur Terrarium Night Light: A Step-by-Step Guide
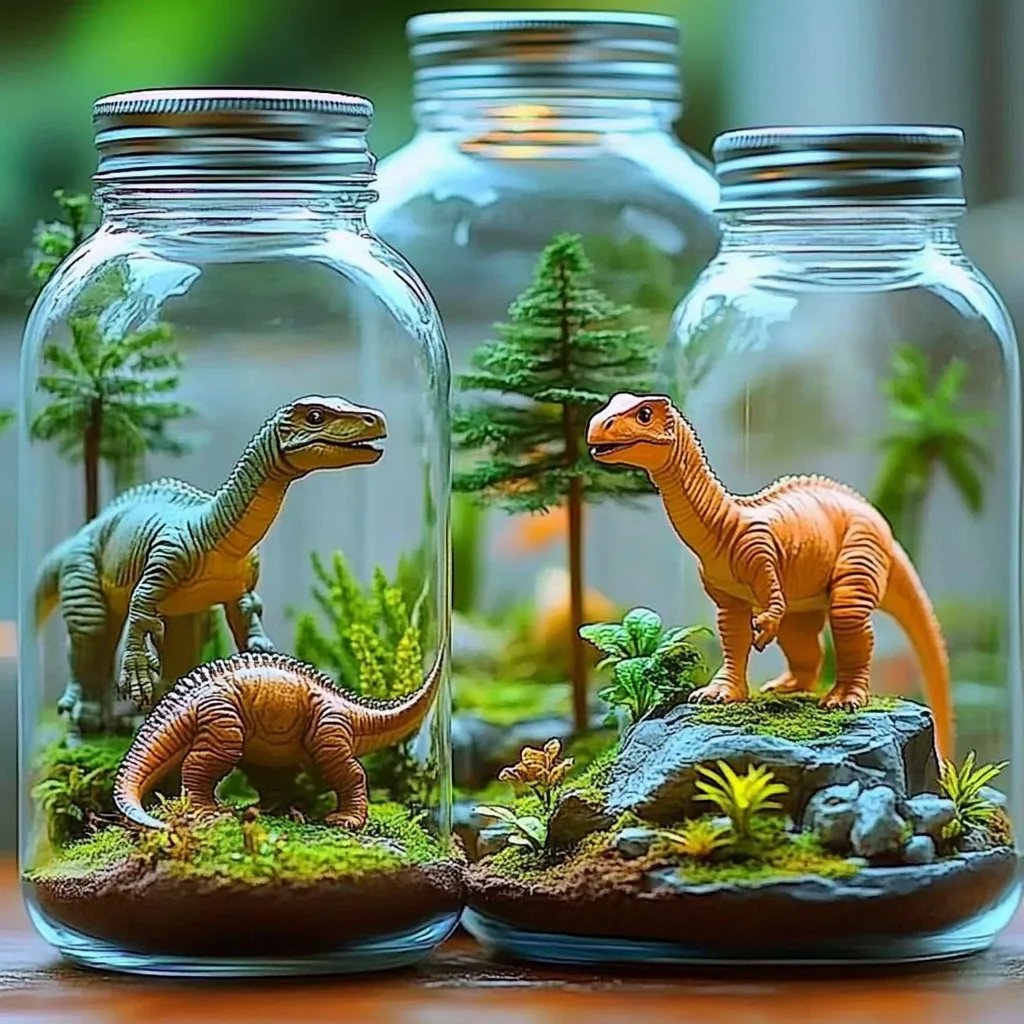
Hello fellow craft enthusiast! Today, I'm thrilled to take you on an exciting journey of creating your own Miniature Dinosaur Terrarium Night Light. This fun project combines the whimsical charm of dinosaurs, the tranquility of a terrarium, and the soft glow of a night light, making them perfect for kids' rooms, nurseries, or even a delightful addition to your own space.
Why Make a Miniature Dinosaur Terrarium Night Light?
You might wonder why this crafting project is so popular. For many of us, dinosaurs evoke a sense of nostalgia and playfulness, reminding us of childhood dreams and adventures. They make a great project for kids and parents to do together, encouraging creativity and hands-on learning about plants and ecosystems. Plus, who doesn’t love a gentle glow at night? It can soothe little ones to sleep and set a cozy mood in any room.
I often find these terrariums cozy enough to have on my living room shelves, adding a touch of personality that always sparks a conversation. So, let’s dive right into the making process!
Materials You’ll Need
Before we get started, let’s gather all the supplies. Here’s a list of what you’ll need:
- Container: A glass jar or terrarium bowl (the shape and size depend on personal preference).
- Small Dinosaur Figurines: Choose a variety of mini dinosaurs that can fit comfortably in your container.
- Soil: Potting soil or succulent soil works nicely.
- Plants: Choose small, low-maintenance plants such as succulents or moss. These will require minimal care and adapt well to different light conditions.
- LED Fairy Lights: Submersible LED lights or fairy lights (battery-operated for safety).
- Activated Charcoal: Helps with hydration and odor prevention in closed terrariums.
- Decorative Elements: Rocks, sand, or other decorative items to enhance the dinosaur setting.
- Tools: Spoon or small trowel for planting, scissors, and tweezers (helpful for placement).
Step-by-Step Instructions
Step 1: Prepare Your Container
Start with a clean glass container. It’s essential to ensure that your container is free of any dust or residues. This not only looks nicer but also keeps your plants healthy by preventing mold.
Tip: I sometimes rinse mine with vinegar afterward for an extra clean finish!
Step 2: Add Activated Charcoal
Once your container is dry, add a thin layer (about 1-2 inches) of activated charcoal on the bottom. This will help absorb excess moisture and keep your terrarium fresh.
What Could Go Wrong: Skipping this step can lead to odors or mold forming. If you notice a smell later, consider adding more charcoal.
Step 3: Layer the Soil
Next, I layer the soil on top of the charcoal—around 3-4 inches is usually ideal. Make sure the soil is level and ready for planting.
Tip: Use soil appropriate for the plants you're using. Cacti and succulents require well-draining soil, while moss prefers more moisture-retaining types.
Step 4: Plant Your Greenery
Now, it's time to plant! Make small holes in the soil to accommodate the roots of your plants. If you’re using succulents, be gentle; they can be delicate. Use a spoon or your fingers to tuck the plants into the soil.
What Could Go Wrong: Overcrowding the container can lead to competition for resources. Space the plants adequately for healthy growth.
Step 5: Add Your Dinosaurs
Here comes the fun part—place your dinosaur figurines amongst the plants! You can have them peeking out or standing guard over their miniature landscape. Use tweezers for precision in placement if necessary.
Variation: Consider creating a specific scene, like a “Jurassic jungle” or a “dinosaur desert,” depending on your plant choice.
Step 6: Decorate with Stones or Sand
Adding decorative elements can give your terrarium that final touch. Place small rocks, colored sand, or pebbles around the base of the plants and dinosaurs.
Tip: Choose colors that complement your plant’s aesthetics. This adds visual interest without overwhelming the greenery.
Step 7: Introduce Your LED Lights
Now it’s time to add the magic! Gently weave your LED fairy lights around your terrarium. If you’re using submersible lights, make sure they are battery-operated and safe for the plants.
Safety Warning: Avoid using traditional electrical lights, which can create heat and damage your plants or containers.
Step 8: Water Sparingly
After assembling your terrarium, give it a light misting—just enough to hydrate the soil. Be cautious not to over-water, as terrariums retain moisture naturally.
What Could Go Wrong: Overwatering will lead to mold and poor plant health. Keep an eye on the moisture level; if the soil is dry, it’s time for another light mist.
Maintenance and Care
Terrarium care is quite simple. Place your miniature dinosaur terrarium in a spot that receives indirect sunlight. Water sparingly—every few weeks—and simply enjoy watching your little ecosystem come to life.
Final Thoughts
Crafting a Miniature Dinosaur Terrarium Night Light is not just a fun project; it’s an adventure into creating a unique piece of art that brings joy and whimsy into your home. Take pride in your creation, and don’t be afraid to experiment with different plants and decorations.
Feel free to share your dinosaur terrarium creations with friends and family or even gift them! This project is a joy to create and a delight to behold. If you have any questions or want to share your experiences making this project, I would love to hear all about it in the comments! Happy crafting!