Crafting Your Own Beach Memory Jar: A Step-by-Step Guide
Ah, summer. The warm sun, the sound of crashing waves, the scent of saltwater in the air—it's a beautiful time for making memories. If you're anything like me, you cherish those sun-soaked days spent at the beach, and you might even feel a bit nostalgic about them when the seasons change. That emotional connection is why I absolutely love creating a Beach Memory Jar. This keepsake not only allows me to preserve those delightful moments but serves as a stunning decorative piece for my home.
Over the years, I’ve made numerous memory jars, and I’m here to share my process with you. Whether you’re looking to commemorate a cherished beach vacation, give a thoughtful gift, or simply add a personal touch to your home décor, creating a Beach Memory Jar is both simple and enjoyable. So grab your crafting materials and let’s get started!
What Is a Beach Memory Jar?
A Beach Memory Jar is a special container where you collect mementos, photographs, and little trinkets from your beach outings. It’s often decorated in a coastal style, filled with sand, seashells, and anything that reminds you of your beach experiences. The beauty of this craft is that it’s highly customizable; it can serve as a visual reminder of your adventures along the ocean shoreline or as a touching tribute to a loved one who shined brightly in your life.
Why Is This Craft Popular?
The popularity of memory jars has soared in recent years, capturing hearts in the DIY crafting world. Here are a few reasons why:
- Sentimental Value: This craft allows us to preserve happy memories in a tangible way, encouraging reflection on good times.
- Creative Expression: Decorating jars provide room for personal creativity; you can personalize them to reflect your style.
- Family-Friendly: This craft can involve everyone, making it an excellent activity for families and friends to bond over.
- Versatile Uses: Apart from beach outings, these jars can represent any significant life moments, such as weddings, birthdays, or family vacations.
When to Use Your Beach Memory Jar
Your Beach Memory Jar becomes a keepsake to appreciate throughout the year. After returning from a beach trip, you can take a moment to unwind and reminisce as you fill the jar. As time passes, it can serve as a stunning centerpiece in your home, or perhaps a thoughtful gift for someone special.
Step-by-Step Tutorial
Materials Needed
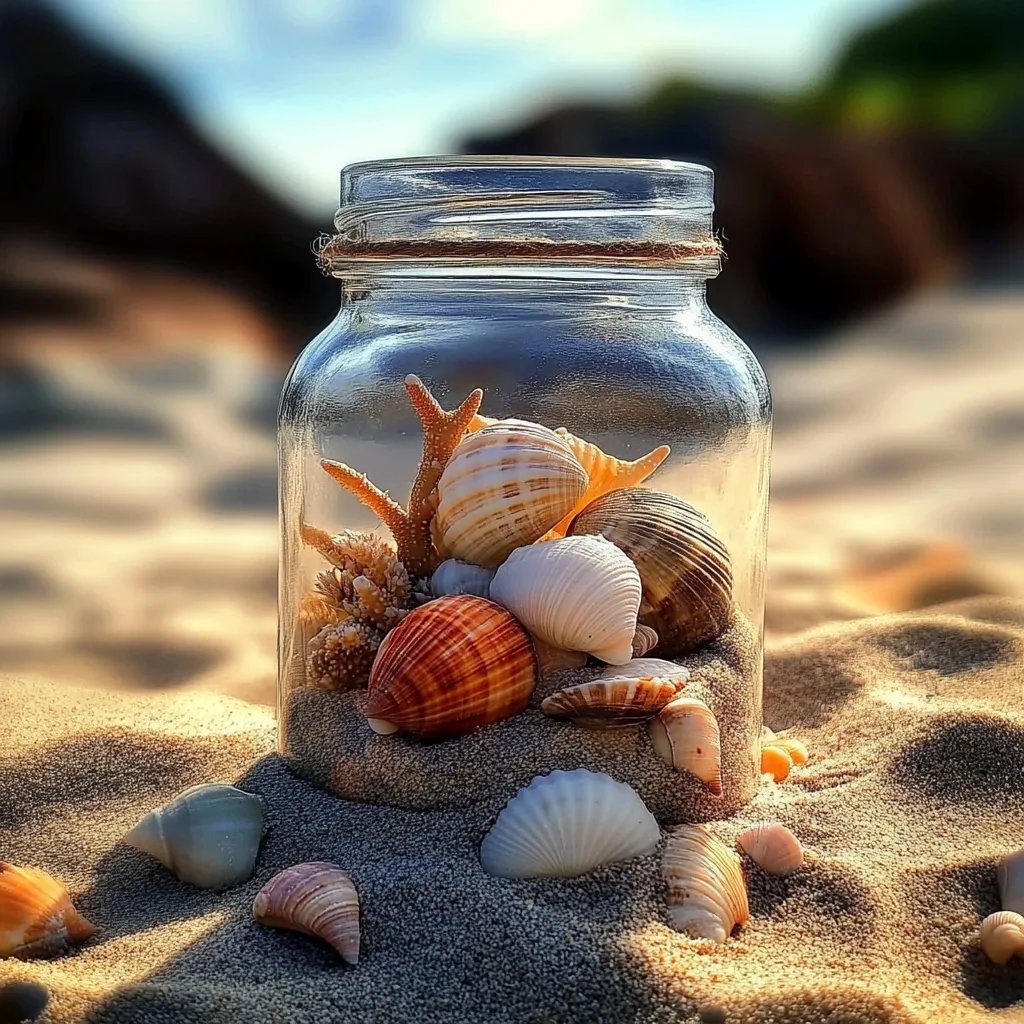
- A Clear Jar: You can use a mason jar, a decorative glass jar, or any container that resonates with you. The size depends on how many treasures you plan to collect.
- Sand: Bring a bit of the beach home with you (make sure to follow local guidelines about collecting sand).
- Seashells: Collect both big and small shells for variety. You can also add small beach stones, driftwood, or coral.
- Photos: Use snapshots of your beach day or other mementos like postcards or ticket stubs.
- Decorative Items: Twine, ribbons, or charm accessories that align with your coastal theme.
- Craft Glue or Hot Glue: For securing decorations.
- Labels: Optional, but you may want to add the date or location of your beach visit for reminiscence.
Step 1: Gather Your Memories
After returning from the beach, the first step is to sort through your mementos. I like to lay out all the items I’ve collected. This includes sand, seashells, and photos. It not only helps to visualize how they will fit in the jar but allows reminiscing about the day spent at the beach.
Tip: If any shells are still dirty or require cleaning, soak them in warm, soapy water for a few hours, then scrub gently with a brush. Let them dry completely before using them.
Step 2: Prepare the Jar
Once your mementos are sorted and cleaned, it’s time to prepare your jar. Start by adding a layer of sand to the bottom of the jar using a funnel or your fingers.
Why This Matters: The sand serves as a base to hold your items in place and offers an authentic beach vibe.
Potential Issue: If the sand isn’t packed tightly or is too loose, your mementos may sink. You can fix this by ensuring the sand layer is level and firm.
Step 3: Layer Your Treasures
Next, begin layering your collected items on top of the sand. There’s no right or wrong way to do this; it’s all about your personal preference! I often start with the larger shells at the back and layer down to smaller items at the front so that everything is visible.
Tip: Take your time and adjust the placement. It’s like creating a miniature scene!
Step 4: Secure Significant Items with Glue
If you want to keep certain larger items in place within the jar, use craft glue or hot glue to secure them after layering. Just be careful with hot glue—it can be quite hot on your fingers!
Why This Step Matters: This ensures that your precious items stay in place and minimizes rattling if you decide to move the jar.
Step 5: Personalize Your Memory Jar
Now’s the time to add your personal touch. I enjoy wrapping twine around the jar’s neck and attaching a charm or label that indicates the date and location of the beach trip. You can use decorative stickers or paint to mark the jar.
Creative Variation: If you’re feeling adventurous, you could even create a themed label. For example, write “Beach Day Memories” or “Summer 2023” for a bit of flare.
Step 6: Seal and Display Your Jar
Once you’re happy with how your Beach Memory Jar looks, you can seal it. If you prefer an open presentation, leave it as is! My favorite spot to place my jars is on a shelf or coffee table, where friends and family can appreciate them.
Tip: If you plan to keep the jar sealed, make sure to clean the inside rim of the jar to avoid leaving any residue behind that could get stuck.
Troubleshooting Common Issues
- Items Not Staying in Place: If shells or mementos are shifting, make sure you secure larger items with glue, making sure layers are tightly packed.
- Dust Getting Inside the Jar: Consider using a lid for dust protection. If you prefer an open jar, a quick clean-up every few months can maintain its pristine look.
- Understanding the Right Amount of Sand: A good rule of thumb is to leave enough space at the top of the jar to allow items to be visible; about ¼ to ½ inch should suffice.
Final Thoughts: The Joy of Crafting
Creating a Beach Memory Jar is more than just a craft; it’s a journey through memory lane. As I finish up each project, I often find myself laughing at the fun times I had while also cherishing the small moments that might otherwise fade into oblivion.
So, gather your materials, pick a cozy spot, and let your creativity flow! This project will not only celebrate your beach memories but will also ignite a spark of joy every time you look at it.
Remember, crafting is about the process just as much as the end product. I hope this guide helps you create a Beach Memory Jar that brings warmth to your home and serves as a lovely reminder of sunny days spent by the ocean. Happy crafting!