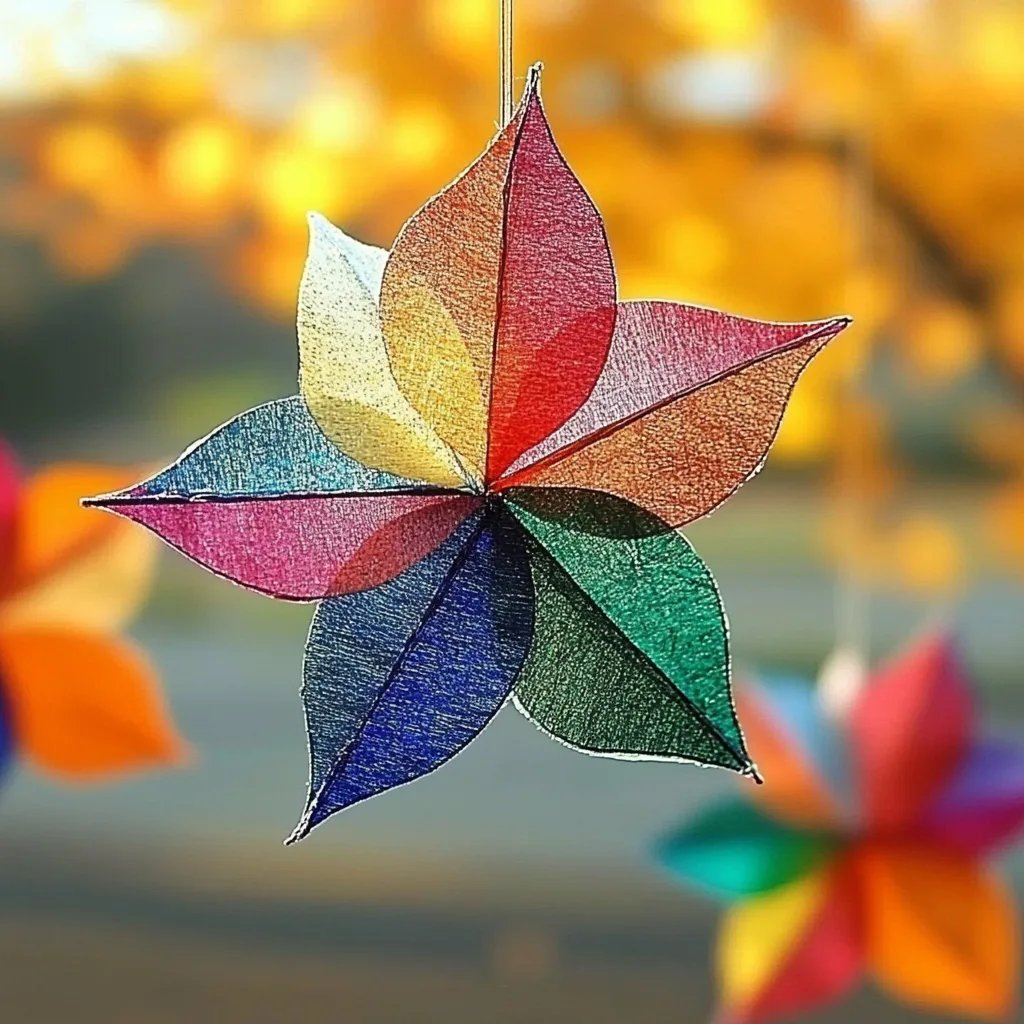
Crafting Tissue Paper Leaf Suncatchers: A Step-by-Step Guide for All Ages
Hello, fellow crafters! Today, I'm excited to share with you one of my all-time favorite DIY projects—*Tissue Paper Leaf Suncatchers*. This project is not only engaging but also a breathtaking way to bring some color and cheer into your home, especially during those gloomy fall days or even dreary winter afternoons. Suncatchers are simply translucent art pieces that can capture light beautifully, transforming your windows into vibrant art displays.
In this article, I'll walk you through each step of the process, sharing tips and insights from my own crafting experiences. Whether you're crafting with children or just indulging in some creative time on your own, this project is an excellent way to celebrate nature and add sparkle to your surroundings. Are you ready to get started? Let’s dive in!
What Are Tissue Paper Leaf Suncatchers & Why Are They Popular?
Tissue paper leaf suncatchers are colorful, delicate leaf-shaped designs made primarily from tissue paper and a few other basic materials. They have gained popularity in recent years due to their simplicity, affordability, and the stunning visual effects they create. They can be displayed in homes, classrooms, or even at special gatherings and fall festivals.
I've always found that harnessing the beauty of nature in our crafts adds a personal touch—after all, what better way to celebrate the changing seasons than with bright, cheerful leaves? These suncatchers filter sunlight, creating dynamic patterns and colors in your space, making everything feel a little cozier and inviting. Plus, they’re a fantastic opportunity for kids to learn about colors and shapes while sparking their imagination!
Materials You’ll Need
Before we roll up our sleeves, let’s gather our materials. You’ll need:
- Tissue Paper: Various autumn colors like red, orange, yellow, and green. It’s readily available at craft stores.
- Contact Paper (or clear adhesive lamination film) or Mod Podge: This will serve as the base for your suncatcher and will help your materials adhere well.
- Scissors: A sharp pair for cutting shapes.
- Black Construction Paper (optional): For creating a more striking outline for your leaves.
- Pencil: To trace leaf shapes if needed.
- A Paper Plate or a Baking Sheet: For containing the mess while working.
- Paintbrush (if using Mod Podge): For applying glue if you choose that method.
- Hole Punch (optional): To create a hanging tag if you wish to display them on strings.
Step-by-Step Tutorial
Step 1: Prepare Your Work Area
First things first, let’s set up our workspace! I recommend covering your crafting surface with newspaper or a disposable tablecloth to catch any messy spills. This way, you can enjoy your crafting without worrying about clean-up. I think the mess is part of the creative process, but it’s always wise to have a plan for post-craft organization.
Step 2: Cut Out Leaf Shapes
Using your scissors, cut the tissue paper into small squares or rectangles—about 2×2 inches each works well. I usually prepare a variety of colors since it allows for more dimensional and vibrant designs.
Once you have your tissue paper, you can create your leaf shapes. You can either freehand it or use a leaf template for a more structured look. If you are crafting with kids, they might enjoy tracing leaves from nature. Simply place a real leaf under a piece of paper and trace around it!
Step 3: Adhere the Tissue Paper to Contact Paper
Now comes the fun part! Cut a piece of contact paper to the size of your intended suncatcher. Peel off one side of the backing and place it sticky side up on your work surface. Layer your tissue paper pieces onto the contact paper, overlapping them slightly to fill the space. This will create a beautiful collage effect.
Tip: If you find that the tissue paper tears easily when handling, use smaller pieces and work gently. You can always fill in gaps later.
Step 4: Seal Your Suncatcher
Once you are happy with your colorful collage, it’s time to seal it. Peel another piece of contact paper (same size) and carefully place it on top of the tissue paper, sticky side down. Smooth it out from the center to the edges to avoid any bubbles, which can affect how the light filters through.
If using Mod Podge, brush on a thin layer over the design, ensuring it covers all the tissue paper. Let it dry completely—this usually takes a few hours. This step is crucial because it gives your suncatcher durability.
Step 5: Cut Out the Leaf Shape
Now that everything is securely in place, take your scissors and cut out the shape of your leaf. If you used black construction paper for framing, cut out a slightly larger leaf shape out of the construction paper, and glue your tissue paper leaf on top for contrast.
Step 6: Add a Hanging Mechanism (Optional)
If you wish to hang your suncatcher, use your hole punch to create a hole at the top of the leaf. Thread some string or yarn through the hole, and your beautiful leaf suncatcher is ready to be displayed!
Troubleshooting Common Issues
- If the tissue paper tears: Don’t panic! Use smaller pieces to patch up holes or get creative with your design by cutting around the tear.
- If the colors fade: Display your suncatchers in a spot of indirect sunlight to preserve their vibrancy.
- If the suncatcher isn’t sticking: Make sure you’ve pressed down all edges well and used enough adhesive (Mod Podge or contact paper) to secure the materials properly.
Safety Warnings
While crafting is fun, please remember to supervise younger kids when using scissors and adhesive materials. Always have safety guidelines in place, especially if using Mod Podge which might not be suitable for very young children.
Creative Variations
Feeling adventurous? Here are some creative variations of this project:
- Seasonal Themes: Change the colors based on the seasons—pastels for spring blossoms, bright colors for summer, and cool hues for winter.
- Nature Prints: Use leaves, flowers, or even small twigs embedded in the tissue paper for a natural look.
- Layered Effects: Experiment with layering different shapes and sizes to create a 3D effect.
Final Thoughts
Making tissue paper leaf suncatchers is a delightful way to express creativity, celebrate nature, and create something beautiful to enhance your space. Whether you choose to follow my steps closely or let your imagination run wild, I hope you enjoy the process just as much as the final product!
Each suncatcher is not only a craft but a creative keepsake imbued with personal memories. So go ahead, gather your materials, and start crafting today. I can't wait to see the brilliant suncatchers you create!
Happy crafting! 🌟