Crafting Timeless Beauty: How to Make Pressed Flower Bookmarks
Hello, fellow crafters! If you’re anything like me, you thrive on creating beautiful, hand-made items that carry a touch of nature and individuality. Today, I’m excited to share with you my process for making pressed flower bookmarks. These little treasures are not only visually stunning but also serve as a heartfelt gift or a personal keepsake to cherish.
Pressed flower bookmarks have gained immense popularity over the last few years, and for good reason. They capture the beauty of nature in a durable form that can brighten each page of your reading journey. Whether you’re an avid bookworm, a student, or simply someone who enjoys journaling, these bookmarks are perfect for adding a personalized touch to your reading experience. Plus, they make fantastic gifts for friends, family, or even as party favors!
In this detailed guide, I’ll walk you through each step of creating your unique pressed flower bookmarks, share tips to avoid common pitfalls, and offer some creative variations you might enjoy. Ready to dive in? Let’s get crafting!
What You’ll Need
Before we begin, gather the following materials. Most of these items are readily available around your home or at a local craft store:
Materials:
- Fresh flowers or leaves: Think small blooms like violets, daisies, or ferns.
- Heavy books or a flower press: If you don’t have a flower press, any heavy, flat item will work.
- Wax paper or parchment paper: This prevents the flowers from sticking to other surfaces.
- Scissors: For trimming flowers and cutting bookmarks.
- Cardstock or thick paper: This will serve as the base for your bookmarks.
- Mod Podge or clear-drying glue: This will seal your design.
- Paintbrush: A small one for applying Mod Podge.
- Ruler: For cutting the bookmarks to size.
- Optional: A hole punch and decorative ribbons for finishing touches.
Safety Warning:
While crafting, make sure to keep sharp tools away from children. If you're working with glue, it’s best to do so in a well-ventilated area to avoid inhaling potentially harmful fumes.
Step-by-Step Tutorial
Now, let's get our hands a bit messy and delve into the crafting process!
Step 1: Prepare Your Flowers
Start by selecting the flowers and leaves you want to use. I often find inspiration during a walk in the garden or park, picking small blooms and vibrant leaves. Remember, the smaller and flatter the flower, the better it will press.
Tip: Look for flowers at their prime, preferably early in the morning when they are fresh and dewy. This helps in preserving their color during the drying process.
What could go wrong: If the flowers are too thick or bulky, they may not flatten properly. This can lead to an uneven or bulky bookmark.
Step 2: Press the Flowers
Place your selected flowers between two pieces of wax paper, ensuring they don’t overlap. Then, place the wax paper between the pages of a heavy book or in your flower press.
Why this step matters: Proper pressing ensures the flowers retain their shape and color without browning or wilting.
Pro Tip: If you’re using a heavy book, you might want to add a few more books on top to apply extra pressure!
What to watch out for: Avoid opening the book too often to check on your flowers. This can disturb their drying process. Leave them for at least a week for optimal results.
Step 3: Creating the Bookmark Base
While your flowers are pressing, it’s time to prepare the bookmark base. Take your cardstock or thick paper and cut it into rectangles measuring about 2 inches by 6 inches. This is the standard size, but feel free to customize according to your taste!
“`markdown
Creative Variation: Instead of rectangles, try cutting different shapes, like hearts or even abstract designs for an artistic touch!
“`
Step 4: Arrange Your Flowers
Once your flowers have pressed thoroughly, it’s time to arrange them on your bookmark. I recommend laying your flowers out before gluing to get a sense of composition.
Tip: Try layering flowers or placing some flowers strategically at the bottom or side of the bookmark for a creative flair!
Step 5: Glueing the Flowers
Using your paintbrush, carefully apply a thin layer of Mod Podge (or clear glue) to the back of each pressed flower, then place it down on your bookmark base. After positioning the flowers, apply another layer of Mod Podge over the top to seal everything in.
Why sealing is important: This step protects your flowers and ensures their longevity while adding a beautiful glossy finish.
Mistakes to avoid: Be careful not to use too much glue, as it can make your flowers look soggy. Less is more!
Step 6: Finishing Touches
Once your bookmark is dry, use scissors to trim any excess paper. If you want to add a hole at the top for a ribbon, do this using a hole punch. You can also tie a decorative ribbon through the hole for an elegant finish.
Additional Tips and Fun Variations
- Experiment with Different Flowers: Don’t hesitate to mix petals and foliage for added depth and color. Just be mindful of the sizes!
- Try Using Dried Flowers: You can purchase dried flowers from craft stores if fresh blooms aren’t available.
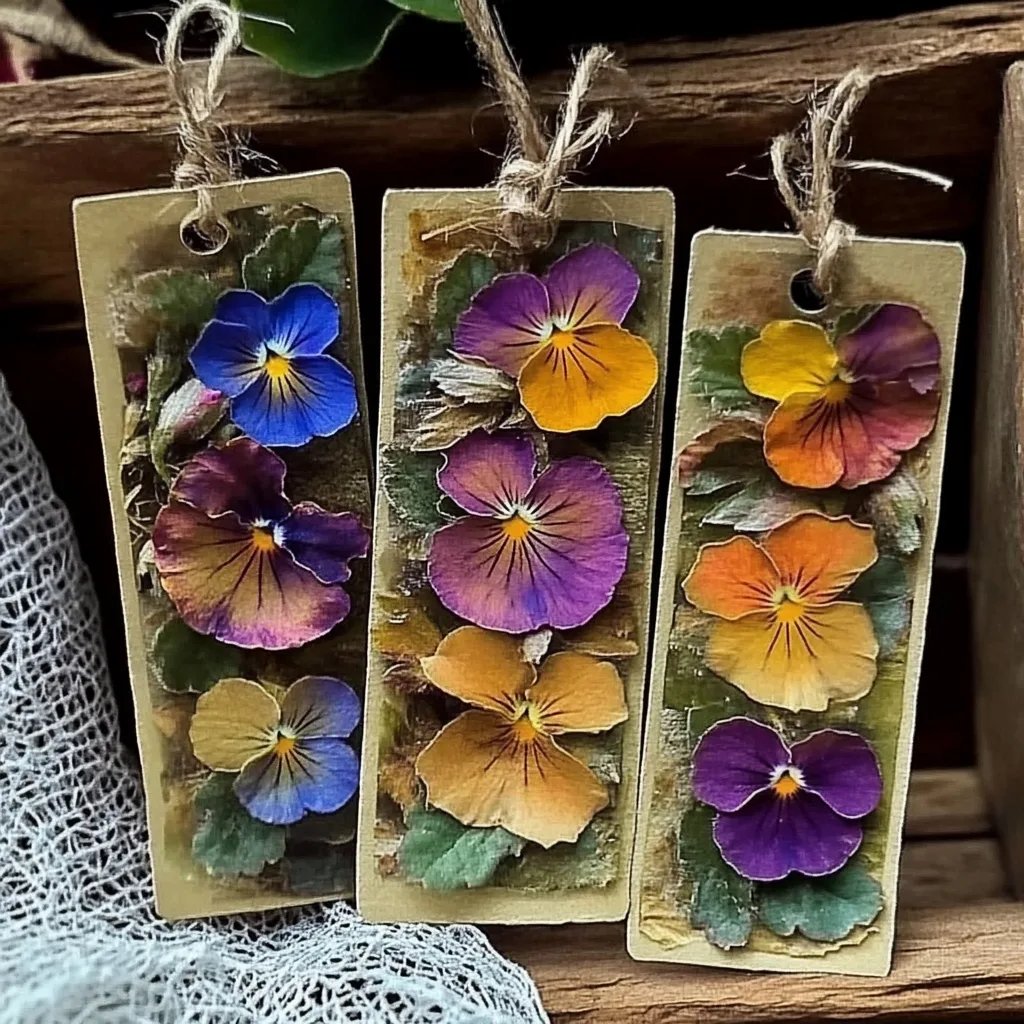
- Layering Technique: For an intricate design, try layering bigger flowers like pansies with tiny flowers like baby's breath. This adds a delightful 3D effect.
- Personalize with Quotes: Use a permanent marker to write your favorite quotes or affirmations on your bookmarks. This adds a personal touch that’s sure to inspire.
- Consider Epoxy Resin: If you're feeling adventurous, consider encasing your pressed flowers with resin for a shiny, durable finish, turning your bookmarks into keepsakes that last a lifetime.
Reflecting on Your Crafting Journey
As I look back on crafting pressed flower bookmarks, I’m always amazed by the balance between simplicity and beauty this project encapsulates. Each bookmark tells a story—whether it’s the flowers I pressed from a special garden or the quiet afternoons I spent dedicated to this creative endeavor.
In conclusion, making pressed flower bookmarks is not only fun but it also allows you to connect with nature, express your creativity, and produce something truly unique. So gather your materials, immerse yourself in the craft, and let your creativity blossom!
There’s nothing quite like the joy of gifting a handmade item, especially one that brings a touch of the outdoors to the pages of a book. I hope you find as much peace and inspiration in this craft as I have. Happy crafting! 🌸