Crafting Spooky Tissue Paper Jars: A Complete Guide to Your Halloween Decor
As the leaves turn crispy and the air becomes crispier, it's time to unleash your creativity for one of my favorite seasons: Halloween! Today, I'm thrilled to share with you how to create Spooky Tissue Paper Jars, an enchanting project that bathes your space in an eerie glow, perfect for setting the mood for Halloween gatherings or frightful festivities. Whether decorating for a party, creating a cozy corner for trick-or-treaters, or adding a touch of spookiness to your home, these jars add an imaginative flair that’s hard to resist.
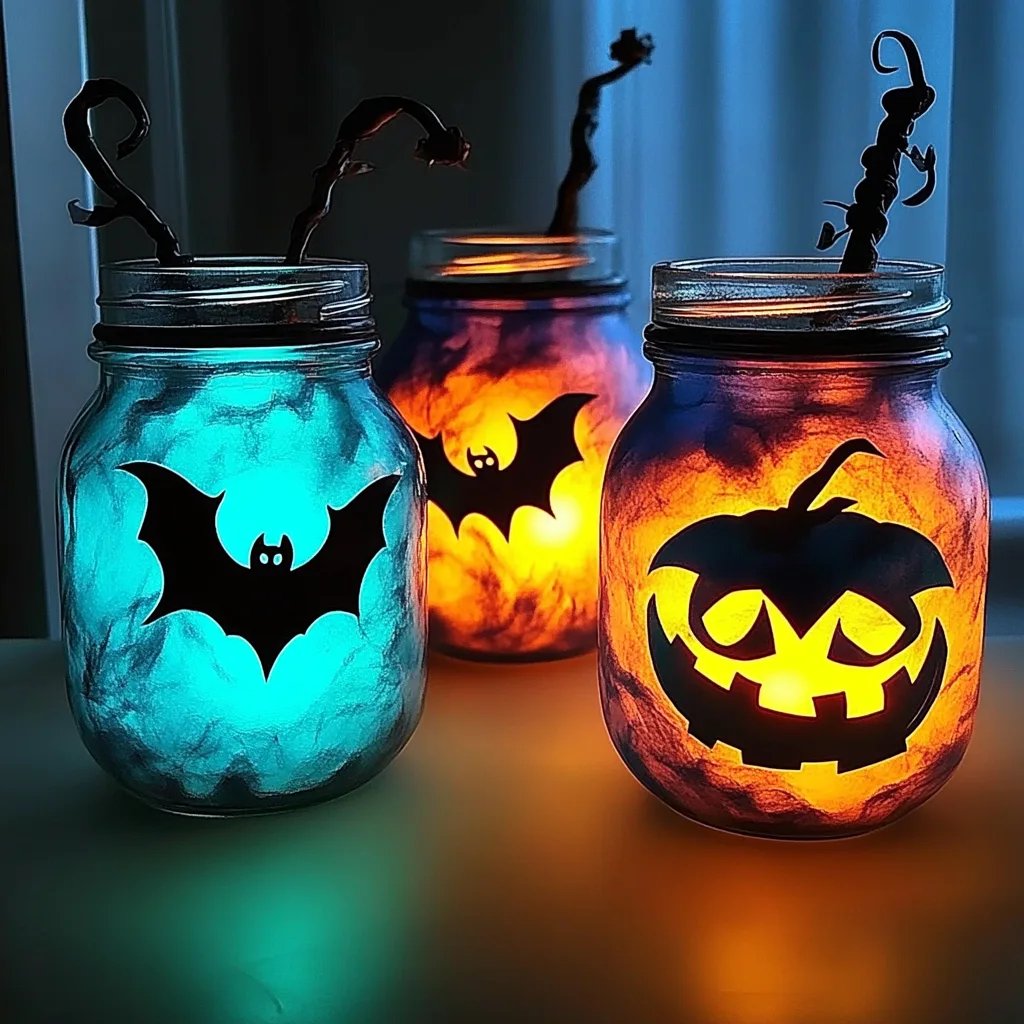
These lanterns are not only visually striking—thanks to their textured and layered tissue paper—but they also allow for tremendous flexibility in design. They’re incredibly popular among crafters during this season as they're simple to put together and easily customizable. Plus, they serve as great conversation starters! Let’s dive into my step-by-step tutorial so you can easily craft your own spooky décor.
What You Will Need:
Before we dive into the crafting process, let’s gather our supplies. Here is a comprehensive list of everything you’ll need:
Materials:
- Glass jars: Mason jars, empty pickle jars, or any glass container work great.
- Tissue paper: Black, orange, purple, and white are classic Halloween colors.
- Mod Podge or white school glue: This will serve as your adhesive and sealant.
- Paintbrush: A medium-sized brush works well to apply the glue.
- LED tealight candles: These are safer than real candles and prevent fire hazards.
- Scissors: A sharp pair will allow for neat cutting.
- Optional decorations: Googly eyes, stickers, or glitter for added flair.
Tools:
- Workspace: Lay down a protective covering like newspaper or a craft mat to keep your area clean.
- Cup of water: If using glue, it helps to have a cup of water nearby to keep your brush clean.
Step-by-Step Tutorial: Crafting Your Spooky Tissue Paper Jars
Now that you have your materials gathered, it's time to start crafting! Follow my detailed steps, and don't worry—I'm here to guide you through any potential pitfalls.
Step 1: Prepare Your Jars
First, ensure your glass jars are clean and dry. If they had labels, soak them in warm soapy water and remove the glue residue with a gentle scrub. A clean surface helps the tissue paper adhere effectively.
Tip: You can even spray paint your jars matte black for an extra spooky vibe before applying tissue paper, but this is optional. Just make sure it’s thoroughly dried before proceeding.
Step 2: Cut Your Tissue Paper
Next, grab your assorted tissue paper and cut them into different shapes—think strips, squares, or jagged edges to mimic eerie shadows. Aim for a variety of sizes to add depth and interest.
Expert Insight: You don’t need to be perfect! The beauty of this craft lies in its imperfections, which will enhance the spooky vibe.
Step 3: Apply Glue
Using your paintbrush, apply a generous layer of Mod Podge or glue to the outside of the jar. Starting from the bottom and moving upward creates a more seamless look.
Why this Matters: A good adhesive layer ensures the tissue paper sticks well and won’t peel off later.
Step 4: Layer the Tissue Paper
Begin layering the cut tissue paper onto the glue-covered jar. Start with darker colors like black or purple for the base. You can overlap pieces for depth, and don’t worry if some edges don’t stick completely. This adds to the creepy effect!
What Could Go Wrong: If you find the paper is tearing during the application, it may be too wet. Simply let the glue dry slightly before proceeding with more layers.
Step 5: Add More Layers
Once the base is established, continue layering with lighter colors like orange or even a spooky ghost white. You can also create shapes like pumpkins, bats, or spider webs from the tissue and apply them around the jar.
Creative Variation: Try adding a layer with a different texture (like a piece of netting) to add an interesting touch!
Step 6: Seal it Up
After you’re satisfied with your design, brush a final layer of Mod Podge over the entire jar. This adds a protective coating and gives it a finished look.
Step 7: Insert LED Tealight Candles
Once your jars are completely dry (give them a few hours or overnight to be safe), place an LED tealight inside each. These will illuminate your jars and create a stunning effect at night.
Safety Warning: Never use real candles in these jars, as the tissue paper may catch fire. Stick with LED lights for safety!
Step 8: Display Your Jars
Now comes the best part! Find a charming spot in your home to showcase your spooky jars—perhaps on your front porch, window sills, or as centerpiece decor at your Halloween party.
Personal Anecdotes and Final Tips
I remember the first time I made these Spooky Tissue Paper Jars; I was so proud to see my children’s excitement as they placed them on our porch. Hearing “oohs” and “ahhs” from our neighbors filled my heart with joy. Crafting these jars turned into a family tradition, gathering everyone around a table filled with colorful paper and laughter.
Alternative Methods and Substitutions
If you don't have tissue paper, consider using old newspapers or colored construction paper instead. You’ll achieve a similar effect, albeit with different textures.
Troubleshooting Common Issues
- Peeling Tissue: If pieces begin to lift over time, simply apply a bit more glue underneath and press down.
- Not Enough Adhesion: Make sure to use a generous amount of glue when applying the tissue, allowing it to soak in slightly before layering.
Final Thoughts
Crafting Spooky Tissue Paper Jars is a delightful way to unleash your creativity and celebrate the vibrant spirit of Halloween. With just a few simple materials, you can create beautiful, glowing jars that add charm and spookiness to your décor. I hope my tips and insights have equipped you with the confidence to create your own masterpieces. Get creative, have fun, and don't forget to share your crafts with family and friends! Happy crafting! 🎃✨