Crafting Magic: How to Make Toilet Roll Space Rocket Night Lights
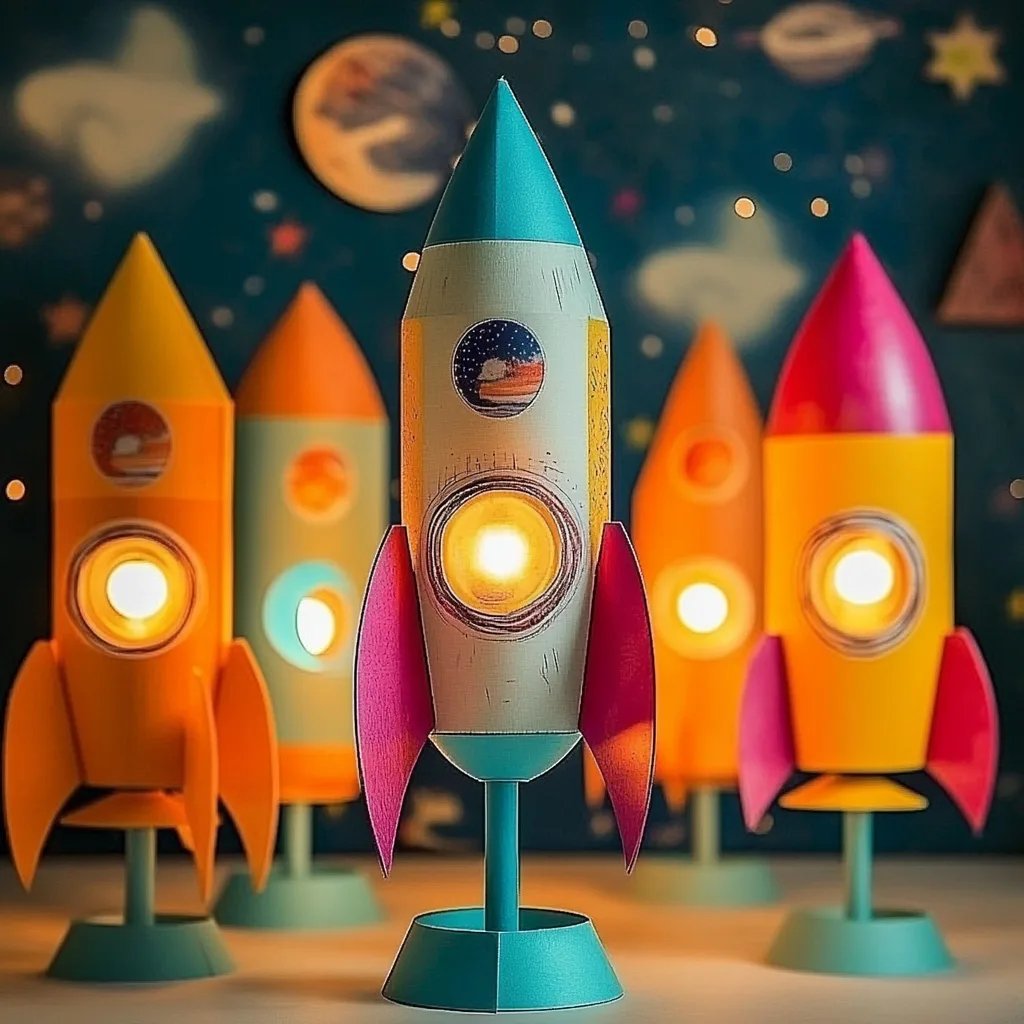
Hello, fellow crafters! Today, I'm thrilled to share one of my favorite DIY projects that combines creativity with a touch of whimsy: Toilet Roll Space Rocket Night Lights. Not only do these delightful little rockets add a soft, enchanting glow to your child’s bedroom, but they also spark their imagination and curiosity about space—perfect for any aspiring astronaut. Plus, crafting with recyclables is eco-friendly, making this project appealing on multiple levels!
Why Are Toilet Roll Space Rocket Night Lights Popular?
Toilet roll rockets have gained popularity not just for their charm, but also for their accessibility. We all have empty toilet paper rolls lying around, making this a budget-friendly project. Kids love the idea of nighttime adventures in their rooms, and these rockets create a calming environment, perfect for bedtime storytelling. As an added bonus, you can personalize them to suit your kiddo’s preferences, making them a special handmade treasure.
What You'll Need
Before we dive in, gather these materials. Most items can be found around your home or easily obtained at local stores:
Materials:
- Empty toilet paper rolls (1 for each rocket)
- Acrylic paint (red, blue, yellow, white, or any combination for decoration)
- Paintbrushes (various sizes for different effects)
- LED tealights (safe and cool to the touch)
- Black construction paper or cardboard (for the rocket fins)
- Scissors
- Glue (hot glue or craft glue)
- Star stickers or glitter (for decoration, optional)
- Clear tape
- Pencil
Safety Considerations:
- When using scissors and hot glue, always supervise young children.
- Ensure LED tealights are placed securely within the roll to avoid fire hazards.
Step-by-Step Tutorial
Step 1: Prepare the Toilet Paper Roll
First, let's give our rocket its foundation. Take an empty toilet paper roll and make sure it's clean and dry. If you find any remnants of paper, remove them gently. This step is essential, as any dampness could affect the paint or glue adhesives later.
Common Issue: If you find that the roll is slightly crumpled, try using a small spray bottle to lightly mist it and reshape it gently. Let it dry before proceeding.
Step 2: Paint Your Rocket
Time to unleash your creative side! Take your acrylic paint and choose your rocket colors. You can go for classic space themes (think bright red and blue) or opt for pastel colors for a softer look.
- Using a paintbrush, apply the first coat of paint to your toilet roll. Don’t worry if it’s uneven; we’ll be adding more coats later.
- Allow the paint to dry completely—this is crucial, as it prevents smudging when we add other details.
Tip: If you're in a hurry, you can use a hairdryer on a low setting to speed up drying. Just be careful not to overheat the cardboard; it might warp!
Step 3: Create the Rocket Fins
While your rocket body dries, let’s make the fins. Draw a triangular shape on the black construction paper or cardboard. You’ll want two identical fins for stability.
- Cut out your triangles carefully. If you want to get creative, consider adding grooves or patterns by cutting into the edges!
- Attach the fins to the bottom of the painted toilet paper roll using hot glue.
Trouble Shooting Tip: If the fins aren’t sticking, you may need to add a bit more glue, or you can reinforce them with a piece of clear tape as well.
Step 4: Add the Rocket Engine Cone
For the top of your rocket, cut a smaller circle of paper (about 1.5 inches in diameter). Roughly measure and cut a triangle that can curl into a cone.
- Roll the triangle into a cone shape and secure it with glue.
- Attach the cone to the top of your painted toilet roll.
Step 5: Illuminate Your Rocket
This is the grand moment! Take your LED tealight and place it safely inside the toilet roll. Make sure that it fits snugly and has enough space to be easily turned on and off.
Safety Tip: Make sure children know that only adult supervision should be involved with the placement and handling of the tealight.
Step 6: Final Decor & Personalization
Now the fun part! It’s time to make this rocket uniquely yours. Use star stickers, glitter glue, or even paint additional designs on the rocket. Perhaps a nice touch would be a crew name or mission statement, like “Mission to the Moon” written across the body!
Step 7: Display & Use
Once everything is dry and secure, switch on your LED tealight and enjoy the beautiful glow! Place your Toilet Roll Space Rocket Night Light on a shelf or bedside table, giving your little one a comforting companion as they drift off to sleep.
Creative Variations
If you want to take it a step further, here are some creative variations to consider:
- Paint the Rockets with Glow-in-the-Dark Paint: This option adds an extra layer of enchantment, making for dazzling light shows long into the night!
- Space Theme: Decorate the rolls to resemble well-known rockets or spacecraft (like the SpaceX Falcon or Saturn V).
- Adding a Sound Module: For a fun surprise, incorporate a little sound module that plays rocket sounds or space-themed music.
Personal Annotations
My kids and I have made these space rockets countless times, and each one turns out uniquely special. The most rewarding moment is seeing their faces light up as we turn the lights off and watch the rockets glow softly in the darkness. It's a wonderful bonding experience that not only fills their rooms with light but also fills their hearts with dreams of cosmic adventures!
Conclusion
Crafting Toilet Roll Space Rocket Night Lights is a fun and straightforward project that nurtures creativity while being an eco-friendly activity. I hope my step-by-step guide helps you bring a little sparkle to your home and serve as a source of inspiration. Remember, the most important part of crafting is to enjoy the process, so don’t stress about perfection. Let's light up those night skies — one rocket at a time!
Happy crafting!