Crafting Magic: How to Make Neon Bouncy Balls in an Aurora Jar
Hello there, fellow crafters! I'm thrilled to share a fun, vibrant, and slightly magical crafting project that I recently dived into: making Neon Bouncy Balls in an Aurora Jar. Whether you're a parent looking for a fun weekend project with your kids, a craft enthusiast seeking new ideas, or just someone who loves the art of creation, this DIY project is for you.
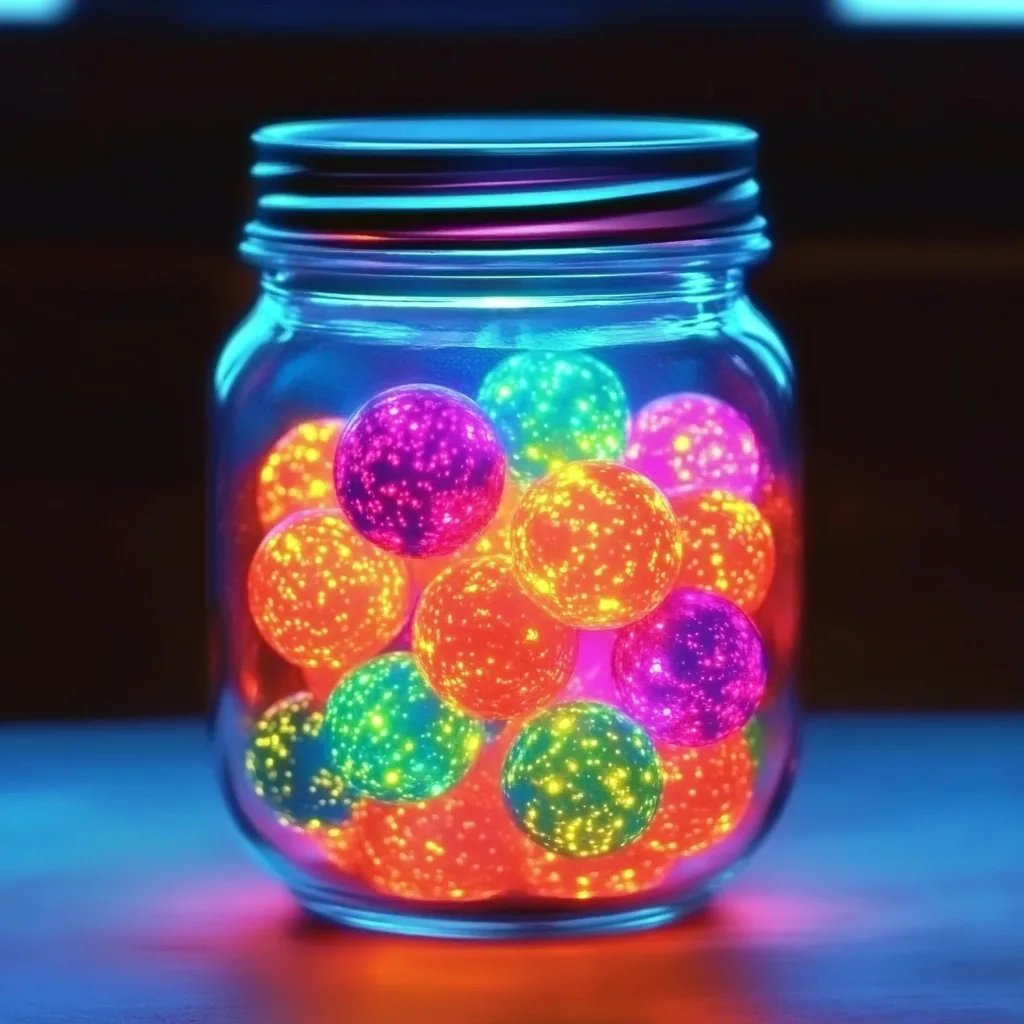
What Are Neon Bouncy Balls?
Neon bouncy balls are colorful, vibrant spheres that can bounce back into your hands with a satisfying thud. They are not only a nostalgic trip down memory lane for many but also serve as fantastic sensory toys for children. Their appeal lies in their squishy texture, vibrant colors, and the joy that comes from watching them bounce and roll. You can use these delightful little balls in games, as party favors, or simply enjoy watching a child’s delight as they play with them.
Why Are They So Popular?
These bouncy balls have transcended generations. Reminiscent of childhood, they evoke feelings of nostalgia while providing therapeutic relief through sensory play for kids and adults alike. Plus, the sight of a glowing neon ball in a dimly lit room is undeniably captivating, making them a perfect decor item for parties or casual gatherings.
What's an Aurora Jar, Anyway?
An Aurora Jar is a simple yet magical crafting vessel that enhances the visual appeal of your neon bouncy balls. It’s often crafted from any clear, recyclable material that can hold light well. Think mason jars, glass containers, or even reused plastic bottles with the labels stripped off. The design allows light to refract, creating beautiful glowing effects that showcase the vibrancy of your neon creations against a stunning backdrop.
Materials You'll Need
Before we dive into the step-by-step tutorial, let’s gather our materials. Here’s what you’ll need:
Essentials:
- White school glue (liquid) – 1/2 cup
- Warm water – 1/2 cup
- Liquid starch – 1/2 cup
- Neon food coloring (for that vibrant touch)
- Mixing bowl and a spoon
- A waterproof table covering (like an old newspaper or an easy-to-clean tablecloth)
For the Aurora Jar:
- A clear jar (mason jars work great!)
- Glitter or holographic mylar (to add a dazzling effect)
- Optional: battery-operated fairy lights (for the extra wow factor!)
Step-by-Step Tutorial: Making Neon Bouncy Balls
Step 1: Prepare Your Work Area
The first thing I always do is set up a clean workspace. This project can get a bit sticky, so I lay down old newspapers or a plastic tablecloth. It's simple but important!
Step 2: Mix the Glue and Water
In your mixing bowl, combine the 1/2 cup of white school glue with 1/2 cup of warm water. Stir until thoroughly mixed. This creates the base for our bouncy balls and ensures a gooey consistency that holds everything together.
Why It Matters:
Ensuring that the glue and water are mixed well is crucial since it influences the texture of your final product. If not well mixed, the balls may be uneven and won’t bounce appropriately.
Step 3: Add the Neon Food Coloring
Now the fun part! Choose your favorite neon food coloring and add a few drops to the glue and water mix. Remember, a little goes a long way! If you want multiple colors, you can separate your mixtures into smaller bowls at this stage.
Tip:
Don’t be afraid to experiment with color combinations. Mixing colors can yield unique shades that glow in the dark!
Step 4: Incorporate the Liquid Starch
Slowly add the 1/2 cup of liquid starch to your colored glue mixture. Stir gently. As you mix, you’ll notice the concoction beginning to clump together. This is what you want—it’s the start of your bouncy ball!
Common Pitfall:
If your mixture remains too watery, it may be that your starch needs to be stirred in more thoroughly. Usually, the mixture should start forming a ball that you can pick up and mold.
Step 5: Knead the Mixture
Once your new gooey ball has formed, take it out of the bowl and knead it in your hands for about 2 minutes. This helps to combine everything and creates a smoother texture that enhances bounce!
Warning:
If the mixture is too sticky, try adding just a bit more liquid starch while working it in your hands. Conversely, if it’s too firm, dampen it slightly with water to make it easier to mold.
Step 6: Shape Your Balls
Now that you’ve kneaded your mixture, pinch off a small section—about the size of a tablespoon—and roll it between your palms to form a ball. Remember to keep them uniform in size so they bounce evenly!
Step 7: Let Them Cure
Once you’ve created your Neon Bouncy Balls, set them aside to cure for 24 hours. This is crucial for developing a perfect bounce. The curing time allows them to solidify, making them bouncier and ensuring they maintain their shape.
Preparing Your Aurora Jar
Step 8: Decorate Your Jar
While the balls are curing, let’s transform our clear jar into an Aurora Jar! Fill your jar with glitter or cut-up pieces of holographic mylar to give it sparkle. If you want to take it a step further, add battery-operated fairy lights at the bottom for an enchanting glow.
Step 9: Showcase the Balls
Once the bouncy balls are completely cured, place them into your Aurora Jar on top of the glitter or lights. They’ll glow and bounce off the reflections, creating a stunning visual display.
Personal Anecdotes and Creative Variations
I’ll let you in on a secret: when I first tried making these bouncy balls, I was overly excited and skipped the curing step. My kids and I ended up with squishy blobs rather than bouncy balls. Lesson learned—they came out a tad deformed, but they still made great toys!
Creative Variations:
- Glow-in-the-Dark Version: Add glow-in-the-dark paint instead of neon food coloring for a nighttime effect.
- Scented Balls: Incorporate a few drops of essential oils into the mix for a delightful aromatic touch.
- Patterns: Use different colors of mixture to swirl and create beautiful patterns in each ball.
Final Thoughts and Safety Warnings
Above all, crafting should be about exploration and FUN! However, always remember to supervise small children during this process, especially when working with food coloring or liquid starch.
If you face any hiccups along the way, don’t be discouraged. Crafting is a journey filled with experimentation! Enjoy every squeeze, roll, and bounce as your neon bouncy balls come to life in their dazzling Aurora Jar.
So there you have it, friends! A step-by-step guide to creating your own Neon Bouncy Balls, complete with the beautiful presentation of an Aurora Jar. I hope you find joy in this project as I did. Happy crafting!