Crafting Magic: How to Create Stunning Salt Paintings
Hello, fellow crafters! Today, I’m thrilled to take you on a colorful journey into the world of salt painting. As an experienced crafter who has experimented with myriad DIY projects, I can confidently say that salt painting is a unique blend of art and science that delights both kids and adults alike. It’s mesmerizing to watch beads of vibrant watercolor spread and dance across salt, creating abstract masterpieces that are as appealing to look at as they are to create.
Why Salt Painting is Gaining Popularity
The recent surge in popularity of salt painting can be attributed to its accessibility, educational potential, and sheer fun factor. It’s an art project that encourages creativity while also teaching us about properties of water, absorption, and color mixing. It’s perfect for young children’s birthday parties, rainy days at home, or even as a therapeutic activity for adults looking to unwind and express themselves. So whether you're a parent, educator, or simply someone looking for a new hobby, salt painting is an exciting endeavor worth exploring.
What You'll Need: Materials for Your Salt Painting Project
Before we dive into the step-by-step process, here's a comprehensive list of materials you’ll need. Don’t worry if you don’t have everything; many of these items are easily accessible or can be substituted.
- Materials:
- Heavyweight watercolor paper (or cardboard for a sturdier base)
- White school glue (I prefer clear-drying glue)
- Table salt (coarse salt works best but fine salt is a great alternative)
- Watercolors (liquid watercolors, watercolor paints, or food coloring diluted in water)
- Paintbrush (a wide one for water and a fine one for detailed work)
- Tray or shallow dish (to catch excess salt)
- Optional:
- Plastic squeeze bottles (for easier application of watercolor)
- Hairdryer (to speed up drying)
- Gloves (to keep your hands clean)
Step-by-Step Guide to Your Salt Painting Masterpiece
Step 1: Designing Your Artwork
Why it Matters: Before you start creating your salt painting, it’s essential to plan your design. This foundation will guide your application of glue and salt, ultimately affecting how your colors interact.
My Tip: Sketch your design lightly on the watercolor paper with a pencil. You can keep it simple with shapes or letters, or opt for a more intricate design. For my first salt painting, I created a vibrant sunset behind a silhouette of mountains, which proved to be an eye-catching choice!
Step 2: Apply Glue
Application Process: Using your school glue, carefully outline your sketch or fill in the areas you want to create texture.
What Could Go Wrong: The glue should be applied evenly; too much glue can create puddles instead of a fine layer for salt.
Fix It: If you accidentally apply too much glue, use a paintbrush to spread it out or even remove excess glue with a paper towel.
Step 3: Sprinkle Salt
Why it Matters: Sprinkling salt over wet glue allows it to adhere and creates the textured surface that will react with the watercolor.
Application Process: While the glue is still wet, generously sprinkle salt over the glued areas. Don’t be stingy; the more salt, the more interesting your painting will turn out!
What Could Go Wrong: If the glue dries before you add salt, you’ll struggle to achieve the textured effect.
Fix It: If you've waited too long, you can lightly mist the area with water to re-activate the glue, but this can also lead to decreased adhesion.
Step 4: Remove Excess Salt
Why it Matters: Removing the excess salt ensures a clean artwork and allows the colors to stand out effectively.
Application Process: After letting the glue dry completely (about 20-30 minutes), gently tap the paper or shake off the excess salt into your tray. Save it if you’d like to reuse it later!
Step 5: Paint with Watercolors
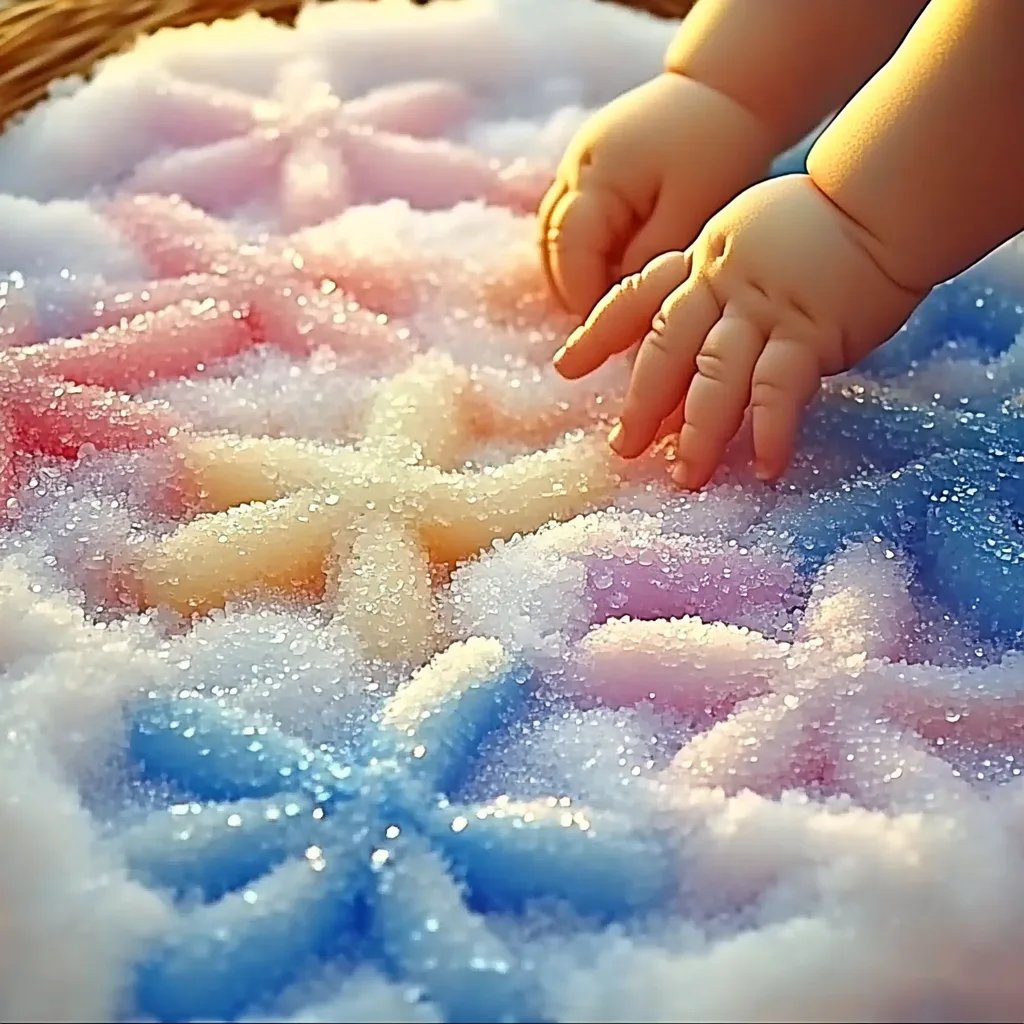
Application Process: Now comes the fun part! Dip your paintbrush into your watercolor or diluted food color. Gently touch the bristle to the salt-covered areas. You’ll see the colors spread and blend beautifully across the salt.
What Could Go Wrong: Be careful; if you apply too much color at once, it might create a muddy look instead of vibrant hues.
Fix It: Start with just a bit of water and add more as needed. If the colors begin to blend undesirably, you can blot with a paper towel or use a hairdryer to dry the area and stop the diffusion.
Step 6: Let Your Artwork Dry
Let your creation air dry completely, ideally for several hours or overnight. Keep it out of direct sunlight to avoid fading, and be patient!
Step 7: Enjoy and Display Your Artwork
Once dry, your salt painting is ready to shine! You can display your creation as-is, frame it, or even create a series of smaller paintings to make a gallery wall.
Personal Insights and Creative Variations
As I mentioned, I have dabbled in a variety of crafts, and salt painting has always held a special place in my heart because every piece is unique. I remember creating salt paintings with my children; we’d use different shapes and colors based on seasons or holidays. Giving an abstract look during Halloween or a floral theme for spring always transformed our living room!
You can also experiment with different paint types. For a more matte finish, try acrylic paints instead of watercolors. Or, if you have old crayons, a technique known as "crayon resist" can work beautifully with salted areas.
Safety Warnings
While salt painting is generally safe, keep an eye on younger children to ensure they don’t ingest any materials, particularly the salt or glue. Use non-toxic supplies whenever possible, and if you're using food coloring, consider using aprons to avoid stains.
Final Thoughts: Embrace Your Creativity
I hope this detailed guide inspires you to dive into the enchanting world of salt painting. Remember, every mistake is just a stepping stone towards discovering your unique artistic voice. Don’t be afraid to play with colors, try out new designs, and let your imagination run wild. Whether you’re creating for fun or showcasing art, each piece tells a story.
Happy crafting, and may your salt paintings be as vibrant and beautiful as your creativity!