Crafting Fun: My Comprehensive Guide to Making Cornstarch & Chalk Dough
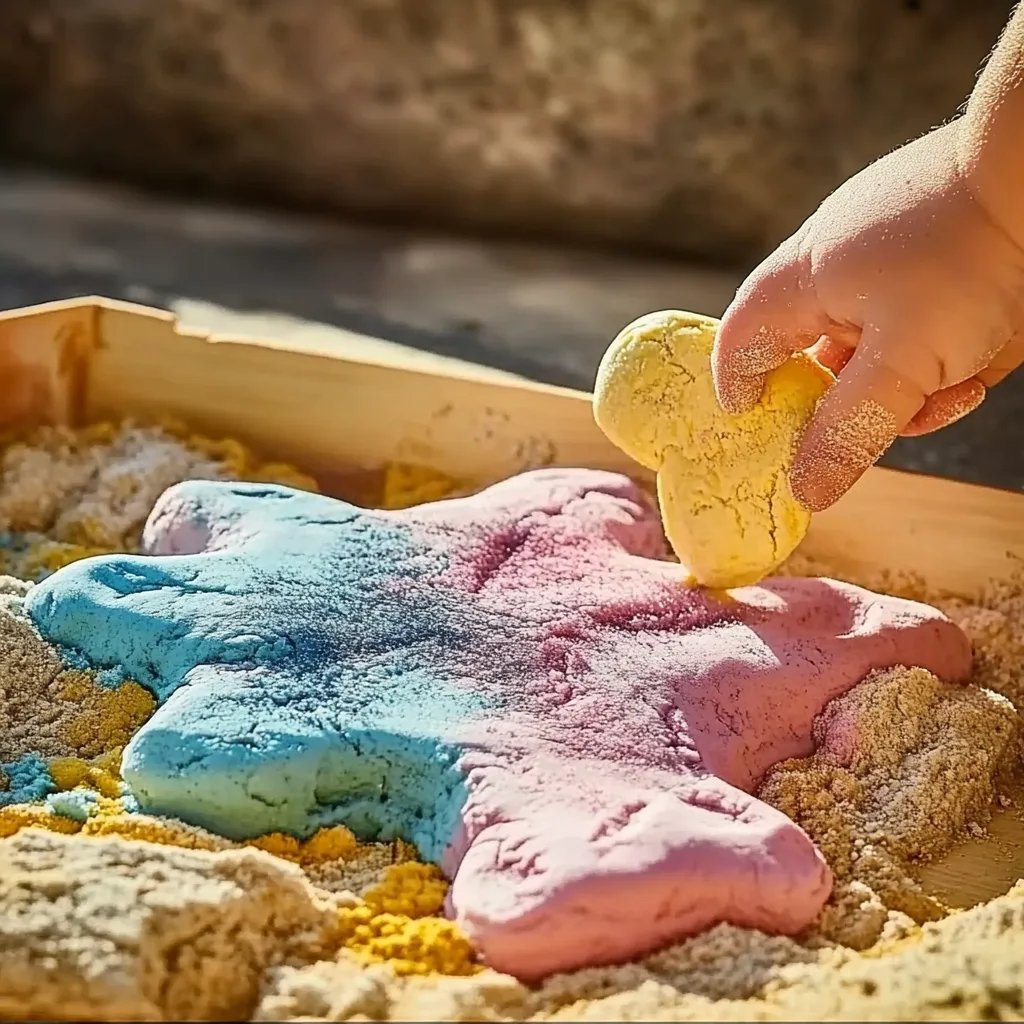
Hello, fellow crafters! I’m excited to share one of my all-time favorite projects with you today: making Cornstarch & Chalk Dough! If you’re looking for a fun, versatile crafting material that’s perfect for kids and adults alike, look no further. This dough is soft, pliable, and incredibly satisfying to work with. Plus, it’s an excellent medium for creating everything from fun sculptures to vibrant ornaments.
Why Cornstarch & Chalk Dough?
You might be wondering what makes Cornstarch & Chalk Dough such a popular choice for crafters worldwide. Well, this dough is not only easy to make, but it also requires just a few simple ingredients that you probably have lying around your home. It’s a fantastic alternative to traditional air-dry clay or polymer clay, especially for those who want a quick, safe, and eco-friendly crafting experience.
This dough can be used to create decorative pieces, small figurines, holiday ornaments, and even classroom projects. Whether you’re a parent hosting a crafting session for your kiddos, a teacher looking for fun and educational art projects, or just a crafty soul wanting to explore new materials, this dough has got you covered!
So let’s dive into the crafting adventure. I’ll guide you through the process step-by-step, revealing useful tips and tricks along the way!
What You’ll Need
Before we begin, gather the following materials:
Ingredients:
- 1 cup of cornstarch
- 2 cups of baking soda
- 1.5 cups of water
- 1 cup of white school glue
- Optional: Food coloring or powdered chalk for colored dough
Tools:
- Large mixing bowl
- Saucepan
- Whisk or spoon
- Measuring cups and spoons
- A clean countertop for kneading
- Oven (for a faster setting)
Safety Warning
While the materials are non-toxic, it’s always a good idea to supervise young children during the crafting process to prevent any accidents with tools and ingredients.
Step-by-Step Tutorial
Step 1: Combine Ingredients
In a large mixing bowl, blend together 1 cup of cornstarch, 2 cups of baking soda, and 1.5 cups of water. If you want to add a pop of color, this is the perfect time to mix in a few drops of food coloring or powdered chalk! I love creating vibrant batches by using different hues for various projects.
Why This Step Matters:
Mixing the ingredients properly helps ensure a smooth, cohesive dough that will not clump during cooking.
Tip:
Use a whisk to combine the ingredients thoroughly; it helps break up any lumps. If the mixture seems lumpy after stirring, don’t worry! Whisk vigorously; a few lumps are usually easy to smooth out later.
Step 2: Heat the Mixture
Pour the mixture into a saucepan over medium heat. Stir continuously to prevent the ingredients from sticking to the bottom. It will start to thicken and clump together—this is where the magic happens!
Common Pitfall:
If you notice that the mixture is becoming too thick or starts to burn, remove it from the heat immediately! You can adjust with a little bit more water if necessary to keep it workable.
Step 3: Kneading
Once your dough has formed a clump and resembles mashed potatoes, transfer it to a clean surface. Allow it to cool for a few moments before kneading it with your hands. Start kneading gently, incorporating any remaining lumps. The dough should be pliable and smooth.
Why Kneading is Important:
Kneading activates the ingredients, allowing the dough to achieve its perfect consistency. This step also cools down the dough for safe handling.
Step 4: Store or Use Immediately
You can use your Cornstarch & Chalk Dough immediately for crafting. If you wish to store it for later, wrap it tightly in plastic wrap and place it in an airtight container. It can last for a week or two without drying out.
Tips for Storage:
Keep it in a cool, dark place. If the dough does dry out a bit, you can often revive it with a touch of water and kneading.
Creative Variations
Now that you’ve mastered the basic Cornstarch & Chalk Dough, let’s explore some creative variations. You can transform your dough into:
- Paintable ornaments: After sculpting, let your pieces dry completely and then paint them with acrylic paints for a beautiful finish.
- Seasonal decorations: Shape your dough into hearts for Valentine’s Day, eggs for Easter, or stars for the Fourth of July.
- Jewelry and accessories: Create beads or pendants for unique jewelry pieces by poking holes with a toothpick before drying.
Personal Anecdote
I remember the first time I introduced Cornstarch & Chalk Dough to my niece during a family visit. We spent the entire afternoon crafting silly shapes and animals, filled with giggles and joy. It turned into a cherished memory, and now she often asks when we can make more dough. It’s amazing how something so simple can create lasting bonds and cherished moments!
Final Thoughts
I hope you’re as excited about making Cornstarch & Chalk Dough as I am! This recipe is not just easy but also incredibly rewarding. Whether you’re crafting solo or sharing the experience with loved ones, this dough encourages imagination and creativity.
Happy crafting! Remember to embrace the process, allow for imperfections, and enjoy every moment of your crafting journey. If you have any questions or want to share your creations, don’t hesitate to reach out. I can't wait to see what you come up with!