Crafting Fall Leaf People: A Whimsical Autumn Adventure
As the vibrant tapestry of autumn unfolds with rich hues of red, orange, and gold, I find it impossible to resist the allure of the season's most abundant treasure—fallen leaves. One of my all-time favorite fall crafts to engage in is making adorable Fall Leaf People. This whimsical project combines nature, creativity, and a touch of nostalgia, making it a perfect activity for all ages. Whether you're a seasoned crafter or a novice parent looking to inspire your children, this craft is sure to bring joy to your home.
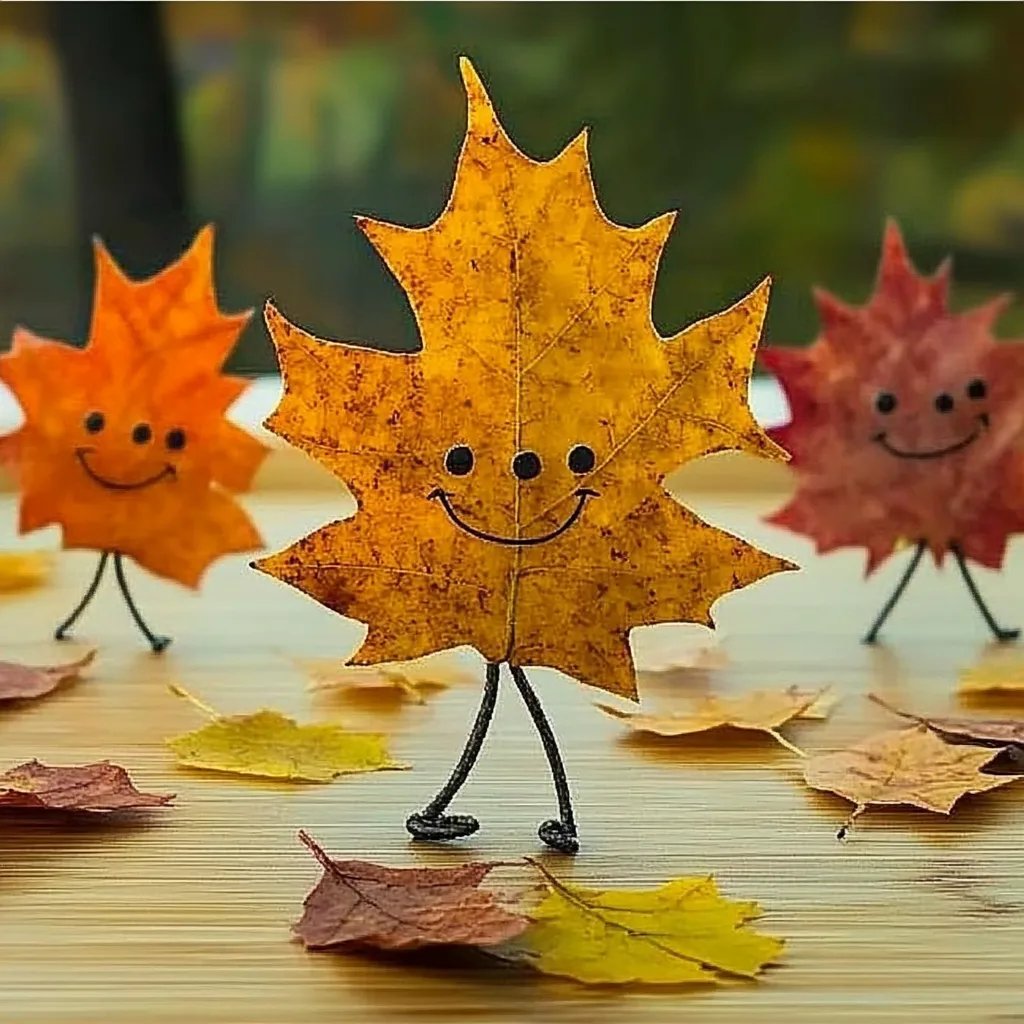
What Are Fall Leaf People?
Fall Leaf People are charming figures created from a combination of leaves, twigs, and other natural materials. They come to life with personality and character, embodying the spirit of the season. Easy to make and delightfully customizable, these leaf figures can be used for decoration, storytelling, or as part of an educational experience about nature. The best part? They can be made indoors on a chilly day or outside in a crisp, sunny afternoon.
Why Are Fall Leaf People Popular?
The popularity of Fall Leaf People stems from several factors:
- Simplicity: Made with easily accessible materials, they are perfect for a quick craft session.
- Nature-Inspired: They encourage appreciation for the changing seasons and the beautiful outdoor environment.
- Customizable: These leaf figures can be altered to represent diverse characters or scenes, making them a fun project for any creative mind.
Materials You’ll Need
Before diving into the crafting process, let's gather our supplies! This project utilizes simple materials that you might already have at home or can easily collect from your local park:
- Assorted Fallen Leaves: Different sizes and colors contribute to variety and personality.
- Twigs: Look for slim branches for arms and legs.
- Glue: Craft glue or a hot glue gun (with adult supervision).
- Scissors: For trimming leaves or twigs if necessary.
- Markers: Non-toxic markers or paints for detailing (eyes, mouth, etc.).
- Small stones or acorns: As optional embellishments for added character.
- Construction paper: For creating backgrounds or landscapes.
- Optional: Accessories like scarves or hats made from fabric scraps.
Step-by-Step Tutorial
Step 1: Gather Your Materials
First things first, heading outside to collect your leaves is half the fun! I often like to bring along a basket or bag as I explore my garden or local park. Look for various leaf shapes, colors, and textures. Keep in mind that dried leaves are preferred, as they are easier to work with than wet leaves, which can turn mushy.
*Tip: If you're unsure about what types of leaves to use, consider collecting from different trees like maples, oaks, and birches. Each offers a unique shape and color.*
Step 2: Create a Base
Once indoors, it’s time to lay down your crafting table. Start by picking a leaf that will serve as the "body" of your Leaf Person (a larger leaf works great for this). Lay it flat on the table.
*Why This Matters: A sturdy base allows your Leaf Person to stand out and makes attaching other natural materials easier.*
Step 3: Forming Features
Now, let’s bring your character to life!
- Head: Choose a smaller leaf or a round stone for the head.
- Eyes and Mouth: With your markers, draw eyes and a mouth directly on the leaf or stone. Get creative! Bumpy acorns make fantastic heads, and you can use small twigs for eyebrows.
*Common Issues and Fixes: If your marker smudges or doesn't show well on certain surfaces, simple clear-drying glue can help to apply small pieces of paper or bits of leaf for more vibrant features.*
Step 4: Crafting the Limbs
Now that the face is set, let’s give your Leaf Person some arms and legs!
- Use twigs—cut them to the desired length.
- Attach the limbs by gluing them to the main body leaf.
*Here’s a tip: You can create the illusion of movement by arranging the arms differently—one raised as if waving can add personality.*
Step 5: Assemble the Character
Next, you can start assembling other elements. Attach smaller leaves for a skirt or cape, or use stones as shoes. Let your imagination run wild!
*Don’t be afraid to get creative—adding accessories from fabric scraps can personalize your Leaf Person even further!*
Step 6: Allow Time to Dry
Patience is key—let your creation dry completely. If using hot glue, supervise younger crafters closely!
*Why This Matters: Proper drying ensures that everything stays in place, preventing any accidental disassembly during the next exciting step.*
Step 7: Display and Celebrate Your Art
Once everything is dry, find a prominent place to display your Leaf Person. Whether it’s on the windowsill, as part of a centerpiece, or in the garden, they’ll make an eye-catching addition!
Variation: Leaf Families or Scenes
Feeling especially ambitious? You can create a family of Leaf People—a whole scene! Use different leaf sizes and colors to represent parents, children, or even pets. Introducing diverse characters can lead to storytelling opportunities that enrich the crafting experience.
Safety Tips
- Supervision: Always supervise young children when using scissors or hot glue guns.
- Material Check: Ensure that any leaves or materials used are free from pesticides or harmful chemicals.
Conclusion
Crafting Fall Leaf People has become a cherished tradition for my family and me. Each creation tells a story, and I hope this guide helps you enjoy this delightful craft as much as I do. So gather your leaves, unleash your creativity, and let the spirit of autumn inspire you!
Remember, crafting is all about the joy of the process, so don’t worry if things don’t turn out perfectly. Every Leaf Person carries a piece of your creativity and seasonal spirit, making them unique. Happy crafting!