Crafting Delight: How to Make Friendly Bat Roll Decor
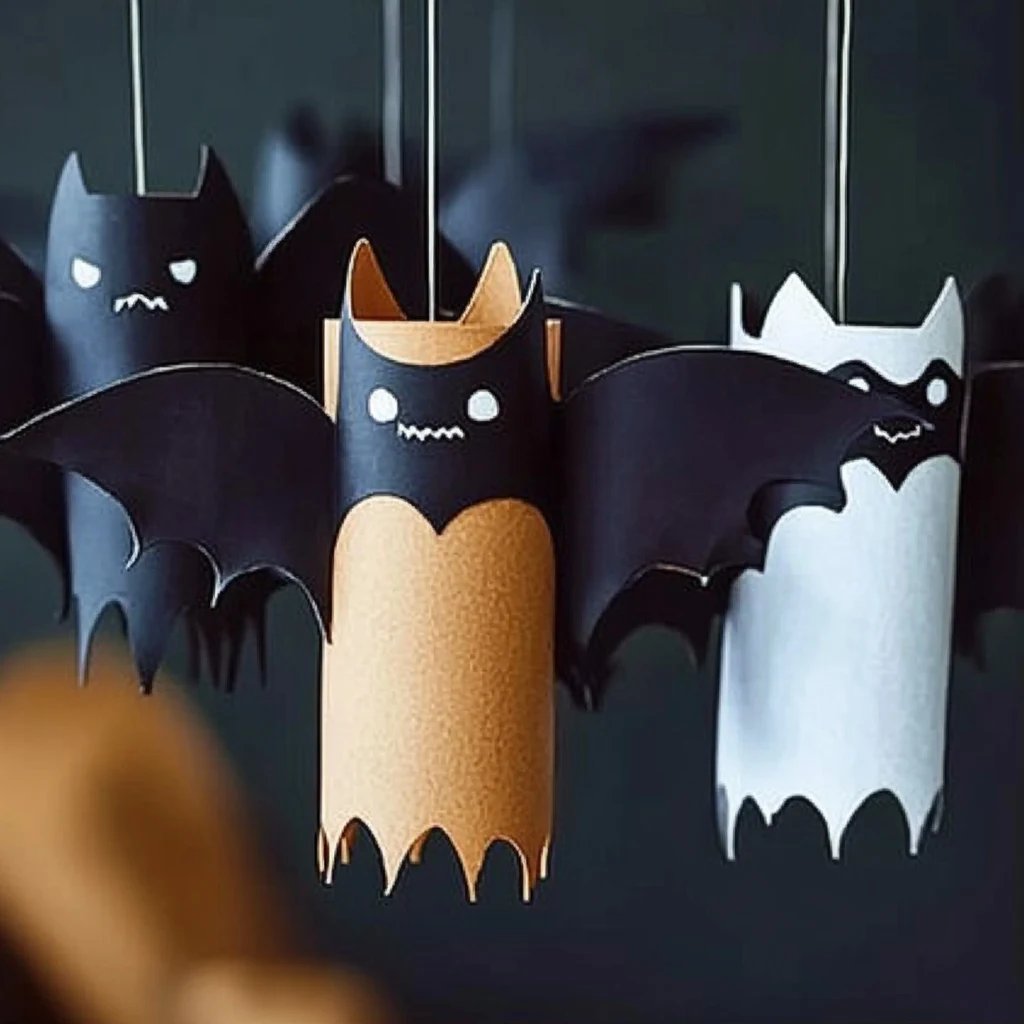
As a passionate crafter, nothing brings me more joy than creating seasonal decorations that can add a touch of whimsy to my home. Today, I’m excited to share with you the step-by-step process for making Friendly Bat Roll Decor—adorable little bat creatures that are perfect for your Halloween decor or even just a fun touch during the fall season. These charming little bats are not just eye-catching; they radiate festive spirit and charm, making them a popular choice for many homes and celebrations.
Why Are Friendly Bat Rolls So Popular?
With Halloween just around the corner, DIY decorations are at the forefront of many people’s minds. The Friendly Bat Roll Decor is especially loved for its easy assembly and the flexibility it offers for personalization; you can make them as spooky or as cute as you wish! Plus, these bats do a fantastic job of sparking conversations when friends and family come over to celebrate the season. They’re perfect to hang from ceilings, perch on mantles, or even give as gifts to your friends who love a little quirky charm in their lives.
Materials You’ll Need:
- Toilet Paper Rolls: The foundation of our bats. Reusing these is not only economical but eco-friendly too!
- Black Construction Paper: For creating the bat wings and features. You can also use other colors for a unique twist.
- Googly Eyes: These bring the bats to life and add a playful touch. Choose various sizes for added character.
- Scissors: Sharp, precise scissors will make cutting through paper much easier.
- Glue Stick or Hot Glue Gun: For securing the parts together. Hot glue dries faster, but be careful—it’s hot!
- Black Marker or Paint: To add details and enhance your bats’ expressions.
- String or Fishing Line: If you wish to hang your bats.
- Optional: Craft Foam, Glitter, or Markers: For extra embellishments.
Step-by-Step Tutorial to Make Your Friendly Bat Roll Decor
Step 1: Prepare the Roll
Start by gathering your toilet paper rolls. It might feel a bit strange to hoard these, but trust me, they’ll transform into something adorable! If you want to create a truly “batty” decor piece, you may want a few extra rolls on hand in case of mishaps.
Potential Pitfall:
One thing that can go awry here is the rolls becoming damp or wrinkled. Ensure they’re clean and dry!
Step 2: Cut the Wings
Using black construction paper, measure out a large rectangle (about 10 inches wide by 6 inches tall) and cut it out. Using the rectangle as a guide, sketch bat wings on the paper—think of a bat’s “W” shaped wings.
Important Note:
Be sure the wings are proportional to the roll. If they’re too large, they will dominate the roll; too small, and they won’t showcase the bat effect you’re aiming for.
Step 3: Attach the Wings
Once the wings are cut out, it’s time to attach them to the roll. You can either glue them directly to the sides or create little slits about halfway up each side of the roll to insert the wings into.
Tip:
If using glue, allow it ample time to dry before manipulating the bat. This ensures that the wings stay securely in place.
Step 4: Create the Bat Face
Now for the fun part—adding personality! Grab your googly eyes and glue them onto the front of the roll. Then, take your black marker or paint to draw a happy or spooky mouth, and if you’d like, add some fanged teeth for a little flair!
Safety Warning:
If you’re using a hot glue gun, remember to be cautious! The glue can cause burns, so work in a well-lit area and keep any curious little hands away.
Step 5: Add the Finishing Touches
If you’re feeling adventurous, you can embellish your bats with sparkly paint, glitter, or even foam shapes for ears. For an added touch of whimsy, I often glue little hand-cut fabric scraps to each bat to create tiny scarf-wearing bats, perfect for the fall!
Personal Anecdote:
I once made a whole batch of these bats at a Halloween crafting party, and my friends loved how each bat took on a character of its own through the different designs!
Step 6: Hang Them Up!
If you wish to hang your bats, cut a piece of string or fishing line and tie it securely around the top of the roll, allowing you to dangle them from ceilings or door frames.
Alternative Methods and Variations:
Feeling a little creative? Here are some variations you could try:
- Colored Bats: Use different card stock colors to make multi-colored bats. Add some blue or purple to mix it up!
- Glow-in-the-Dark: Use glow-in-the-dark paint or stickers for a suspenseful night-time effect.
- Mini Bats: If you want a more delicate touch, cut the tube into smaller sections and make mini-bats for decorating table settings.
Troubleshooting Common Issues
- Wings Drooping: If your wings droop down too much, consider reinforcing them with an additional piece of cardboard or adjusting the glue placement to help them stand upright.
- Glue Mess: If you accidentally create glue strings, don’t fret. Let them dry and trim them off with scissors.
- Non-Secured Parts: If parts aren’t sticking together properly, be liberal with your glue application and hold for a bit longer until secure.
Wrapping Up
As I wrap up this crafting session, I hope you’ve enjoyed the process of creating your very own Friendly Bat Roll Decor. There’s something uniquely satisfying about making decorations that not only look great but are also wonderfully customizable. This craft can be a delightful family activity, a solo project to unwind, or a fun group event to celebrate creativity!
Remember, crafting isn’t just about the end product; it’s about the joy of the journey. So gather your materials, tap into your creativity, and let those bats take flight in your home! Happy crafting, and may your Halloween be filled with friendly spirits!