Crafting Colorful Magic Treasure Rocks: A Delightful DIY Adventure
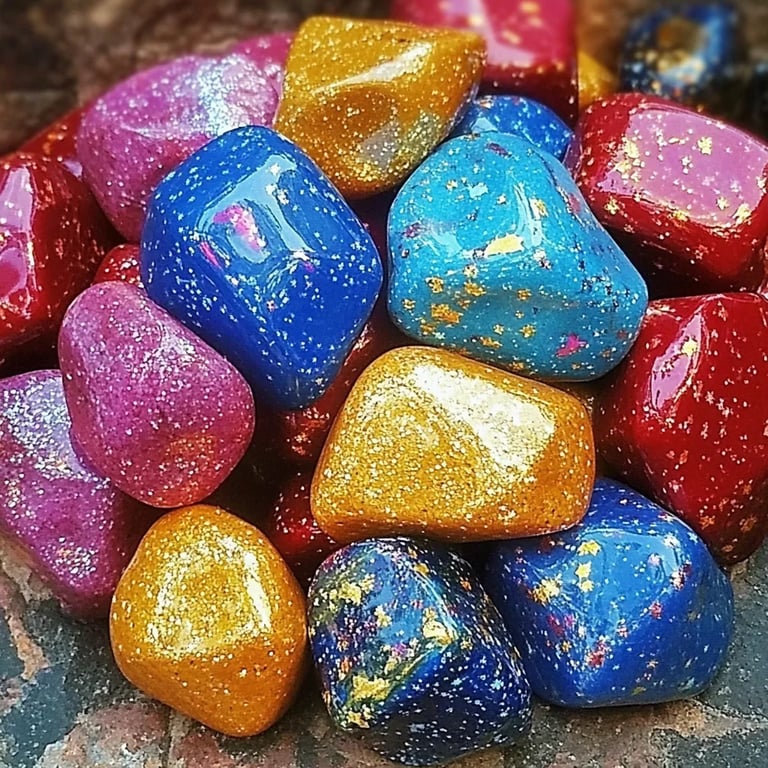
As a seasoned crafter with a passion for creating whimsical treasures, I am thrilled to share my favorite project: Colorful Magic Treasure Rocks. These enchanting little gems are not just visually stunning, but they also create magical moments for children and adults alike. Imagine transforming ordinary rocks into vibrant, sparkly treasures that can be used for everything from role-playing games to decorative pieces in your home.
But why are these treasures so popular? Perhaps it's the combination of nature and creativity that resonates with so many people. Not to mention, they’re perfect for various occasions—ranging from birthday parties, playdates, or even as thoughtful handmade gifts. Plus, as an added bonus, this craft is an excellent way to engage children in a fun-filled activity that fosters creativity and fine motor skills.
Step-by-Step Guide to Creating Colorful Magic Treasure Rocks
Now, let’s dive into the process of making these eye-catching magical rocks together! You’ll be amazed at how simple it is to turn dull stones into spectacular treasures using affordable and easily accessible materials.
Materials Needed
Before we get started, here’s what you’ll need:
- Smooth, rounded rocks (you can find these at craft stores or in your backyard)
- Acrylic paints (vibrant colors of your choice)
- Glitter (for that extra magic!)
- Paintbrushes (various sizes)
- Sealant (like Mod Podge or clear acrylic spray)
- Plastic cups or palettes for mixing paint
- Newspaper or a drop cloth to protect your workspace
- Optional embellishments: sequins, gems, or rhinestones
Step 1: Prepare Your Workspace
Creating a comfortable crafting environment is vital. Begin by laying down newspaper or a drop cloth to protect your workspace. Gather all your materials so that you won't have to rush around in the middle of your project. Trust me, a tidy workspace sets the stage for creativity to flow!
Pro Tip: For easy cleanup, keep a damp cloth or paper towel nearby to wipe any spills.
Step 2: Choose and Clean Your Rocks
Select smooth rocks that fit comfortably in your hand—you can find these at craft stores, gardens, or rivers. It's vital to clean them with soap and water to remove any dirt or debris, ensuring paint adheres well.
Troubleshooting: If you notice stubborn dirt, try scrubbing with a toothbrush and rinsing thoroughly. Let them dry completely before moving on to the next step!
Step 3: Base Coat
Using a larger paintbrush, apply a base coat of acrylic paint in your desired color. This color will act as the backdrop for the sparkles and designs you plan to add. Acrylic paints are perfect for this project because they dry quickly and cover well.
Key Insights: Use bold colors for a vibrant effect, or pastel hues for a softer look. Don't forget to paint the sides of the rocks for a more polished finish!
Step 4: Create Your Design
Let your imagination run wild! After your base coat has dried (this usually takes about 15-30 minutes), it's time to add details. You can draw fun patterns using smaller brushes, paint abstract designs, or even create themed rocks (like galaxy patterns, pirate treasure maps, or whimsical landscapes).
Common Mistake: If you rush this process, the different layers of paint might blend together instead of standing out. Allow each layer to dry before applying the next!
Step 5: Sprinkle in Some Glitter
While the paint is still slightly wet, shake or sprinkle glitter over the painted surface. This is where the “magic” happens! The glitter clings to the wet paint, adding an enchanting sparkle.
Caution: Glitter can get everywhere! Cover your workspace and wear an apron to prevent it from getting on your clothes or other surfaces.
If you want a more controlled sparkle, you can use a small paintbrush to apply a thin layer of glue in specific areas before dusting them with glitter.
Step 6: Seal Your Masterpiece
Once everything has dried completely, it’s time to seal the rocks. This step not only protects your vibrant designs but also enhances the colors and keeps the glitter in place. Use a brush to apply a thin layer of Mod Podge or spray acrylic sealant all over each rock.
Important Note: If using a spray sealant, make sure to do this outside or in a well-ventilated area, and follow the manufacturer's directions for safety.
Step 7: Show Off Your Magic Treasure Rocks
Your colorful magic treasure rocks are now ready to be displayed! Whether you decide to place them indoors as décor, use them in games, or give them as gifts, your creativity will surely shine.
Creative Variations and Tips
- Themed Rocks: Create a set of rocks that follow a theme! For example, you could make a nature-inspired collection using browns, greens, and blues, or a whimsical fairy tale set with bright pinks and purples.
- Interactive Rocks: Consider putting numbers or letters on the rocks for an interactive game that teaches kids counting, spelling, or colors.
- Personal Touches: Incorporate small stickers or drawings that hold special meaning to make them unique gifts.
Safety Warnings
Always supervise children while they’re crafting, especially when using materials like glitter, paint, and sealant. Make sure they wash their hands afterward to avoid ingesting any paint or chemicals.
Final Thoughts
Creating colorful magic treasure rocks is a wonderful way to combine creativity with nature. Remember, crafting is all about exploring your imagination; don’t be afraid to make mistakes! Each beautifully imperfect rock holds its charm.
Let your personality shine through these creations, and most importantly, have fun! I hope this guide inspires you to embark on your crafting adventure and create your very own magic treasures that bring joy and sparkle into your life. Happy crafting!