Crafting Colorful Magic: How to Make Spiced Colorful Salt Jars
Hello fellow crafters! Today, I’m excited to share with you a delightful project that combines artistry with practicality: Spiced Colorful Salt Jars! If you’ve ever walked into someone’s kitchen and marveled at the vibrant, fragrant jars lining their shelves, this project is for you. Not only are these colorful salt jars visually stunning, but they also infuse your dishes with a burst of flavor and aroma. They're perfect for seasoning your culinary creations or as thoughtful, handmade gifts for friends and family.
Why Spiced Colorful Salt Jars?
Spiced Colorful Salt Jars have become increasingly popular in the crafting and cooking communities. Their aesthetic appeal and versatility make them a perfect addition to any kitchen or dining table. Whether you're cooking for yourself, hosting a dinner party, or simply looking to brighten up your space, these jars fit the bill. Plus, they’re a wonderful way to use up spices and herbs that you may have lying around, turning your kitchen remnants into fabulous decor.
I began my journey with colorful salt jars almost five years ago when I wanted to give a personal touch to a housewarming gift. It sparked a passion that has since transformed my kitchen into a gallery of spices and flavors. So, grab your crafting supplies and let’s dive into this fun project!
What You'll Need
Before we embark on our crafting adventure, let’s gather our materials. Here’s a comprehensive list:
- Salt: Choose a base salt — table salt, sea salt, or kosher salt work beautifully. You can also try Himalayan pink salt for a lovely color.
- Dried Herbs and Spices: Think paprika, turmeric, dried basil, cinnamon, or even chili powder for a little kick!
- Food Coloring: Use natural food coloring if you’d like to keep it organic; otherwise, standard food coloring works well.
- Jars: Small glass jars with lids—baby food jars, spice jars, or mason jars are excellent choices.
- Mixing Bowls: For your colorful concoctions.
- Spoons: For mixing and filling.
- Parchment Paper: To catch any spills.
- Labels: For marking each jar if you like.
- Funnel: Optional but helpful for transferring salt to jars.
Step-by-Step Tutorial
Step 1: Prepare Your Space
First things first, set up your crafting space. I like to cover my workspace with parchment paper to easily clean up any spills. It’s essential to have some good lighting to see the vibrant colors you’ll be creating. Trust me, the happier your crafting space, the more enjoyable the process will be!
Step 2: Decide Your Flavors and Colors
Think about what combination of spices you want to use. I often blend different herbs and spices for a unique flavor. Here are a few suggestions that have worked for me:
- Italian Blend: Oregano, basil, garlic powder, and a hint of red pepper flakes.
- Sweet Spice Blend: Cinnamon, nutmeg, dried ginger, and a touch of sugar for sweetness.
- Spicy Fiesta: Chili powder, smoked paprika, and cayenne pepper.
Step 3: Make the Colored Salt
Now comes the fun part! In a mixing bowl, add your base salt. For every cup of salt, add approximately 1 teaspoon of food coloring. Mix it well with a spoon to ensure the color distributes evenly. At this stage, you might think, “Wow, this looks so pale!” But don’t worry—the color will deepen as it dries.
Here’s where things might go a bit awry: If you add too much food coloring, your salt may clump together instead of being nice and granular. If that happens, just add more salt to loosen the mixture. Remember, the goal is to achieve a well-blended, slightly wet-looking salt—it’ll eventually dry out.
Step 4: Incorporate the Spices
Once you’re satisfied with the color, it’s time to add the herbs and spices! Each combination will create a different flavor profile and visual appeal. For instance, if you're making an Italian blend, the green from basil and oregano against the white salt can be striking!
Mix thoroughly, ensuring the spices are evenly distributed. Take a moment to smell your mixture—this is where the magic happens!
Step 5: Fill the Jars
Using a funnel (if you have one), carefully fill your jars with the colorful salt blend. Leave a little space at the top to allow for a nice presentation when you pop the lid on or add a label. If you spill a bit, don’t fret! It’s all part of the fun, and you can simply clean it up later with a damp cloth.
Step 6: Labeling Your Jars
Now comes the final touch—labeling! Not only does this add a professional touch, but it also makes it easy to remember which blend you’ve created. I love using decorative stickers or handwritten labels for that personal flair. You can even add the date so you can remember when you crafted each batch.
Step 7: Let Them Dry
Once your jars are filled and labeled, set them out to dry for at least 24 hours. This drying process ensures that the salt hardens and maintains its texture. After drying, your jars should be vibrant and aromatic, ready to spice up your culinary creations!
Tips and Tricks
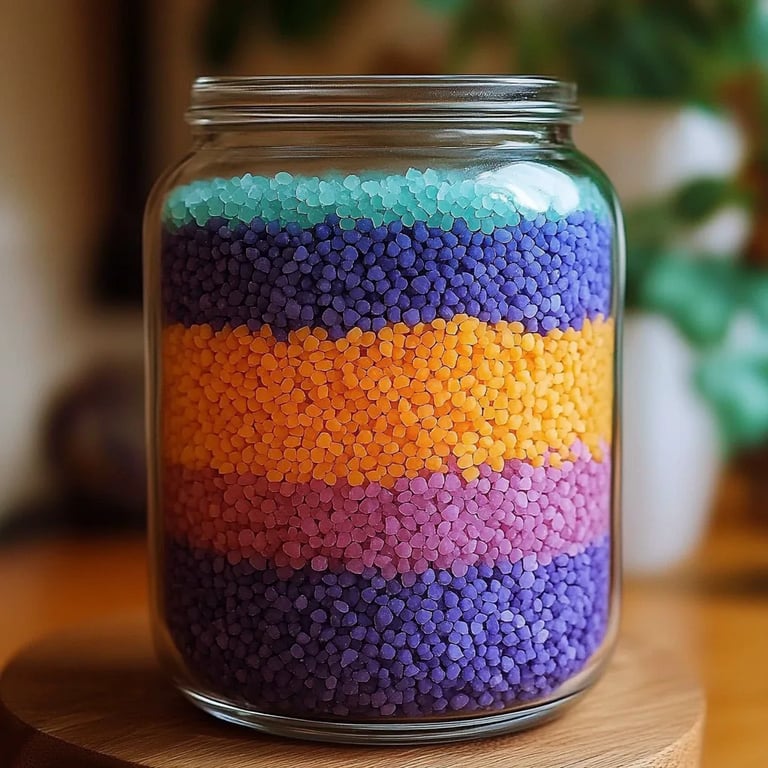
- Experiment with Colors: You can create vibrant rainbow layers in bigger jars by dying and layering different colored salts. It’s not only fun but also incredibly visually appealing.
- Safety First: If you're using essential oils for scent, make sure they're safe to consume and use only a drop or two mixed well with your salt mix.
- Storage: Store your jars in a cool, dry place to maintain flavors. You can also seal them with an airtight lid if you’re in a humid area.
- Alternative Ingredients: If you can’t find a spice at your local store or want to make a twist on my recipes, try using vegetable powders, like beet or spinach powder, for natural coloring.
- Holiday Variations: Consider adding seasonal spices like cloves and star anise during the winter holidays for a festive touch.
Conclusion
And there you have it—your very own Spiced Colorful Salt Jars! I hope this crafting journey has ignited your creativity and inspired you to get in the kitchen. Whether you keep these gorgeous jars for yourself or gift them to someone special, they are sure to add a touch of color and flavor to your life. Remember, every jar has a story, just like every spice tells a tale of its origin.
As you dive into this project, embrace the process, have fun, and don't be afraid to experiment. Happy crafting! If you have any questions or stories to share about your salt jar creations, I’d love to hear them in the comments below. Happy mixing!