Crafting Chromatography Coffee Filter Butterflies: A Step-by-Step Guide
Hello fellow crafting enthusiasts! Today, I’m excited to share with you one of my favorite, colorful, and educational crafting projects: Chromatography Coffee Filter Butterflies. This project not only allows you to create stunning decorations but also serves as a fun science experiment that can be enjoyed by kids of all ages. Whether for a classroom activity, a rainy day at home, or a creative afternoon with friends, these butterflies bring a splash of color and whimsy into our lives.
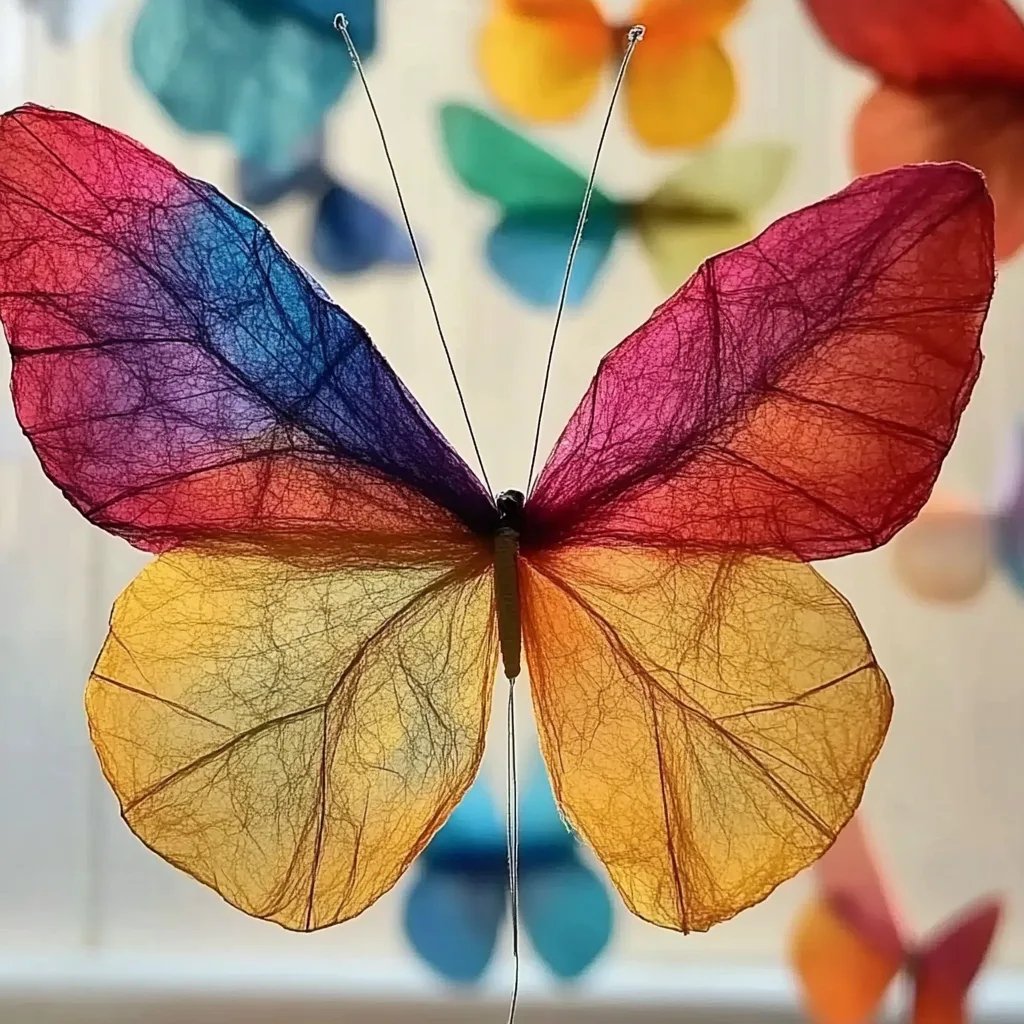
What are Chromatography Coffee Filter Butterflies?
Chromatography Coffee Filter Butterflies are vibrant, artistic creations made from simple coffee filters, water-based markers, and a bit of science. The term “chromatography” refers to a method used in laboratories to separate mixtures, which is exactly what we’re doing when we use markers and water to create beautiful patterns on the filters. The resulting butterflies can be hung as decorations, used in educational settings, or simply admired for their intricate designs.
Why are they so popular? This project beautifully combines art and science, making it a favorite among educators and parents alike. The vibrant colors and the transformation of the filters into butterflies spark creativity while subtly introducing the concepts of chromatography—a win-win in my book!
When to Use This Craft
You can craft these butterflies at any time! Consider:
- Art and Science Classes: A great way to engage students in both subjects.
- Birthday Parties or Playdates: An entertaining and collaborative activity.
- Seasonal Decorations: Create a flutter of butterflies for spring or summer decor.
- Family Bonding Time: Transform a simple afternoon at home into a creative journey.
Materials Needed
Before we dive into the step-by-step tutorial, let’s gather our supplies. Here’s what you’ll need:
- Coffee Filters: One filter per butterfly.
- Water-Based Markers: A mix of colors to make your butterflies vibrant. I love using fine-tipped markers for detailed designs.
- Water Spray Bottle: For activating the colors.
- Pencils or Pipe Cleaners: To create the butterfly body.
- Scissors: For cutting the filters into shape.
- Paper Towels: For drying.
- Protective Covering: An old newspaper or tablecloth to protect your workspace.
Safety Warning
Make sure to work in a well-ventilated area to avoid inhaling any fumes from the markers, and remember to supervise younger children to prevent any accidental ingestion of materials.
Step-by-Step Tutorial
Step 1: Preparing Your Workspace
Begin by covering your workspace with old newspapers or a tablecloth. This will prevent any marker stains on your table. Gather all your materials so they are within reach.
Step 2: Designing Your Filters
Take a coffee filter and lay it flat on your workspace. Using the water-based markers, start drawing patterns on the filter. You can create dots, swirls, or even shapes. The key here is to use a variety of colors—this is what will make your butterflies really pop!
Tip: Pour your creativity into it! The more colors and designs you use, the more unique your butterflies will be.
Step 3: Activating the Colors
Now comes the magical part! Using your water spray bottle, lightly mist the coffee filter with water. Be careful not to oversaturate it. You want just enough moisture to help the colors run and blend but not so much that the filter tears.
What Could Go Wrong? If you spray too much water, your colors may bleed too much and end up muddy. If this happens, simply set the filter aside to dry, and then start again with lighter mists.
Step 4: Allowing to Dry
After misting, let your coffee filter dry completely. This might take about 10-15 minutes. If you're in a hurry, you can use a blow dryer on a cool setting to speed up the drying process.
Step 5: Creating the Butterfly Form
Once the filter is dry, fold it in half so that it resembles a semicircle. Then you’ll need to pinch the center and twist it to form the butterfly body. You can use a pencil or a pipe cleaner to secure this twist. If using a pipe cleaner, simply wrap it tightly around the twisted section and leave the ends long to make antennae.
Step 6: Finishing Touches
Once your butterfly form is created, gently fan out the wings. If you want, you can also add more details with markers to enhance the body or add details to the wings.
Alternative Method: If you don't have pipe cleaners, you can use small dowels or even twisty ties from bread bags to secure the butterfly's body.
Step 7: Displaying Your Butterflies
Your Chromatography Coffee Filter Butterflies are ready to shine! Hang them from the ceiling using fishing line or tape them to a wall as a colorful display. You might even want to create a mobile or a garland with multiple butterflies.
Personal Anecdotes & Creative Variations
One of my favorite memories associated with this project was when I made these butterflies with my niece during a cozy weekend visit. We turned the living room into our art studio, and I was amazed at the creativity she displayed. It was incredible to see how differently our butterflies turned out despite using the same materials.
Creative Variations to Try:
- Theme Your Butterflies: Use seasonal colors for autumn leaves, floral patterns for spring, or even shades of a favorite superhero!
- Add Glitter: For an extra touch of whimsy, sprinkle some glitter on wet markers before they dry.
- Create a Mixed-Media Display: Incorporate these butterflies into a larger art piece, like a painted canvas or a door wreath.
Final Thoughts
Creating Chromatography Coffee Filter Butterflies is more than just a crafting project; it’s an opportunity to explore colors, patterns, and scientific principles in a fun way. I hope my insights, techniques, and stories will inspire you to embark on your crafting journey with confidence. Remember, crafting is all about enjoying the process and celebrating your creativity, so let your imagination take flight!
Feel free to share your butterfly creations in the comments below; I would love to see how your colorful ideas unfold! Happy crafting! 🦋