Crafting a Clay Leaf Bowl: A Step-by-Step Guide to Nature-Inspired Artistry
Creating a clay leaf bowl is more than just a craft; it’s an opportunity to connect with nature and express your creativity. These beautifully textured bowls are not only visually stunning but also functional, as they can serve as catchalls for keys, decorative pieces, or even as serving bowls for special occasions. The popularity of leaf bowls has surged in recent years, thanks to their unique appearance and the trend toward handmade home décor. Each piece is a distinct reflection of nature, making them perfect gifts or cherished home additions.
As someone who has spent countless hours perfecting this craft, I’ve gathered insights, tips, and tricks along the way that I’m excited to share with you. Together, we'll create a stunning leaf bowl that captures the beauty of the outdoors and brings a touch of elegance to your space.
Materials You’ll Need
Before diving into the creation process, let’s gather all the materials you’ll need:
- Air-Dry Clay or Polymer Clay: These are the primary materials for your bowl. Air-dry clay is user-friendly and doesn’t require any baking; polymer clay, on the other hand, can be baked in the oven for durable results.
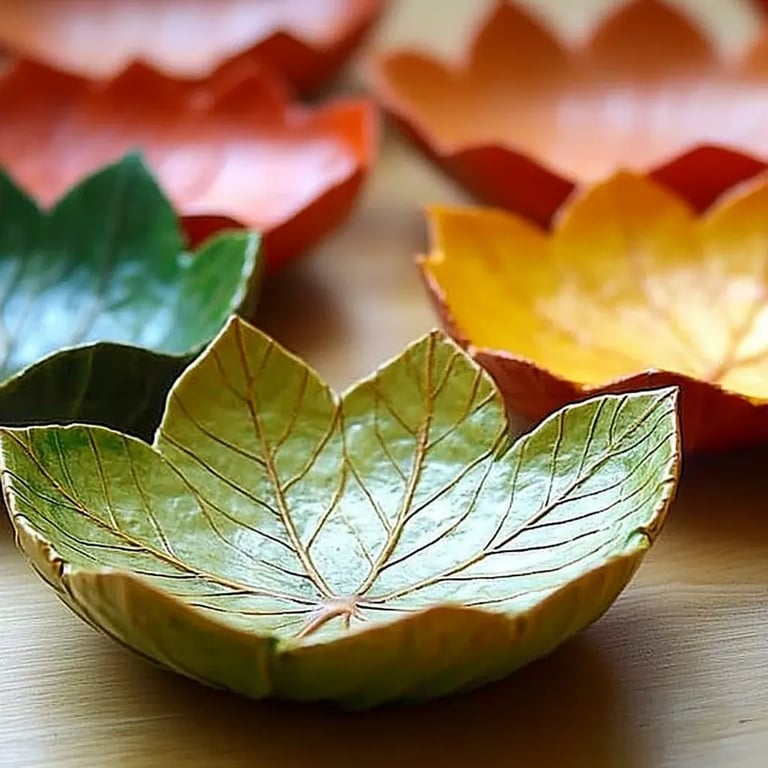
- A Real Leaf: Choosing a leaf with a prominent vein structure, like a magnolia or hosta leaf, will enhance the texture of your bowl.
- Plastic or Wooden Rolling Pin: To flatten the clay evenly.
- Craft Knife or Scalpel: For cutting and detailing.
- Bowl or Mould: To shape your clay. A small bowl or any rounded object will work.
- Water: To smooth the edges and attach pieces.
- Acrylic Paint or Sealer (optional): For finishing touches.
Why This Craft Matters
Crafting a clay leaf bowl enchants me because it intertwines art with nature. Every leaf has its story, and when you create a bowl from a leaf, you’re preserving a piece of that story. This project can also serve as a calming and meditative experience, allowing you to focus and connect with the materials. Not to mention, the end result is a unique piece that can spark conversations and admiration in your home.
Step 1: Preparing Your Workspace
Before you begin, make sure to set up a clean, flat workspace. A dedicated crafting area not only helps keep you organized but also prevents any distractions. Lay down some newspaper or a plastic sheet to catch any clay residue.
*Pro Tip: Wear an apron or old clothes. Clay can be messy, and you’ll thank yourself later for not worrying about stains!*
Step 2: Selecting and Preparing Your Leaf
Choose a leaf that captivates your eye. Ideally, it should be relatively large and have a defined surface texture. Rinse it under water to remove any dirt and let it dry thoroughly before use.
Why This Step Matters: The details on the leaf are what will transfer onto your clay, providing a unique texture for your bowl.
Step 3: Flattening the Clay
Take your air-dry or polymer clay and knead it for a few minutes to make it pliable. Then, using your rolling pin, roll out a piece of clay to about a quarter-inch thick. Larger pieces will create a bigger bowl, so consider the final size you want.
*Common Mistake: If the clay is too thin, it may break easily or not hold its shape. Keep an eye on the thickness!*
Step 4: Impressing the Leaf
Once you have rolled out the clay, lay your leaf on top and press down firmly. Use your fingers to trace the veins and edges, ensuring you create enough detail to capture the essence of the leaf. This step is crucial, as the impression is what will give your bowl its character.
Fixing Mistakes: If the clay collapses or the imprint isn’t clear, don’t worry. You can always re-roll the clay and try again. Just make sure to keep the rolling pin dusted with a little cornstarch or flour to prevent sticking.
Step 5: Shaping the Bowl
Gently peel the leaf away from the clay. You should see the textured imprint left behind. Now it’s time to shape your bowl. Carefully place the clay piece over your chosen bowl or mould. Use your hands to press the clay into the curved shape, making sure the edges are smooth.
*Tip: Keep a small bowl of water nearby. Wetting your fingers can help smooth any rough edges.*
Step 6: Drying and Hardening
Allow your bowl to dry for 24-48 hours (if using air-dry clay) or follow the oven instructions if you’re using polymer clay. Ensure it’s placed in a well-ventilated area. Keeping the bowl out of direct sunlight can help prevent any cracking.
*Safety Warning: If using polymer clay, always follow the manufacturer’s baking instructions carefully to avoid burning the clay or yourself.*
Step 7: Painting and Sealing (Optional)
Once fully dried and hardened, you can add a splash of color to your leaf bowl. Acrylic paint works well for adding highlights or a base coat. After painting, consider sealing it with a clear acrylic spray for added durability and water resistance.
Creative Variations and Personal Touches
Now that you have the basic leaf bowl down, here are some creative variations to consider:
- Color Palette: Use different colors based on the seasons. Bright greens for spring, vibrant oranges for fall, or earthy browns for winter.
- Mixed Media: Incorporate other materials like beads, stones, or fabric to embellish your bowl further.
- Themed Bowls: Create bowls representative of specific themes, such as autumn leaves or tropical foliage.
Conclusion
As we wrap up this crafting journey, I urge you to let your creativity flow. Making a clay leaf bowl is a rewarding experience that allows you to create something truly unique. Remember, every mistake is just an opportunity to learn and refine your technique.
The joy of crafting comes not just from the finished product but from the process itself. So, gather your materials and let your imagination take flight. I can’t wait to hear about your adventures in crafting your own stunning clay leaf bowl! Happy crafting! 🌿