Crafting a Beach Memory Jar: A Step-by-Step Guide to Capturing Summer Moments
As a passionate crafter and memory keeper, I’ve always believed in the importance of cherishing life's beautiful moments. One delightful way to do this is through a Beach Memory Jar. This craft not only provides a unique way to suspend time through tiny treasures but also serves as an artistic talking point for your home. Whether you're commemorating a special day at the beach, a family vacation, or a favorite summer memory, this creative project is sure to capture the essence of your experiences.
Why a Beach Memory Jar?
The Beach Memory Jar has gained popularity for several reasons. It allows us to collect small mementos—like seashells, dried seaweed, or even sand—that remind us of our time spent at the beach. At its essence, this craft is about preserving memories, sparking nostalgia, and creating a unique decor piece that reflects our travels. Ideal for summer crafting, these jars can be made after returning from your vacation or as a fun project during beach outings with your family or friends.
What You'll Need
Before we dive into the steps of creating this heartfelt craft, gather these simple materials:
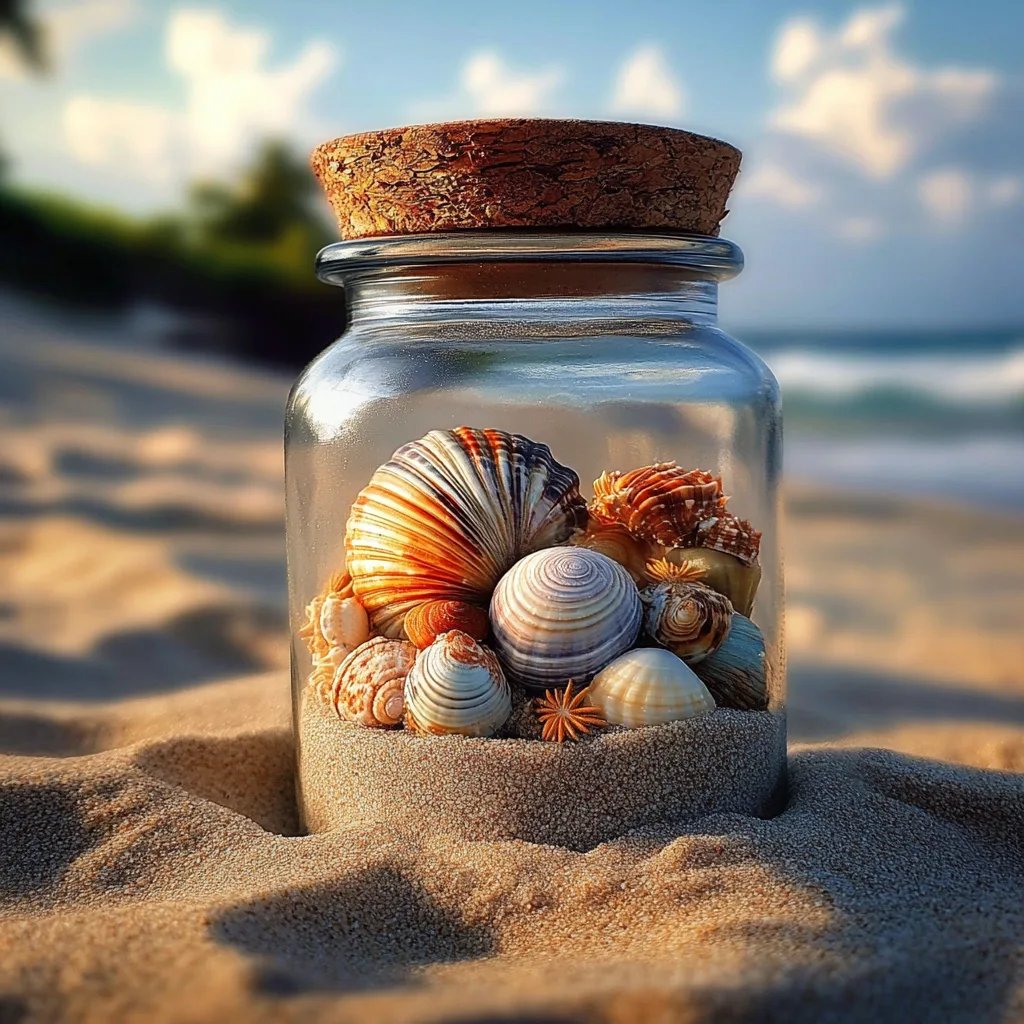
- A Clear Glass Jar: Choose any size or shape that suits your style. An old mason jar or even a repurposed food jar works perfectly.
- Sand: Collect it from your favorite beach or create a colorful layer using craft sand if you don't have access to a beach.
- Seashells and Sea Glass: Gather a variety of shapes and colors to make your jar visually appealing.
- Decorative Items: Include tiny beach-themed trinkets like starfish, dried flowers, or even a small photo framed in a mini size.
- Labeling Materials: Use tags, stickers, or labels to jot down the date or a few memories associated with your beach trip.
- Adhesive (Optional): Strong glue or mod podge for decorating your jar if you wish.
- Twine or Ribbon (Optional): For embellishing the jar’s neck or creating a lovely bow.
Step-by-Step Tutorial
Now, let’s get into the details of creating your own Beach Memory Jar.
Step 1: Prepare Your Jar
Make sure your jar is clean and dry. If using an old jar, give it a thorough wash to remove any labels or residue. This step is crucial because any leftover glue will detract from the clean, artisan look of your final product.
Tip: If you can't get the label off easily, soak the jar in warm soapy water for a while. This often loosens the adhesive.
Step 2: Layer the Sand
Start with a base layer of sand. I usually pour in about an inch of sand, creating a foundation that signifies the beach. You can vary the colors by mixing sands from different beaches.
Why does this matter? The sand creates a backdrop for your memories, and layering it allows you to have more dimension in the jar, making it look visually appealing.
Possible issue: If your sand is too fine and tends to drift to the sides or out of proportion, consider dampening it slightly, as this will aid in its compactness.
Step 3: Add Shells and Treasures
Begin layering your seashells, sea glass, and other decorative items. I often place larger shells at the bottom for stability and then scatter smaller ones on top. It's all about creating an attractive arrangement.
Here’s where you can personalize it: Feel free to add in notes or small mementos, like a ticket stub or a piece of coral. These elements provide a glimpse into your memories, encouraging conversation and storytelling.
Step 4: Personalize with Labels
Using tags or a piece of paper, write down the date and a few words about the significance of the visit—this could include where you went, who you were with, and any special moments.
This step is essential because it turns the jar into a narrative rather than just a collection of items. Affix the label using twine, glue, or simply tuck it into the jar.
Step 5: Seal and Decorate
If you're feeling extra crafty, you can decorate the lid of the jar with washi tape, paint, or even a layer of jute twine around the neck of the jar. This not only adds a personal touch but also enhances the beachy aesthetic.
Note: If you choose to paint the jar lid, make sure the paint is fully dry before sealing the jar to avoid any smudges.
Alternative Methods or Ingredient Substitutions
If you don’t have access to real seashells or sand, consider:
- Craft Sand: You can purchase sand in various colors from craft stores, which is perfect for layering.
- Faux Shells: Many craft stores carry simulated seashells that can add a consistent color scheme.
- Dried Flowers: Add in dried flowers or other natural elements like pebbles or small pine cones, drawing on the colors of the natural landscape.
Potential Pitfalls and Solutions
Crafting is a wonderful journey, but things can go wrong. Here are common mishaps to watch out for:
- Overfilling Your Jar: If you pack the items too tightly, the aesthetics may look cluttered. Step back and make adjustments if necessary.
- Items Floating: If they shift after sealing, gently shake the jar to settle them back into place.
- Labels Smudging: If your pen smudges, use a permanent marker or print your labels for clean, crisp text.
Closing Thoughts
Creating a Beach Memory Jar is more than just a fun craft; it’s a meaningful way to celebrate and preserve precious moments. I hope this guide empowers you to express your creativity and capture the beautiful nuances of your beach adventures. Remember, there’s no right or wrong way to craft. Allow your personality to shine through every layer and every shell; your unique experiences and memories deserve to be highlighted.
So gather your memories, your seashells, and your creative spirit. Let’s make something beautiful together! If you have any questions or need further inspiration, feel free to reach out—I'd love to help you along your crafting journey! Happy crafting!