Crafting a Baking Soda Glowing Ghost Jar: An Enchanting DIY Adventure
As a passionate crafter, I've always loved creating decorations that add a hint of magic to my home, especially during the festive season. Among my favorites is the Baking Soda Glowing Ghost Jar. This enchanting project combines simplicity, whimsy, and a dash of science to create a glowing ghostly visage that lights up your space—perfect for Halloween, spooky parties, or even just to inject some charm into your home.
In this article, I'll guide you through a detailed step-by-step process to make your very own Baking Soda Glowing Ghost Jar. It's not only an enjoyable crafting experience, but it's also a fabulous way to engage with family and friends. Are you ready? Let’s jump into our ghostly adventure!
What is a Baking Soda Glowing Ghost Jar?
A Baking Soda Glowing Ghost Jar is a delightful craft that combines essential baking soda and glow-in-the-dark paint (or an alternative) to create an ethereal, glowing ghost inside a jar. The light emitted adds an enchanting ambiance, making it ideal for Halloween decor, spooky dinner parties, or just as a special nightlight. The best part? It's kid-friendly, allowing young crafters to join in the fun, making it a wonderful family project.
Why is it Popular?
The popularity of Baking Soda Glowing Ghost Jars stems from their simple materials, the engaging crafting process, and the delightful ambiance they create. Plus, they allow for creative expression! You can adjust design elements to create unique ghostly designs that match your personality and decor. Crafting these jars also taps into the fun of DIY and the satisfaction of making something special with your hands.
Materials You’ll Need
Before we get started, here’s a list of everything you’ll need. I always recommend gathering your materials ahead of time; it keeps the process fluid and enjoyable!
Basic Materials:
- Glass jars (Mason jars, recycled jars, etc.)
- Baking soda (1 cup)
- Glow-in-the-dark paint (or alternative phosphorescent materials)
- Water (1/2 cup)
- Plastic eyeballs (optional) (These can be found in most craft stores or the Halloween section)
- Black permanent markers or paint (for drawing spooky faces)
- Paintbrushes (for applying the glow-in-the-dark paint)
Optional Extras:
- LED tealight candles (to illuminate the jars further)
- Glitter (for a touch of sparkle)
- Natural elements (like twigs or leaves for added decoration)
Safety Notes:
When working with glow-in-the-dark paint, make sure to follow the manufacturer’s safety guidelines. Ensure proper ventilation and consider wearing gloves to avoid skin contact with paint.
Step-by-Step Tutorial
Step 1: Prepare Your Jar
First, you want to start with a clean workspace. Wash your glass jar thoroughly and allow it to dry. This step ensures that there are no residues that could interfere with the materials you will apply later.
Tip: Remove any labels easily by soaking the jar in warm, soapy water. If any sticky residue remains, a little rubbing alcohol on a cloth can help!
Step 2: Mix the Ghostly Base
In a separate bowl, mix 1 cup of baking soda with about 1/2 cup of water. Stir the mixture until you achieve a paste-like consistency.
Why This Step Matters: Baking soda acts as both a fantastic base and texture in our ghostly concoction. It helps to give your ghost structure while also enhancing the glowing effect later on.
What Could Go Wrong: If the mixture is too watery, it won’t stick well to the jar. If it’s too thick, it won’t smooth out. Aim for a peanut butter-like consistency!
Step 3: Apply the Mixture
Using your hands or a spatula, apply the baking soda mix to the outer surface of the jar in ghostly clumps. Let your creativity flow! Don’t worry about making it perfect; a lumpy texture gives it a more ghost-like appearance.
Tip: Blend in some black glitter or spooky sequins at this stage for added interest.
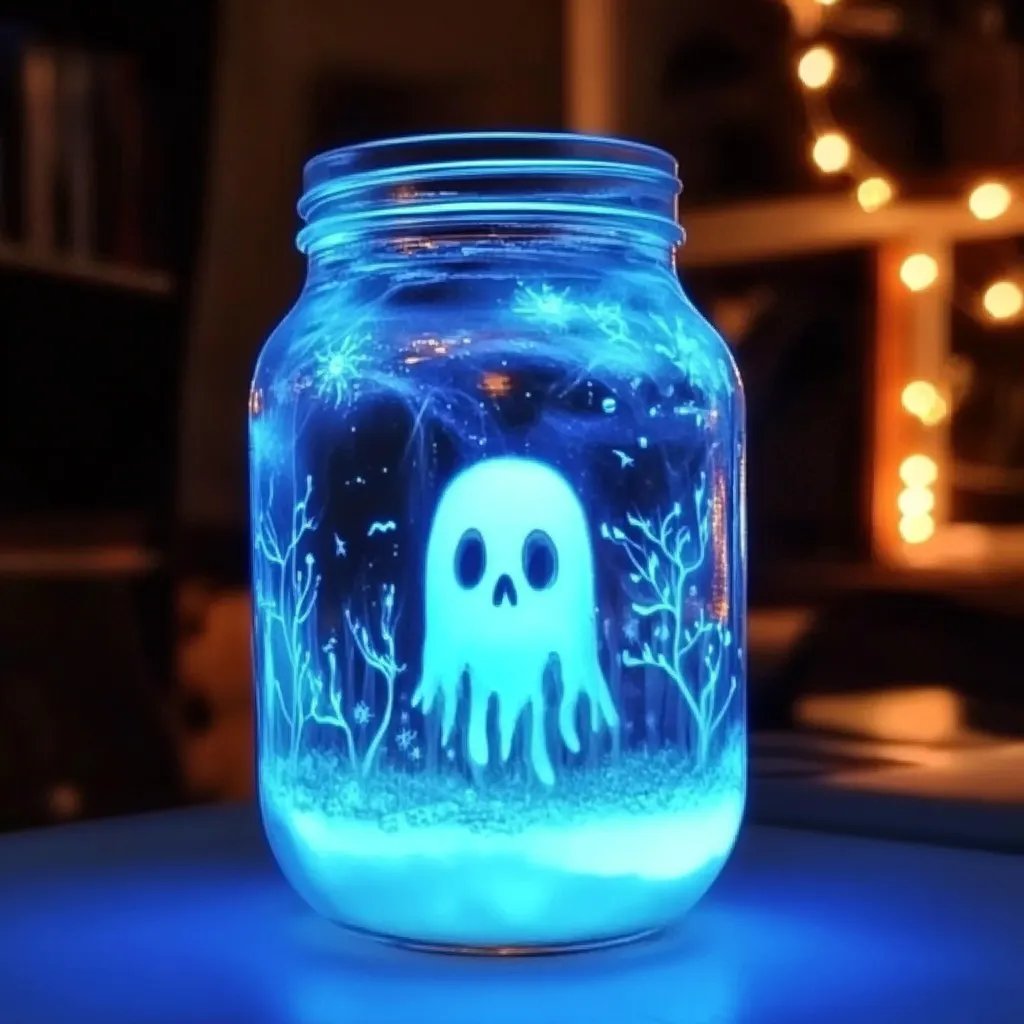
Step 4: Create the Ghostly Face
Once your jar is coated, it's time to add a face. You can either use black paint and a brush or, for a less messy option, draw with a black permanent marker. Create a ghoul-esque visage—think wide eyes and a spooky smile!
Personal Anecdote: The first time I attempted this, I drew too small of a face, and it got lost against the baking soda mixture. Make sure your face stands out!
Step 5: Paint with Glow-In-the-Dark
After your base has dried for about an hour, it’s time to bring your ghost to life! Apply 1-2 coats of glow-in-the-dark paint over the entire surface. Always follow the instructions on the can, as each brand might vary in application methods and drying times.
Why It’s Important: The glow will only be effective if you have applied an adequate layer of paint. More layers often yield a better glow!
Step 6: Let Your Ghost Dry
Allow your jar to dry completely, preferably overnight. This drying time allows our ghost to soak in that beautiful phosphorescent glow.
Step 7: Optional Lighting Enhancement
For an ethereal touch, drop in an LED tealight candle at the bottom of your jar once the paint is dry. It enhances the glow and gives off a spooky flickering light.
Word of Caution: If using a real candle, ensure the baking soda layer is heat-resistant to prevent any mishaps.
Troubleshooting Common Issues
- If the glow isn’t vibrant: Consider re-coating the jar with extra glow-in-the-dark paint. Ensure the paint has been properly charged by exposing it to light.
- If the baking soda mixture is peeling: It might need more time to dry. If it completely detaches, you can reapply it and paint over it after it sets.
Creative Variations
Feel free to modify your ghost jar project! Here are a few creative ideas to inspire you:
- Family Theme: Create a set of jars, each representing a family member's ghost. Use different hues of glow paint to create a variety of spooky shades.
- Different Shapes: Instead of traditional jars, try using vases, bottles, or even lanterns for unique shapes and sizes.
- Seasonal Twist: Swap out the face for festive designs to celebrate various holidays—think turkeys for Thanksgiving or hearts for Valentine's Day.
Conclusion
And there you have it! A magical Baking Soda Glowing Ghost Jar that not only adds charm and whimsy to your space but also provides a wonderful crafting experience that can be enjoyed by all ages. Crafting is about exploration, so don’t be afraid to experiment and make this project your own.
As you pop your ghost jar on a shelf or take it outdoors to wow friends and family at your next Halloween gathering, take pride in knowing you’ve created something uniquely yours. Happy crafting! 🎃👻
If you enjoyed this tutorial or have any tips of your own, I’d love to hear about your experiences in the comments below! Let’s keep spreading the creative spirit together!