Craft Your Own DIY Glowing Bubble Lamps: A Step-by-Step Guide
Hello fellow crafters! I'm excited to share one of my favorite DIY projects with you today: creating your own glowing bubble lamps. These mesmerizing lamps add a whimsical touch to any space—be it a cozy nook in your home, a fun accent in a child's room, or even a spectacular centerpiece for a special event. I’ve found that these lamps are not just visually stunning, but they also create a serene ambiance that can turn any evening into a magical experience.
In recent years, glowing bubble lamps have gained popularity, particularly among crafters who appreciate the fusion of creativity and functionality. They are perfect for birthday parties, romantic dinners, or simply to lighten up your living space. Plus, they make fantastic handmade gifts! So, tie on your apron, and let’s embark on this expressive journey together.
Materials You’ll Need
Before diving in, it’s important to gather all the materials. I like to lay everything out beforehand so that I have easy access and can work without interruptions. Here’s what you’ll need:
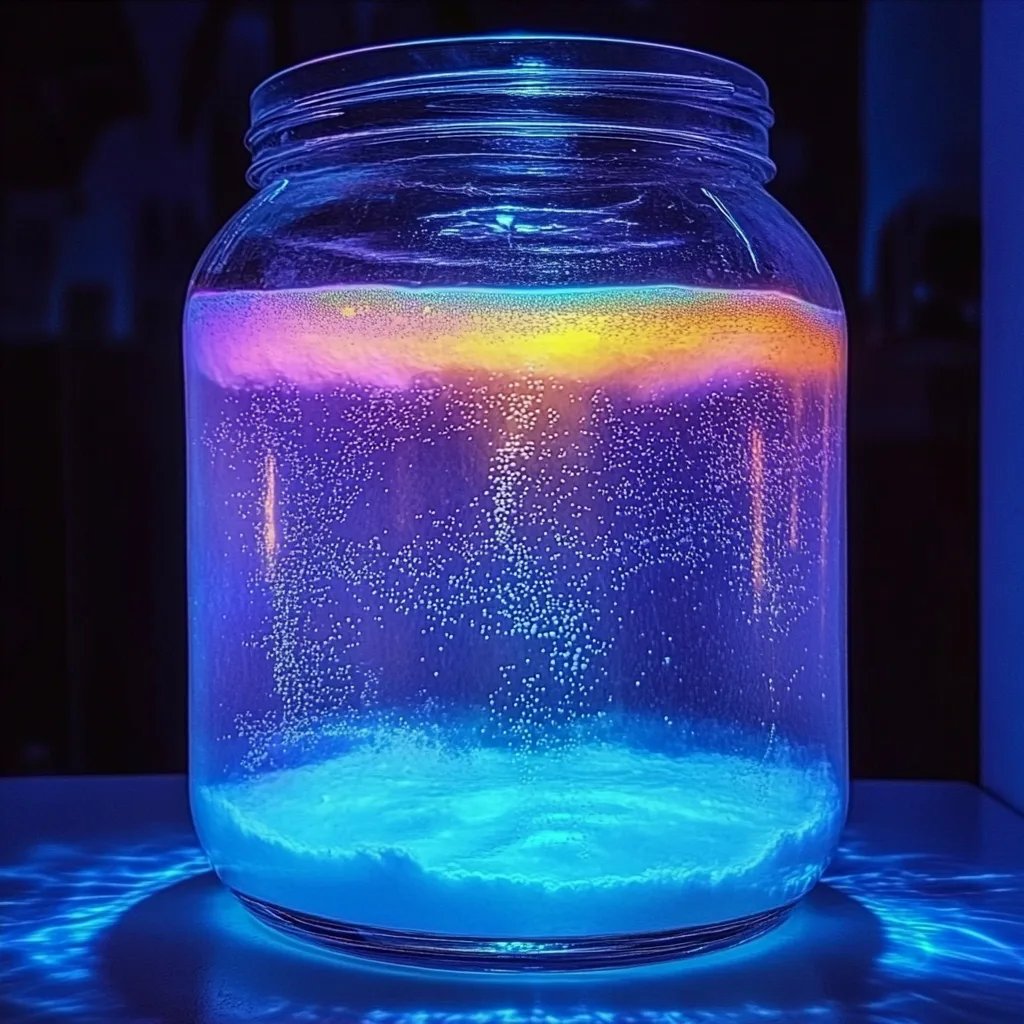
- Clear Glass or Plastic Containers: These can be jars, mason jars, or any clear container that allows light to shine through.
- Battery-Operated LED Lights: Choose small, waterproof LED lights for a brighter glow; twinkle lights work beautifully for an enchanting effect.
- Water: It’s essential for this project! Use distilled water for clearer results.
- Glycerin: This gives the bubbles their classic floating effect. You can find glycerin at most pharmacies or order it online.
- Dish Soap: A few drops will do! This is critical for creating bubbles.
- Food Coloring (optional): For a pop of color, consider adding food coloring. You can blend colors for a mesmerizing effect.
- Glitter or Confetti (optional): If you’re feeling extra crafty, sprinkle some glitter or colorful confetti to enhance the visual appeal.
Quick Note on Safety
While this project is relatively safe, always handle materials like glass with care to avoid any injuries. If you are crafting with children, supervise them, especially when handling glass jars.
Step-by-Step Tutorial to Create Your Glowing Bubble Lamps
Step 1: Prepare Your Container
Why it Matters: The container will be the showcase for the entire lamp, so choose it wisely!
What to Do: Start by cleaning your container thoroughly. Washing with warm, soapy water removes any dust or residue that could interfere with the lighting effect. Once clean, let it air dry completely.
Tip: If you’re using a used jar, soak it in warm soapy water for a few minutes to easily remove old labels.
Step 2: Mix Your Bubble Solution
Why it Matters: A well-prepared bubble solution ensures that your bubbles remain suspended and float nicely.
What to Do: In a separate bowl, combine about 2 cups of water, 2 tablespoons of glycerin, and 1-2 tablespoons of dish soap. Stir gently to mix without creating too many bubbles.
Tip: If your bubbles aren’t floating well, try increasing the proportion of glycerin; this can help produce more stable bubbles.
Step 3: Add Color and Sparkle
Why it Matters: Adding color and sparkle enhances the visual excitement of your lamp.
What to Do: If you wish, add a few drops of food coloring and mix gently to distribute the color evenly. For added flair, toss in a pinch of glitter or confetti.
Creative Variation: Experiment with different colors! Think about using seasonal palettes—soft pastels for spring or rich oranges and browns for fall.
Step 4: Fill Your Container
Why it Matters: Filling your container properly ensures a captivating display.
What to Do: Carefully pour the bubble solution into your container, filling it about three-quarters full. Be mindful not to overfill, as it could compromise the bubble action.
What Could Go Wrong: If your solution spills out of the container, simply blot it up with a paper towel and continue filling carefully.
Step 5: Insert the LED Lights
Why it Matters: This is the moment when your lamp starts transforming from ordinary to extraordinary.
What to Do: Taking your battery-operated LED lights, place them in the bottom of the jar, ensuring they are waterproof if you chose to use them directly under water. If you’re using twinkle lights, I like to string them around—this creates a flowing, ethereal effect!
Tip: You may want to use a few small pebbles or marbles at the bottom to secure the lights in place, preventing them from floating to the top.
Step 6: Final Assembly
Why it Matters: The last touches make all the difference in the final presentation.
What to Do: Once your lights are set up, you can cover the container with a lid if you desire. However, I prefer leaving it open to showcase the bubbles.
Alternative Methods: If you don’t want to use a lid, consider wrapping twine or ribbon around the neck of the jar for added decor.
Step 7: Switch On and Enjoy!
Why it Matters: This is where all your effort comes to life!
What to Do: With everything securely in place, switch on your LED lights and watch as the beautiful bubbles rise, taking on the colors and sparkle of your creation.
Personal Anecdote: The first time I saw my finished glowing bubble lamp come alive, I was utterly mesmerized. It felt like capturing a piece of the night sky in my living room!
Troubleshooting Common Issues
Even seasoned crafters can face hiccups! Here are some helpful solutions:
- Bubbles Not Forming: If your bubbles aren’t forming, double-check your dish soap to glycerin ratio. More soap can help!
- Lights Not Working: Ensure your LED lights are fresh and properly positioned. Sometimes a loose connection can hinder the glow!
- Container Leaking: If you notice any leaks, examine your container for cracks. Always use a reliable, undamaged container.
Creative Variations
- Seasonal Themes: Use fall leaves and orange tones for autumn, or snowflakes and blues for winter.
- Scented Elements: Add a few drops of essential oils to the water for a multi-sensory lamp.
- Larger Installations: Consider creating a whole set of varying sizes and colors for a stunning centerpiece.
Conclusion: Let Your Glow Shine Brightly!
I hope this tutorial has inspired you to create your own glowing bubble lamp. Whether you're a seasoned crafter or just starting out, this project is perfect for any skill level. The joy of transforming simple materials into a beautiful lamp is incredibly rewarding. Plus, the endless possibilities for customization allow your personality to shine through each creation.
Remember, crafting is all about having fun and experimenting, so don’t hesitate to put your spin on it. I would love to hear about your experiences and see photos of your glowing masterpieces! Happy crafting, and let the light shine!