Color-Changing Milk Experiment: An Amazing Ultimate Guide to 7 Steps
Color-Changing Milk Experiment is an incredible way to engage with science while creating a visual spectacle. This wonderful project not only captivates the eyes but also serves as an educational journey. It’s perfect for all ages, making it an excellent choice for classrooms and family fun. As you conduct this mesmerizing experiment, you will explore the effects of soap on the surface tension of milk, sparking curiosity among participants.
Whether you’re a parent seeking an engaging activity with your kids or a teacher looking for an eye-catching science demonstration, the Color-Changing Milk Experiment fits the bill perfectly. Praised for its simplicity and effectiveness, this experiment requires few ingredients and delivers impressive results. Get ready to dive into the colorful world of this exciting experiment!
With its burst of colors and the thrill of seeing science in action, the Color-Changing Milk Experiment is bound to inspire awe and wonder. You will find that even the youngest learners can adapt to this stimulating experience and grasp basic scientific principles along the way. In this comprehensive guide, we will explore why you'll love this experiment, the preparation and time required, what ingredients you'll need, and finally, the step-by-step instructions to make your own masterpiece. Let’s jump into the vibrant world of color-changing milk!
Why You’ll Love This Experiment
The Color-Changing Milk Experiment is not only visually stunning but also an educational tool that captivates science enthusiast minds. Here are some reasons why this experiment is a must-try:
- Easy Setup: You don’t need any specialized equipment or skills, making it accessible for everyone.
- Engaging for All Ages: Both kids and adults will find joy in the vibrant colors and the magic of science.
- Quick Results: You’ll see immediate reactions as soon as ingredients mix, keeping participants intrigued.
- Educational Value: Participants learn about chemical reactions, surface tension, and color mixing in a fun way.
- Cost-Effective: Most ingredients are inexpensive and readily available at home or a local store.
- Promotes Curiosity: The hands-on nature encourages questions, discussions, and further experiments.
- Easy to Customize: You can tweak the colors and patterns, adding an element of creativity.
With so many positive aspects, it’s no surprise that this experiment has become a favorite among educators and families alike. Watch as the colors swirl and dance, creating an immersive learning experience that leaves a lasting impression.
Preparation and Cooking Time
The Color-Changing Milk Experiment is a breeze to set up and conduct. Here’s a breakdown of the necessary time you'll need:
- Preparation Time: 5 minutes
- Experiment Time: 10 minutes
- Cleaning Up: 5 minutes
In total, you’ll be invested for about 20 minutes, making it a quick yet impactful activity. While the preparation time is minimal, the memories created during the experiment will last much longer.
Ingredients
- 1 cup whole milk (preferably full-fat)
- 5-6 drops of liquid food coloring (various colors)
- 1 teaspoon dish soap (liquid)
- A shallow dish or bowl
- Cotton swabs or toothpicks (optional for swirling)
Step-by-Step Instructions
Creating the Color-Changing Milk Experiment is simple and straightforward. Just follow these steps to witness the magic unfold:
- Pour the Milk: Start by pouring the whole milk into your shallow dish. Make sure there’s enough milk to cover the bottom.
- Add Food Coloring: Carefully add drops of food coloring to different areas of the milk. Feel free to use any color combination you like!
- Observe Initial Results: Take a moment to observe the colors sitting on the surface, as this sets the stage for the reaction to come.
- Add Dish Soap: Dip your cotton swab or toothpick into the dish soap. Then, gently touch it to the surface of the milk in a spot where you see food coloring.
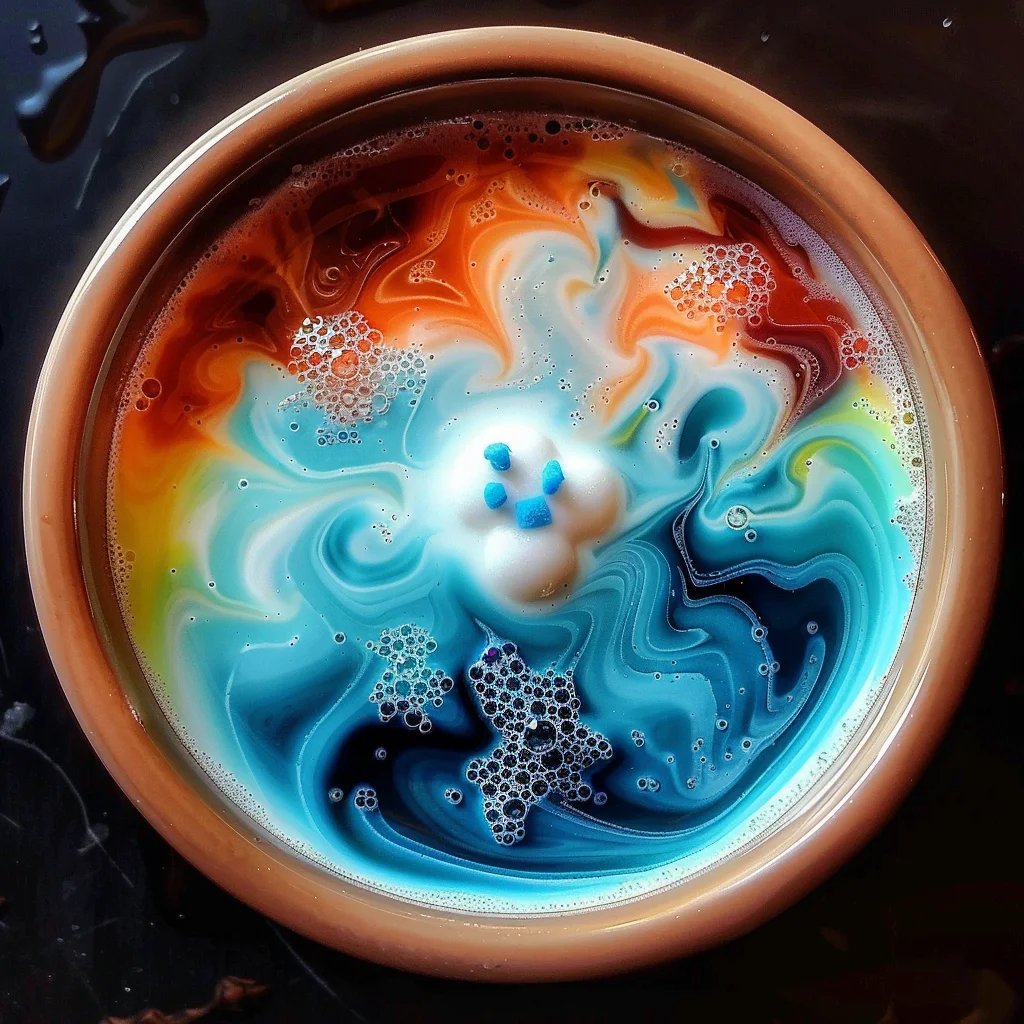
- Watch the Magic Happen: Observe as the colors start to swirl and blend dramatically! The soap reduces surface tension and creates the color-changing effect.
- Experiment Further: Try moving the cotton swab or touching different spots to see how many unique patterns you can create.
- Discuss the Science: Use this opportunity to explain the science behind what’s happening, including the role of surface tension and how dish soap interacts with the fat in milk.
How to Serve
When preparing to share the Color-Changing Milk Experiment with others, consider the following:
- Presentation: Use a bright and colorful dish to enhance visuals. Clear bowls allow easy viewing of the swirling colors.
- Engagement: Encourage participants to ask questions or suggest different color combinations before starting the experiment.
- Photo Opportunities: Capture the vibrant moments on camera! This experiment offers stunning visuals for social media or personal albums.
- Discussion: After the experiment, engage in a conversation about what was witnessed. Encourage everyone to express their thoughts and insights.
- Follow-Up Activities: Explore additional science topics or experiments that relate to this activity, such as chromatography or the properties of liquids versus solids.
By focusing on an engaging presentation and promoting conversation, you will elevate the Color-Changing Milk Experiment experience even further, making it memorable for all participants. Enjoy the colorful journey into the world of science!
Additional Tips
- Use Fresh Ingredients: Ensure your milk and food coloring are fresh. This contributes to the best results and vibrant colors.
- Experiment with Patterns: Don’t just stop at swirls; experiment with dots, outlines, or layers of colors to create stunning designs.
- Safe Cleanup: To avoid staining, be careful with food coloring. Use an apron or old clothes to safeguard against any spills.
- Discuss Observations: After the swirling, discuss what everyone sees. Different age groups may articulate their thoughts differently, leading to enriching conversations.
- Replicate at Home: Encourage participants to replicate the experiment at home, allowing for independent learning.
Recipe Variation
There are endless ways to modify the Color-Changing Milk Experiment. Here are a few variations you can explore:
- Different Liquids: Try using almond milk or coconut milk to see how the colors react differently based on milk fat content.
- Natural Dyes: Use vegetable-based dyes like beet juice or turmeric to explore natural alternatives for food coloring.
- Add Glitter: For added visual effect, consider adding edible glitter to the milk before the soap for a sparkly twist.
Freezing and Storage
While the Color-Changing Milk Experiment is best enjoyed fresh, here’s how to handle any leftovers:
- Immediate Use: The experiment is meant for real-time engagement. It’s advisable to conduct it fresh as the colors won't maintain their vibrancy over time.
- Storage Tips: If you have leftover milk mixture, store it in the refrigerator and use within a day, although results may vary.
Special Equipment
This experiment requires minimal equipment, but having the right tools can enhance the experience:
- Shallow Dish or Bowl: Wide containers work best, allowing for ample surface area to witness color changes.
- Cotton Swabs or Toothpicks: Helpful for adding soap, but not necessary. Participants can use their fingers too!
- Measuring Spoon: For precise measurement of the dish soap, ensuring each trial is consistent.
Frequently Asked Questions
Can I use non-dairy milk for this experiment?
Yes, you can experiment with non-dairy milk options. However, results may vary due to differences in surface tension and fat content.
How long does the effect last?
The swirling effect typically lasts a few minutes, as the soap disperses the colors through the milk. Observing it in real-time is part of the fun!
What is the science behind this experiment?
The soap reduces the surface tension of the milk, which allows the colors to burst and swirl, creating this mesmerizing visual effect.
Is this safe for young children?
Absolutely! The ingredients used are safe, but adult supervision is recommended, especially with handling colors and potential spills.
Can I use any type of dish soap?
While any liquid dish soap should work, avoid antibacterial or specialized soaps as they may affect the results. Standard dish soap is optimal.
Conclusion
The Color-Changing Milk Experiment is a delightful and engaging way to introduce basic science principles to learners of all ages. This dynamic activity combines visual stimulation with educational concepts, making it ideal for classrooms and home. Your journey through vivid colors presents an opportunity for creativity, experimentation, and discussions about science, ensuring lasting memories. So gather your ingredients and get ready to watch the magic of science unfold before your eyes!